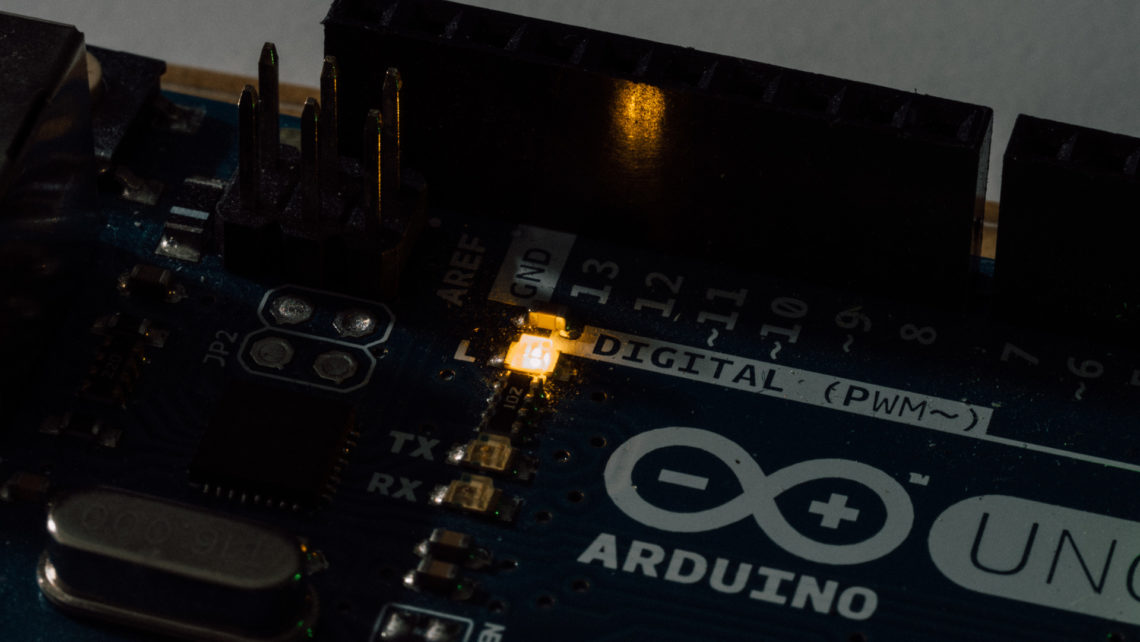
We have written plenty of Arduino Tutorials, but none of them have been about displays. So we decided to do something about that. This is the first of a planned three-part tutorial series on how to use various displays with the Arduino.
In this first part we’re going to show you how to use character displays based on the Hitachi HD44780 LCD controller. This is a much used standard on these kinds of displays and together with Arduino’s LiquidCrystal library they become super easy to use. Throughout this post we’ll use a JHD 162A LCD display and an Arduino Uno.
Wiring
To get the display up and running you can use a breadboard to make the wiring a bit easier. You’ll need a couple of resistors as well as two 5V sources, so the breadboard comes in handy.
Parallel Interface (with or Without Serial Backpack)
These screens have a parallel interface, which takes up a lot of pins on the Arduino. There are screens with a so-called serial backpack which makes it able to use UART to communicate with the display, resulting in a far lower amount of pins used. We will however not look at this in this post.
Different Setups
For the simplest HD44780 parallel displays you will need to hook up 12 or 16 pins on the display. On the Arduino you need to use 6, 7, 10 or 11 GPIO-pins.
The first choice you should make is whether to use 4 or 8 pins for the data. This is a trade-off between pin usage and display refresh rate:
- 4 pins
- Pro: you save 4 GPIO-pins for other stuff.
- Con: you need to use two cycles to write to (and read from) the display. This is done automatically, so it doesn’t up the complexity, but it takes a bit longer time.
- 8 pins
- Pro: faster refresh rate.
- Con: lots of occupied GPIO-pins.
The other choice you need to make is whether or not to be able to read from the display registers. This ability takes up one more GPIO-pin. We’re unsure if the LiquidCrystal library uses this pin for anything. So if you, like us, aren’t particularly interested in using this pin you can just hook it up to GND and save a GPIO-pin.
Analog Pins
The display has two pins that reacts on an analog values: contrast and background LED brightness in addition to 5 V supply pin and two GND pins.
Contrast
For the contrast pin you should use a voltage divider to set a specific voltage on the pin.
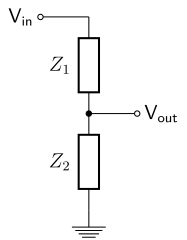
In our case Vin is 5 V and Vout is the voltage on the contrast pin on the display. The ratio between Z1 and Z2 defines Vout (i.e. the contrast) according to the following equation:
![]()
For our JHD 162A display we get maximum contrast at Vout around 0.6 V. At around 1.4 V the contrast get so low that the text disappears completely, so that’s the range you have to work with. If you replace Z1 with a potentiometer, you can adjust the contrast on the fly.
LED Brightness
This is a bit more straight forward. We just need to limit the current flowing through the LED. Our JHD 162A has a 100 Ω resistor on board so we can apply 5 V directly. However, check that your display has a LED resistor before applying voltage. If you want less brightness you can add a resistor or a potentiometer in series between 5 V and the LED pin on the display. We’re running around 400 Ω total and it looks pretty good.
Digital Pins
As mentioned earlier you need to hook up either 4 or 8 data pins. In addition to this you need to connect an Enable pin, an RS pin and an optional R/W pin. The datasheet gives you more info on each of these pins.
Schematics
In the illustration below you can see how we’ve hooked up the JHD 162A to our Arduino Uno. This setup will continue over to the coding example further down.
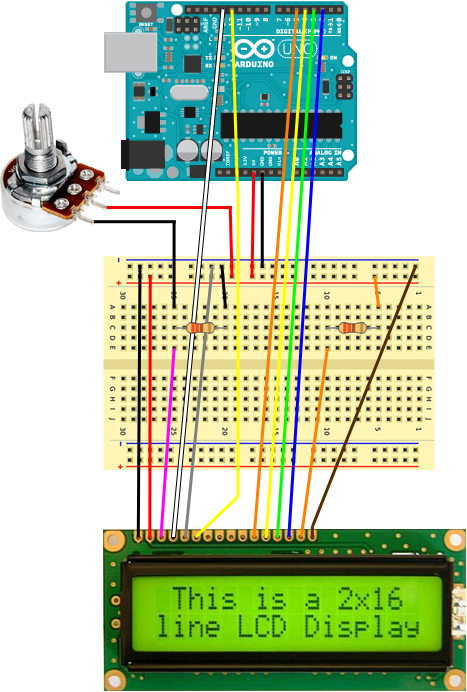
Which GPIO pin you use to what (upper row on the Arduino) doesn’t really matter as long as you input the correct pin numbers in the firmware.
Firmware
LiquidCrystal
The LiquidCrystal library is included in the Arduino IDE and makes everything incredibly easy. The library is for the user basically a set of functions that does all the hard work for you.
Instead of going through all the functions, we’ll just going to show you the code we used in the image at the top of this post. The documentation on the Arduino website is more than adequate, with plenty of examples and overview of all the functions.
Our Code
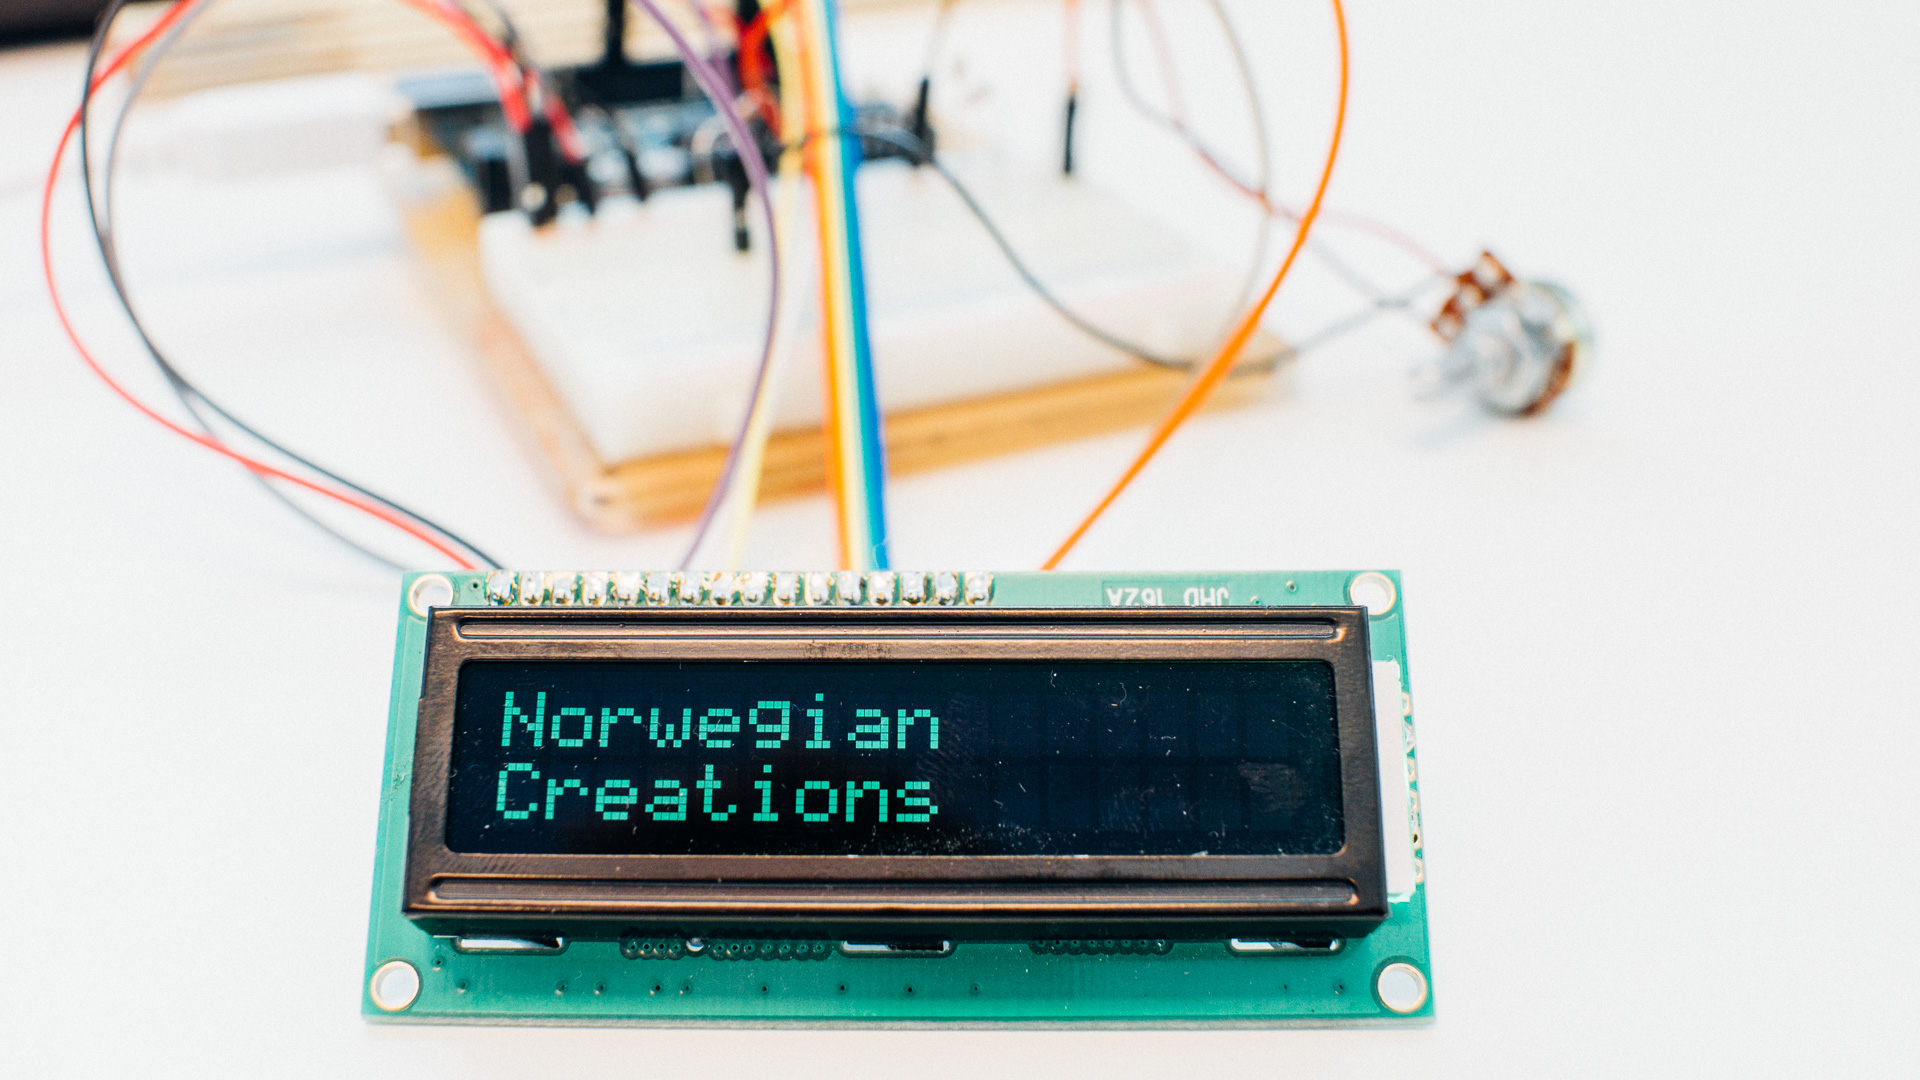
The code we used to display “Norwegian Creations” as in the top image is super easy and doesn’t require many lines of code:
#include <LiquidCrystal.h>

LiquidCrystal lcd(13, 12, 5, 4, 3, 2);

void setup() {
	lcd.begin(16,2);
	lcd.print("Norwegian");
	lcd.setCursor(0, 1);
	lcd.print("Creations");
}

void loop() {
}
And that’s it!
Be sure to carefully study the LiquidCrystal() constructor documentation carefully such that you get the parameter list in the right order.
To Summarize…
As you can see, hooking up a HD44780-based character display and making it show some text is really easy with the Arduino and the LiquidCrystal library.
If nothing seem to work, double check your contrast voltage. Depending on your display you might need to have the LED backlight working to get a good contrast.
The LiquidCrystal library makes the coding easy. Use the documentation on Arduino’s website.
In the next part in this blog post series we’ll look at how we can use displays with serial backpack to limit the pin usage.