Last summer we wrote a blog post (which we recommend reading before continuing) about how you can hook up an HD44780 character display to an Arduino and program it using the LiquidCrystal Arduino library. Back then we had to use at least 6 (or in “worst case” up to 11) of Arduino’s GPIO pins. This might often be a problem if you need to use those pins to other things. One solution to this issue is to use a so called serial backpack.
In this blog post we’ll first explain the deal with serial backpacks and then provide a simple example using an Arduino Uno, a serial backpack from Adafruit and the Adafruit_LiquidCrystal library. This main purpose of this blog post is to make the reader aware of the serial backpack option and to show its simplicity.
What Is a Serial Backpack?
The purpose of a serial backpack is to use less GPIO pins on your MCU or Arduino. Physically speaking, a serial backpack is a circuit board that can be attached directly to the display or connected to the display via wires. The MCU or Arduino is connected to the serial backpack via some kind of digital serial communication (eg. UART, I2C or SPI). This way you can send commands to the LCD with a considerably less amount of GPIO pins.
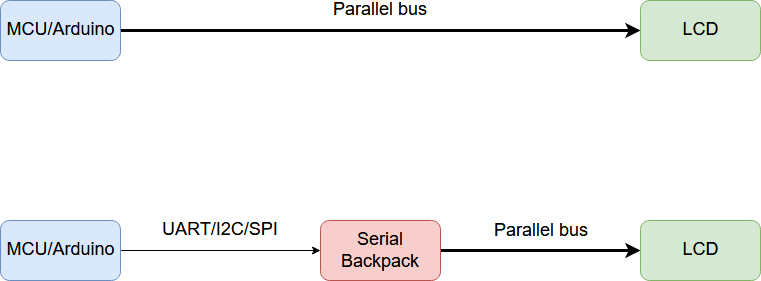
The illustration above gives a clear overview of the basic functionality of the serial backpack.
Example
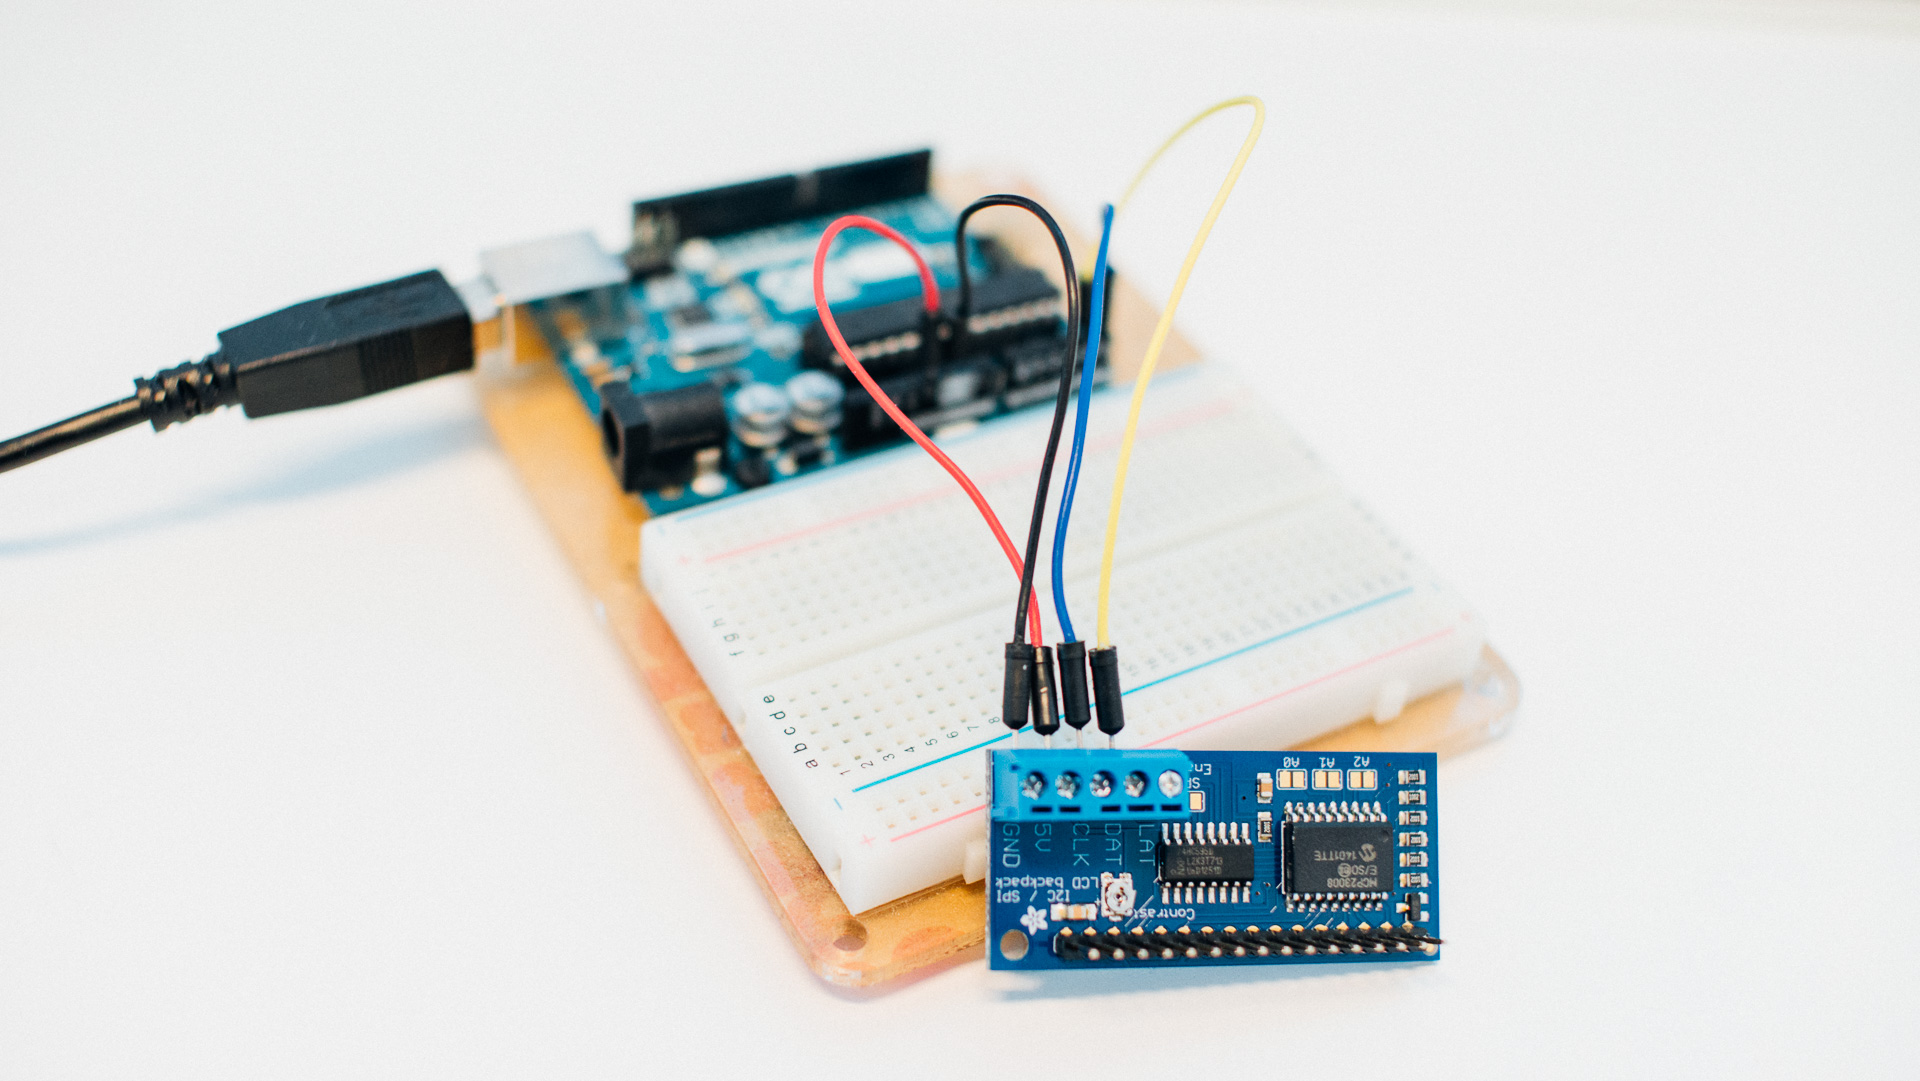
There are many different serial backpacks around. What we had laying around at the time of writing this post was one from Adafruit. This one works with both I2C and SPI and you can download the Adafruit_LiquidCrystal library for easier Arduino usage. We chose to use the serial backpack in I2C mode.
Wiring
In our case we use the Arduino Uno. With this, the serial backpack’s CLK and DAT pins will need to be connected to the Arduino’s A5 and A4 pins, respectively. You will also need to hook up 5V and GND. And that’s it! 2 GPIO pins instead of at least 6.
Read the instructions/datasheet for how to connect your serial backpack.
Code
Since this is an Arduino tutorial, we’ll stick to Arduino code and the Adafruit_LiquidCrystal library. The code is quite similar to the code found in part 1 and produces the exact same result.
#include "Wire.h"
#include "Adafruit_LiquidCrystal.h"
Adafruit_LiquidCrystal lcd(0);
void setup() {
lcd.begin(16, 2);
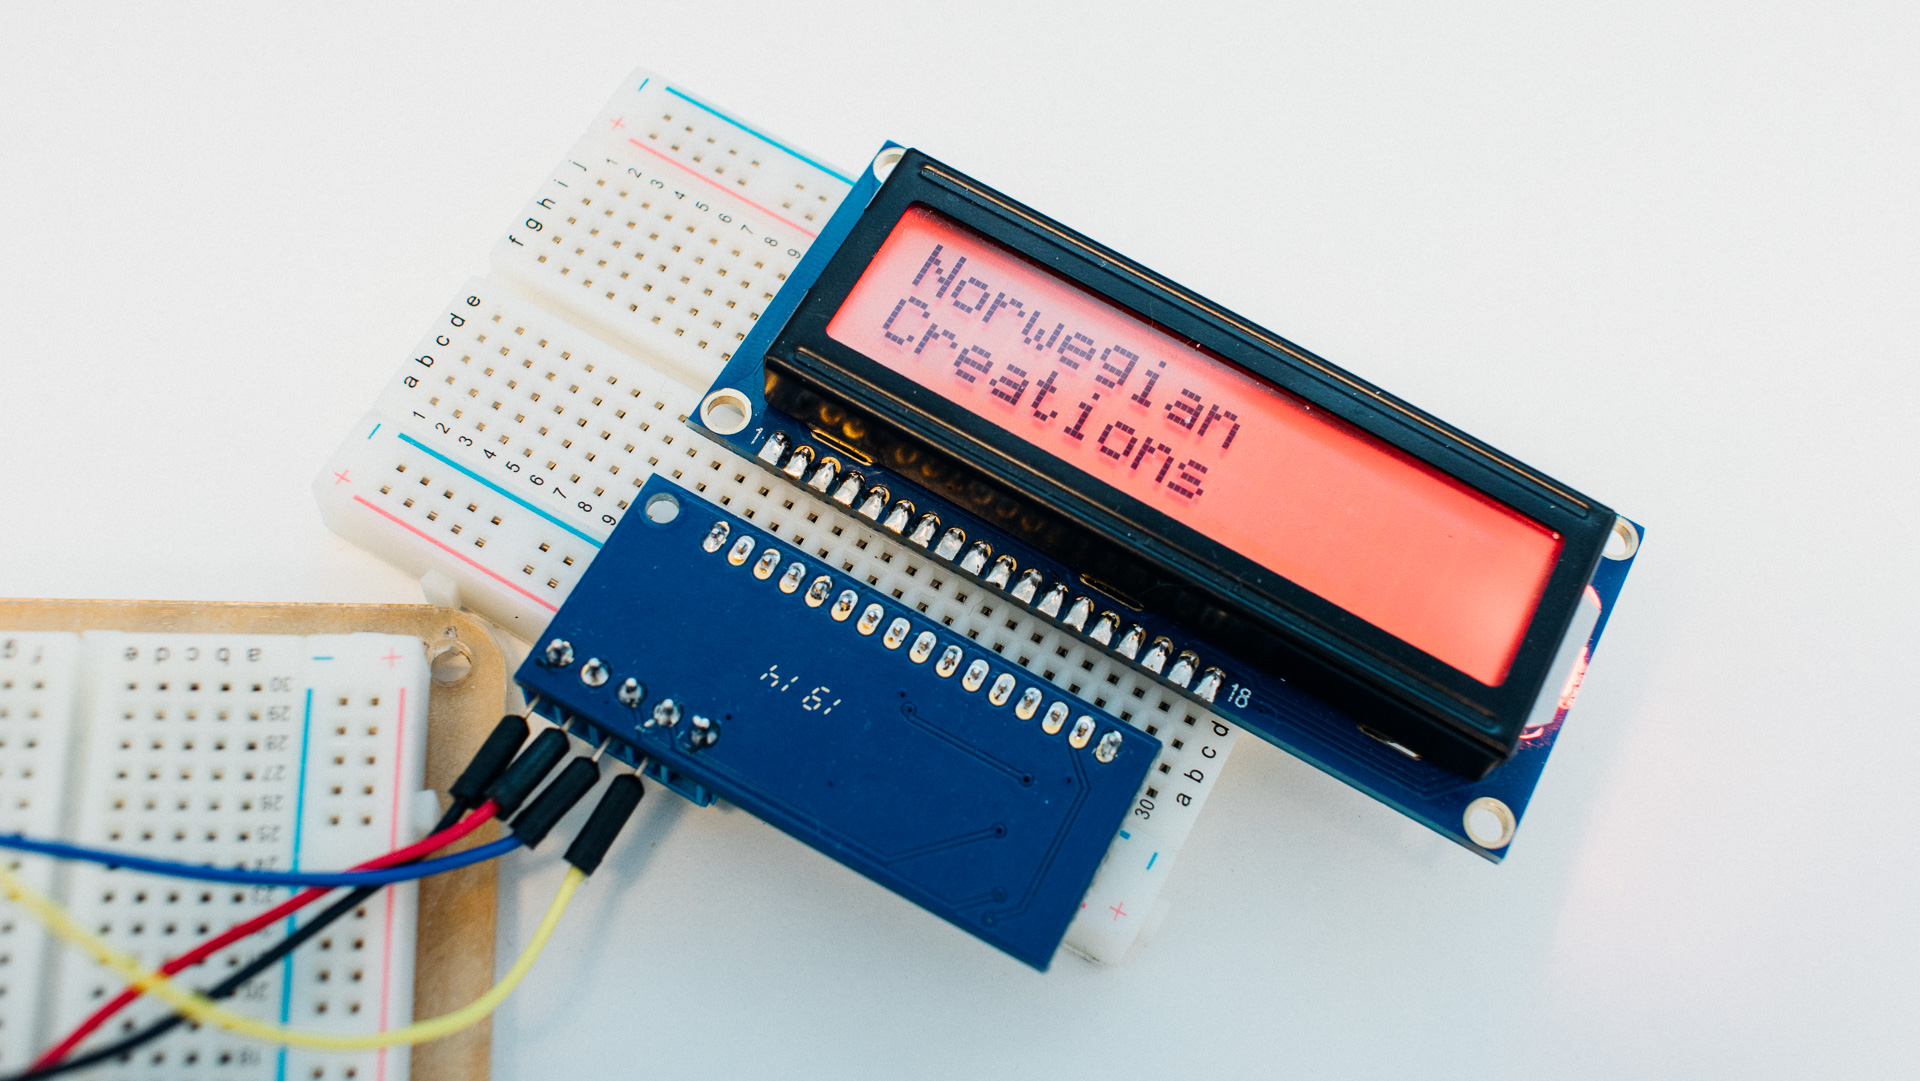
lcd.print("Norwegian");
lcd.setCursor(0,1);
lcd.print("Creations");
lcd.setBacklight(HIGH);
}
void loop() {
}
The changes from part 1 are minor:
- We’ve included
Wire.hfor the I2C. - Instead of
LiquidCrystal.hwe includeAdafruit_LiquidCrystal.h. - We create a different
lcdobject where the only parameter is the address of the serial backpack. - The backlight LED is set in the code with the
lcd.setBacklight()function.
Summary
A serial backpack cuts the GPIO usage drastically. Depending on your hardware it can also be extremely easy to use. You don’t have to use an Arduino for these to be very useful, even though that is what we’ve focused on in this blog post.
This series is worth revisiting in the future since there are several other types of LCD displays out there which are fun to use.