Our custom Kossel delta 3D printer is continually being upgraded. Let’s take a look at the latest addition to the printer.
Here are the previous posts in this series:
- Pt. 1: Parts and Planning
- Pt. 2: Building Update
- Pt. 3: Electronics and Wiring
- Pt. 4: Modifying the Effector
- Pt. 5: Video from the Building
The Idea
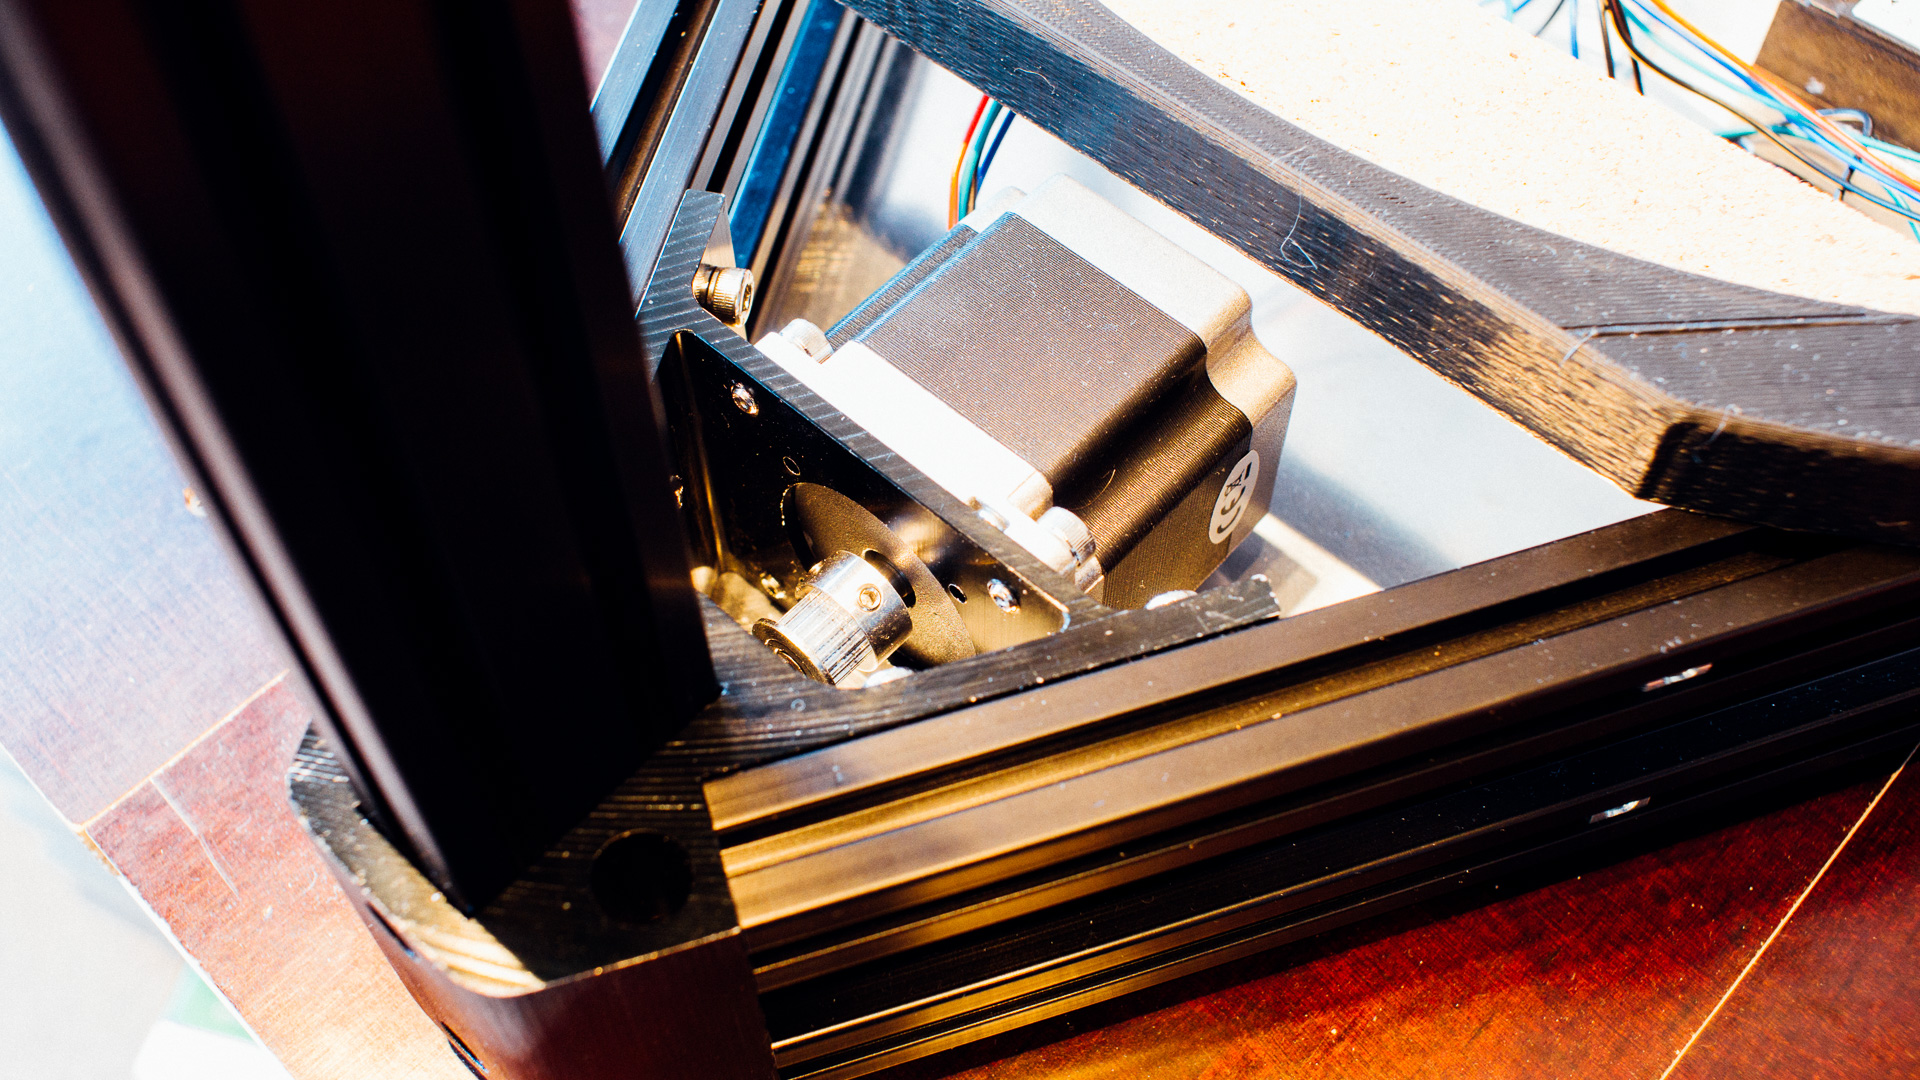
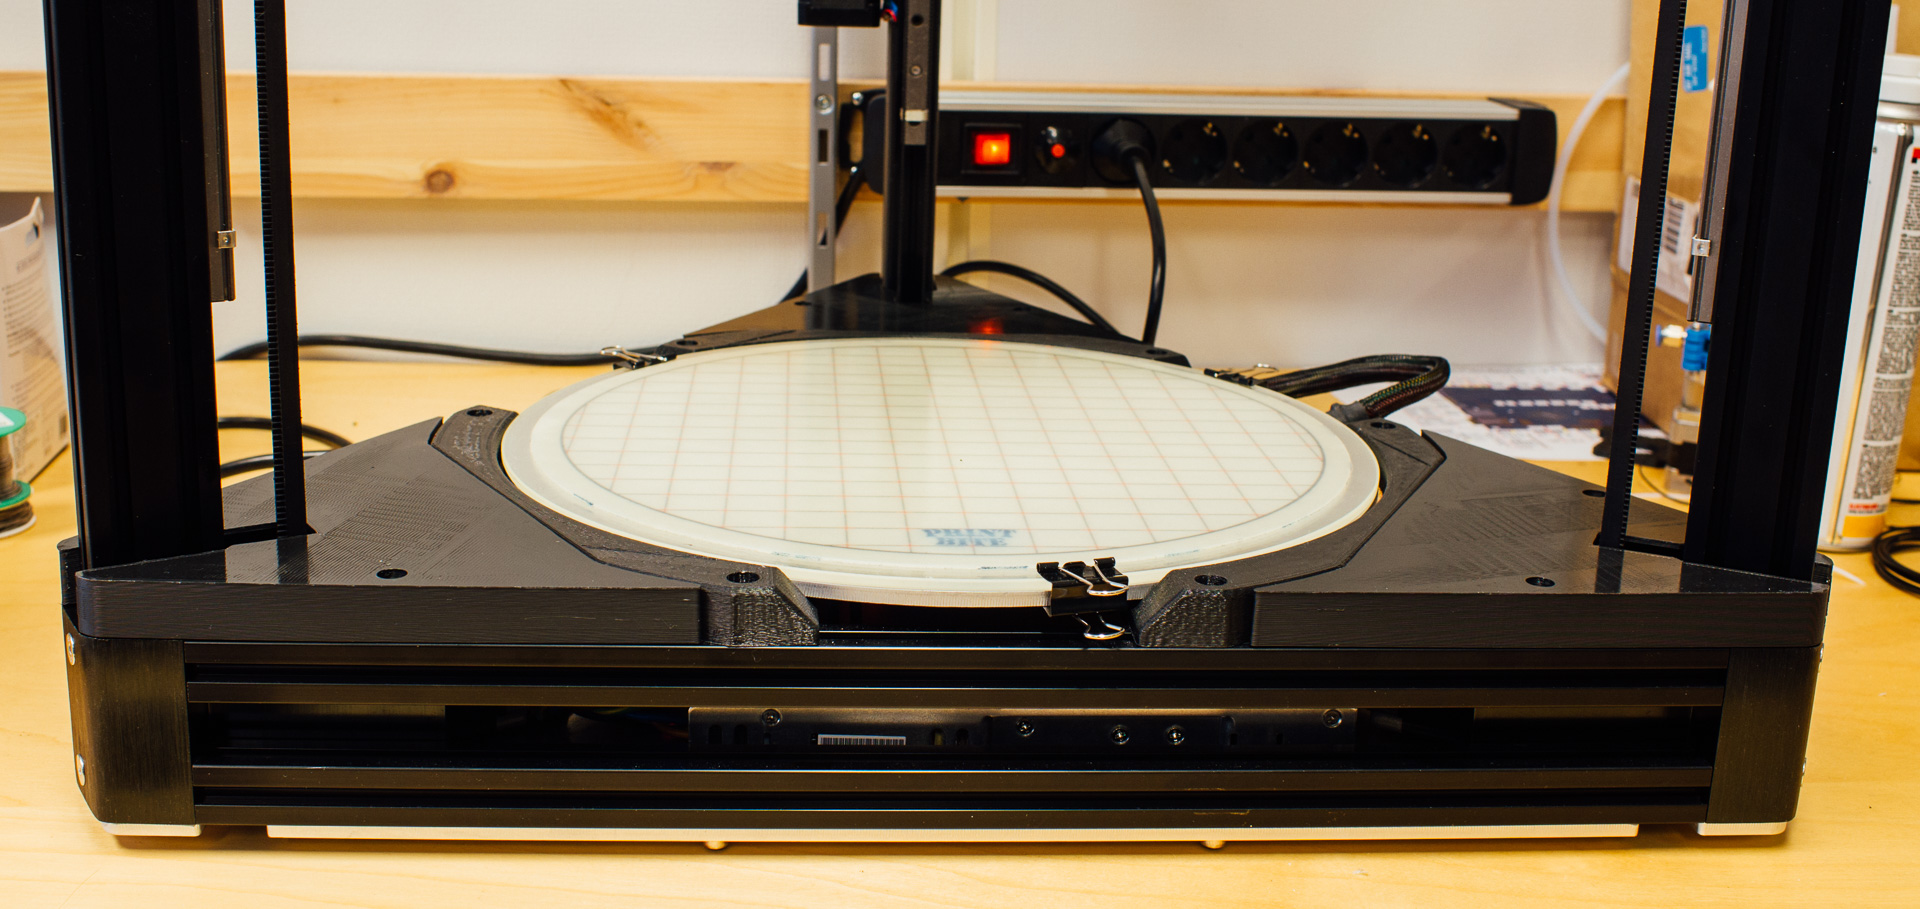
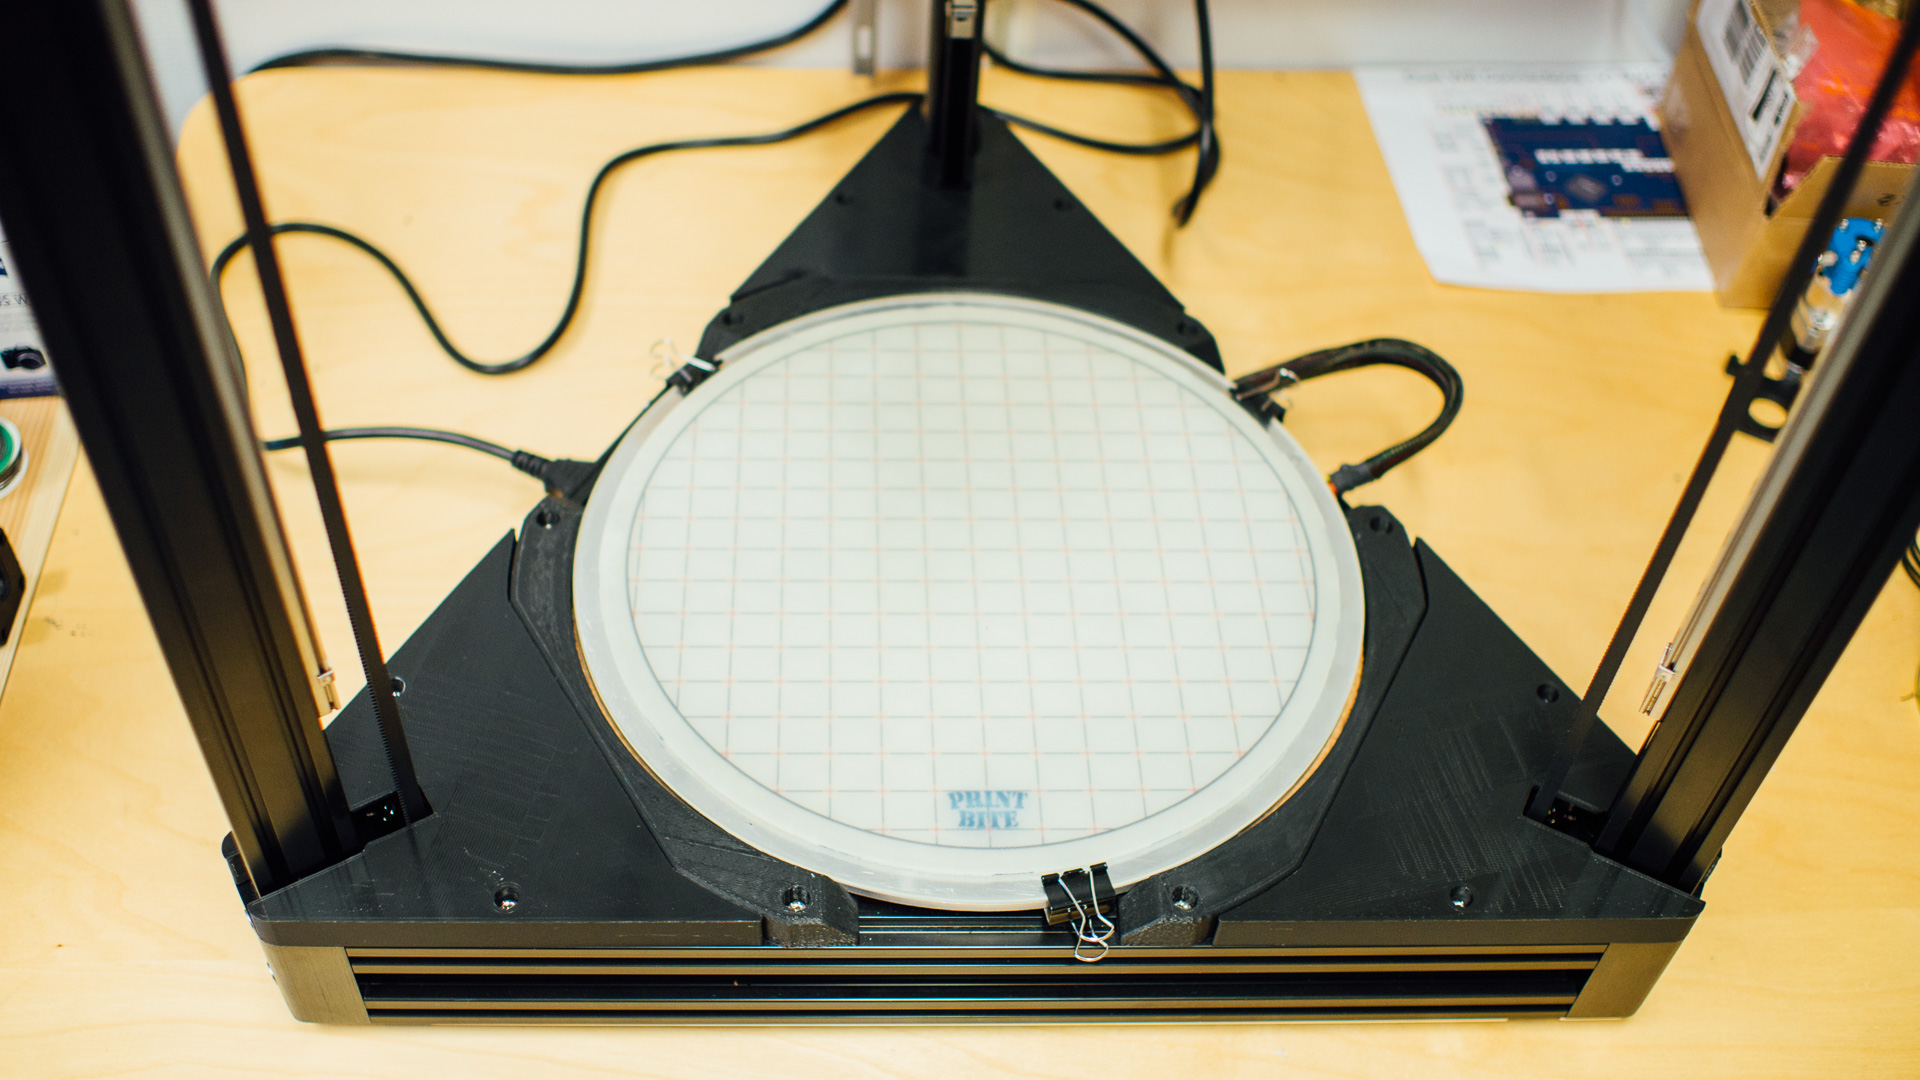
What we wanted to do with our printer was to cover up the corners such that dust and dirt wouldn’t reach the compartment underneath the build plate. Also, we thought it would look good, covering up a lot of the cables around the build plate and giving the printer a sleek look.
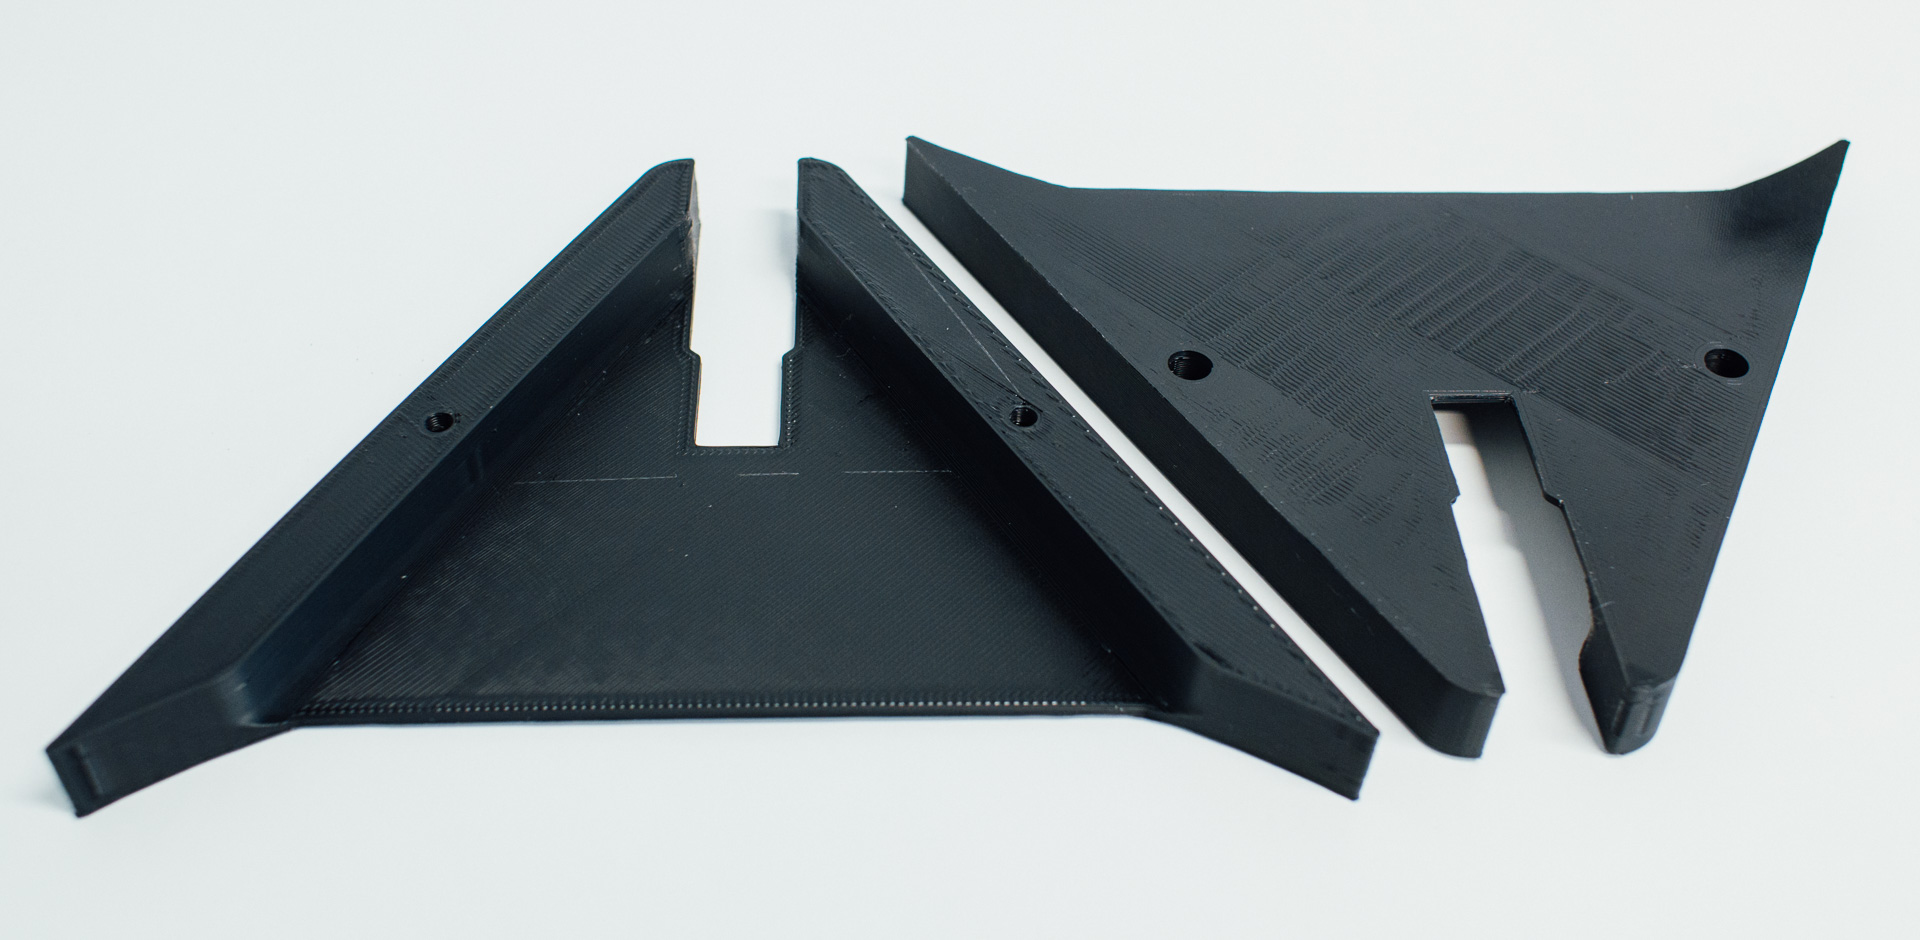
The Design
We needed two different types of covers, one “standard” version and one “cable” version which would need a bit more space around the aluminium extrusions for the cable covers to move through. We only have cables going up along one of the vertical extrusions, so we needed one cable version and two standard versions.
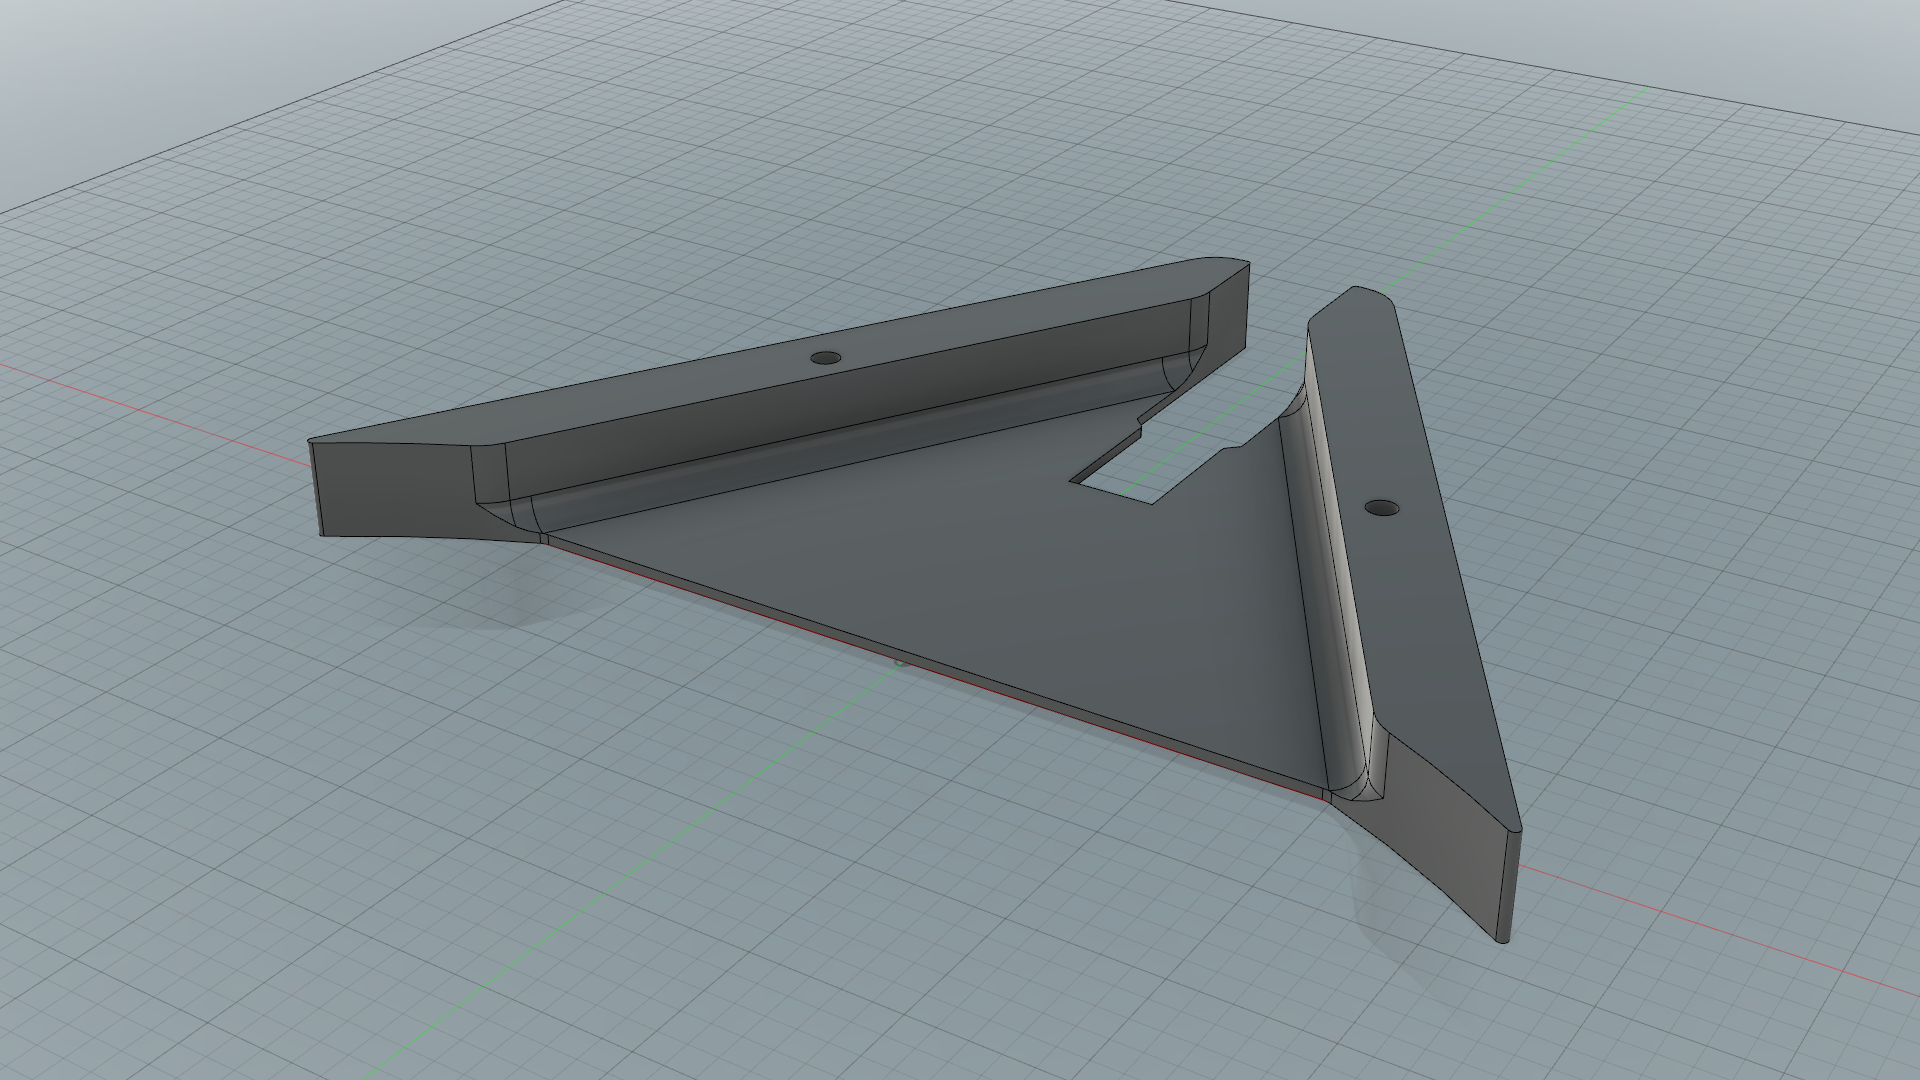
The mounting holes would have pockets for the bolt heads to hide within. The bolts would be mounted to post-assembly spring loaded nuts similar to these, which work great.
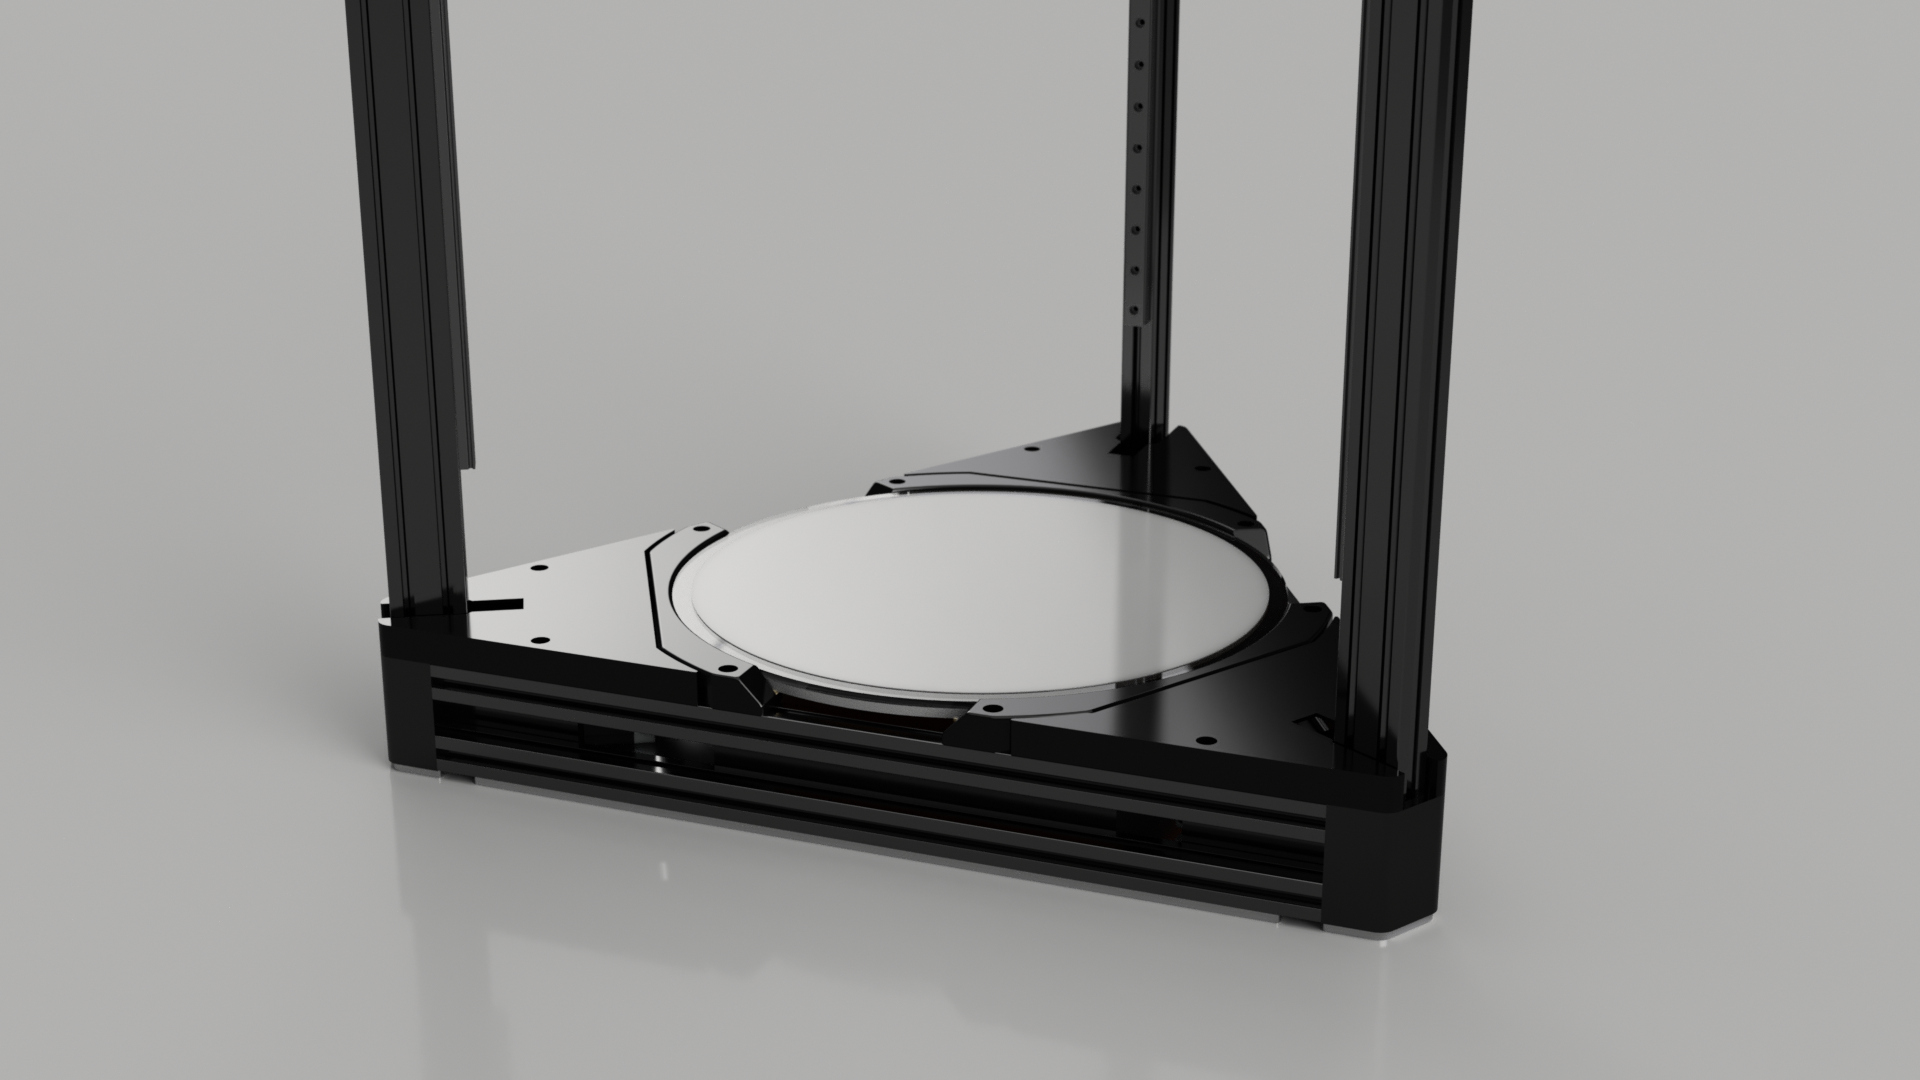
The Result
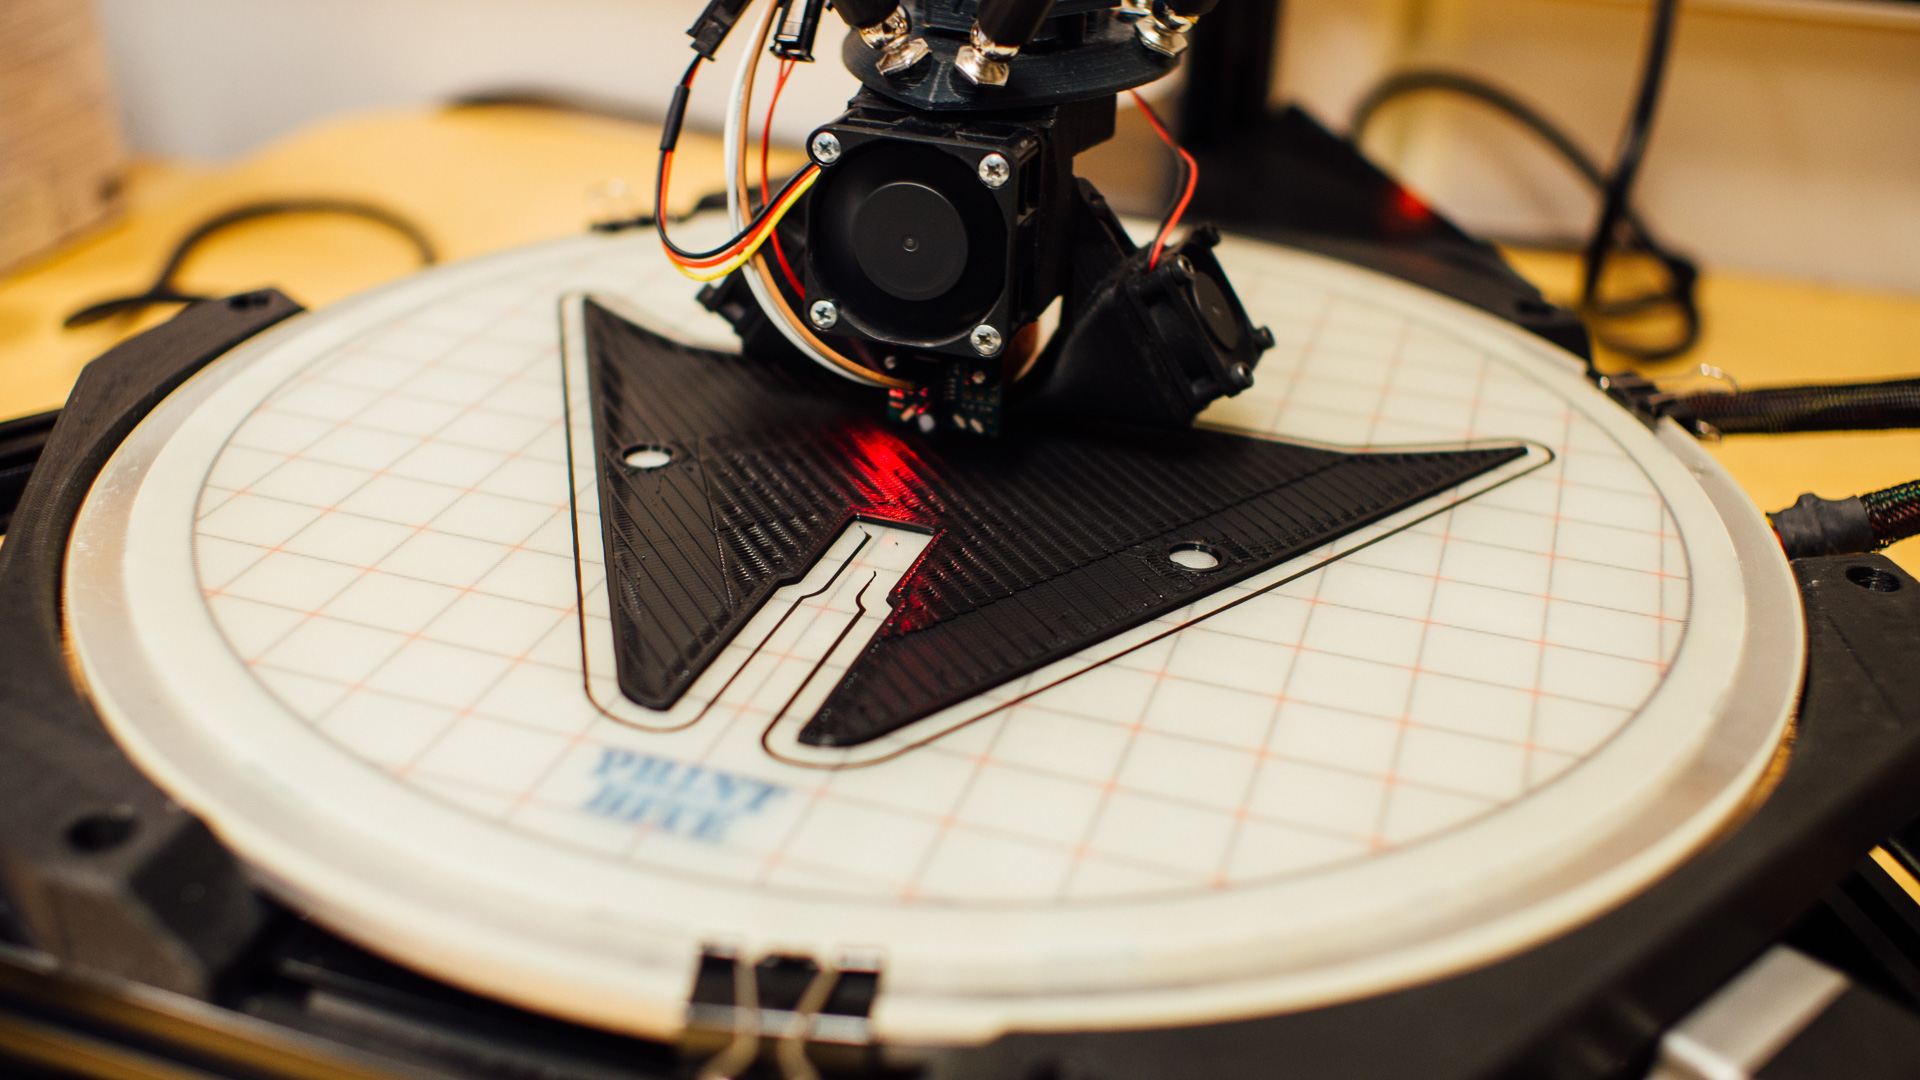
We’re really happy with how this turned out. The covers fit nicely, and thanks to the clean PrintBite surface, the underside of the prints becomes nice and shiny, giving the printer the look we want.
The Next Steps
Next up we will move the cable from the bed heater, which you can clearly see on the right side in the image above, in underneath one of the covers. For this to work we need to replace one of the bed holder brackets with one with a tunnel for the cable to go through. We have the design ready, so another update is not too far away.
We also have several other ideas for future upgrades, so as usual, stay tuned!
In the next part in this series we’ll publish all the design files of the custom part on the printer.


