Let’s take a closer look at the custom modification we’ve done to our Kossel build’s effector. But first, you might be interested in the previous editions in this blog series:
The Original Design and Initial Modification
We got the original effector from Flex3Drive. Unlike the drawing on this page, our effector came with two 25 mm fans for part cooling.

Flex3Drive’s effector comes in many versions, customized for filament thickness, hotend brand (JHead, Hexagon and E3D) and joint type. As mentioned in earlier posts, we use the E3D Volcano hotend. The effector, however, is customized for the regular E3D-v6, which is shorter along the z-axis. Therefore, we needed to do small initial modifications to the effector.
The first thing we needed to do was to lower the IR-board with an amount equal to the difference in z-axis length between the E3D-v6 and the Volcano hotend. We did this by adding a simple extension bracket.
The second thing we needed to do was to aim the 25 mm part fans away from the hotend. This was achieved by rotating the fans such that the airflow more or less avoided the nozzle.
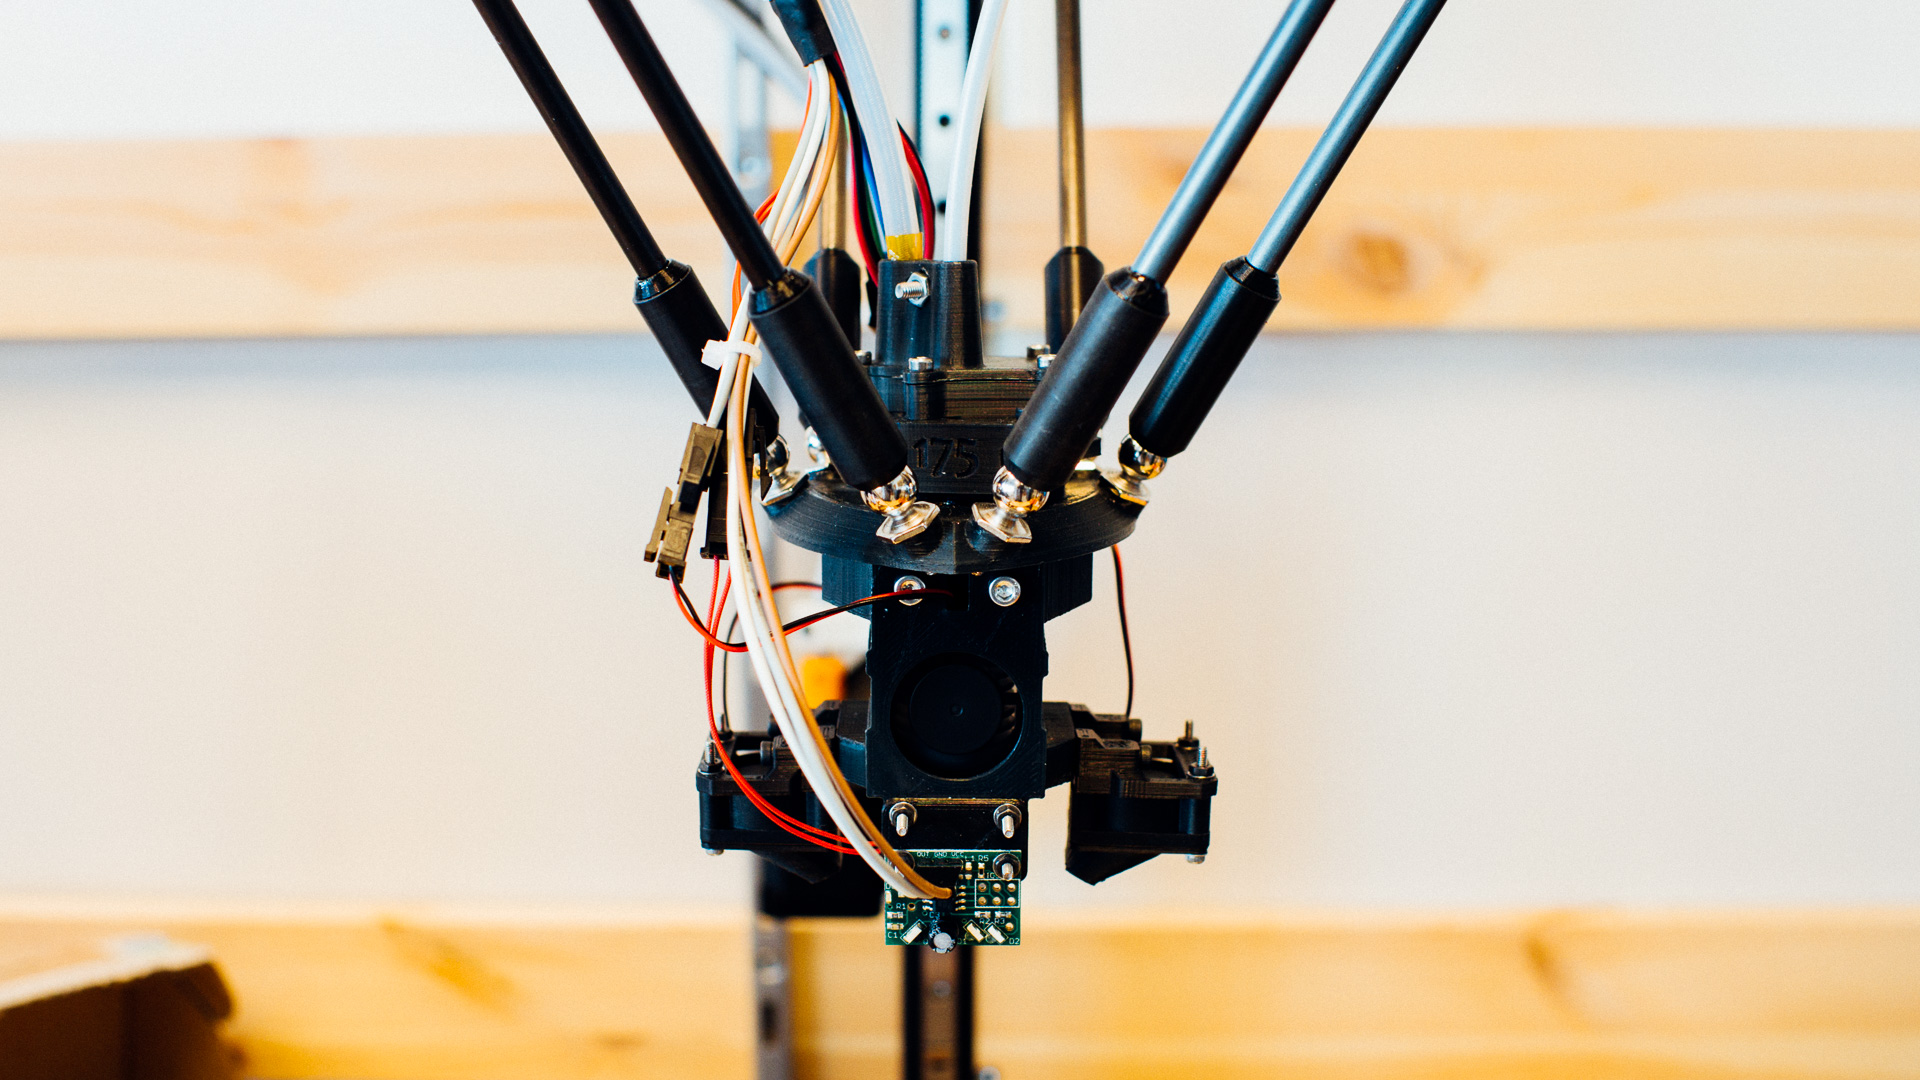
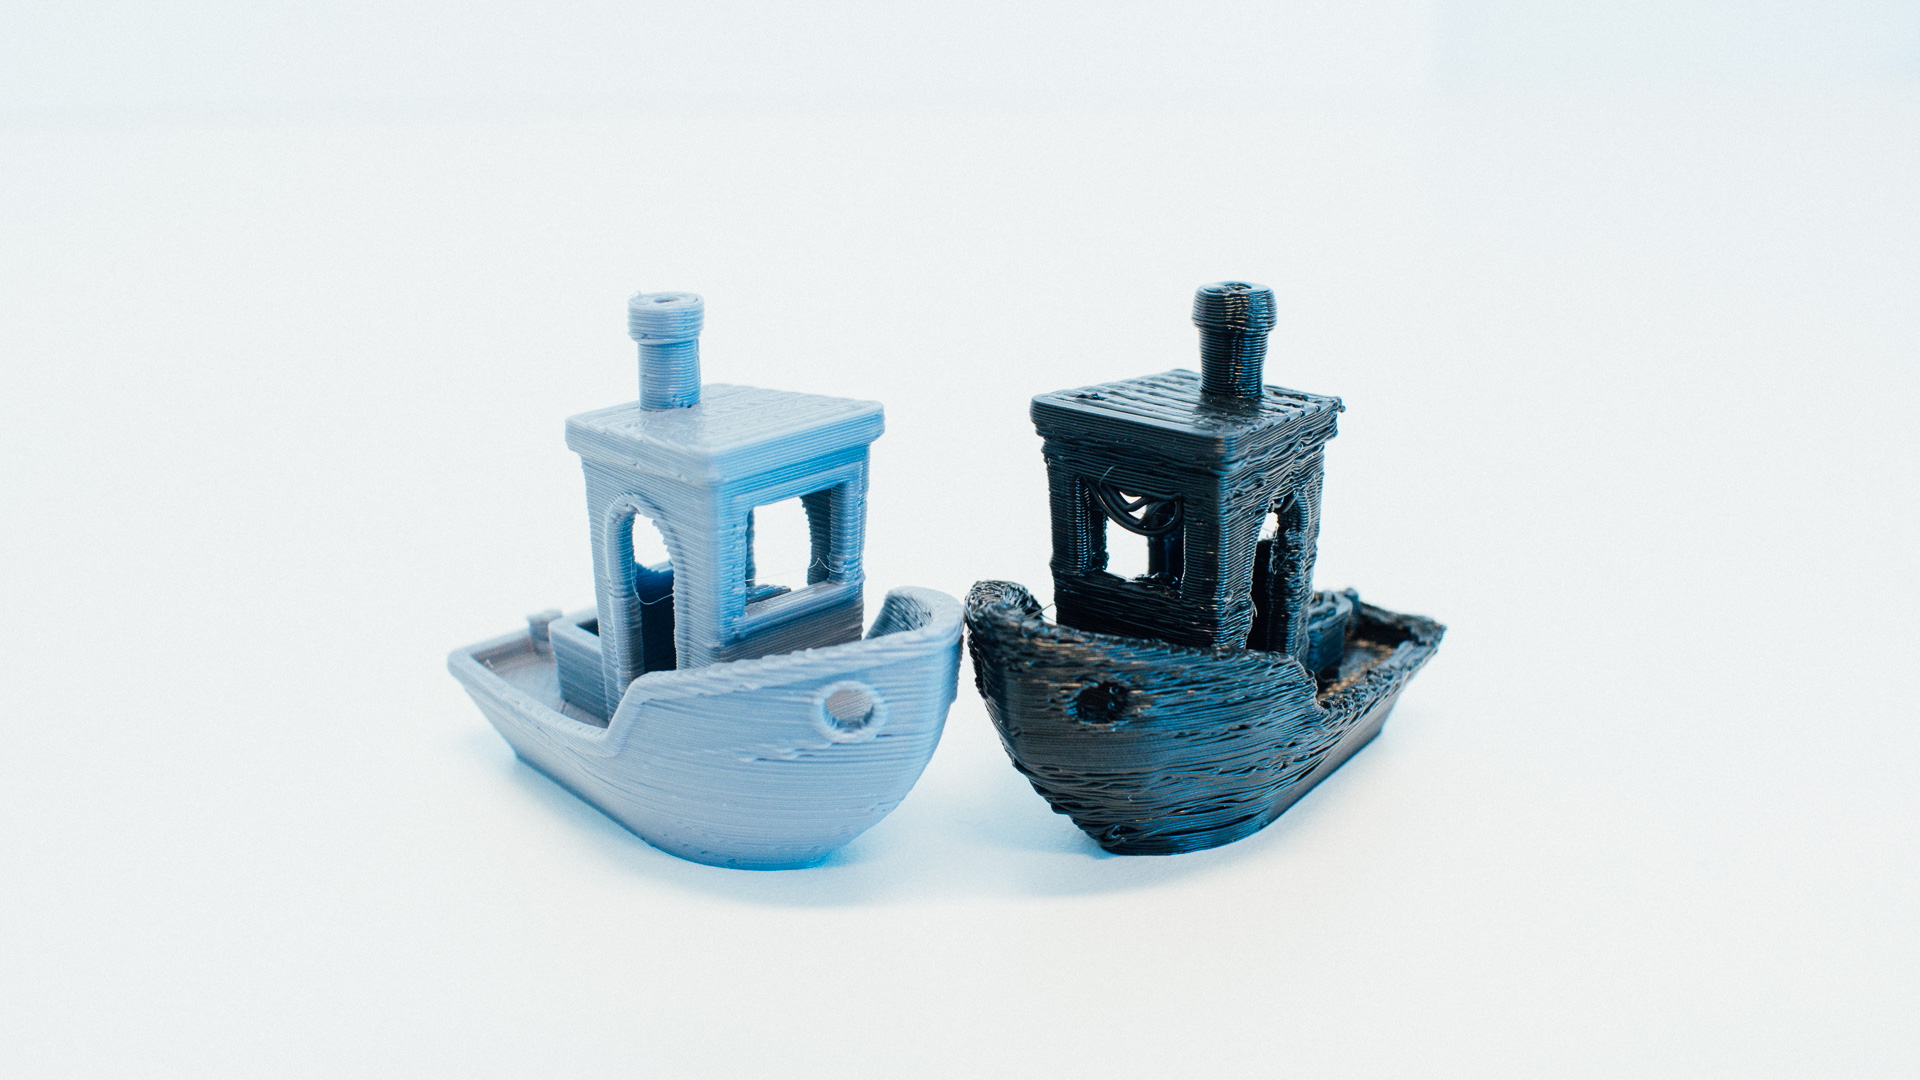
However, this solution didn’t give us enough fan power. This counts for both the part fans on the sides AND the hotend fan. The fact that we didn’t get enough part cooling was obvious, as seen in the Benchy comparison image further down, but we also found out that the hotend heat sink didn’t get enough cooling. So we decided to beef up the fan sizes!
The Current Modification
For the part fans we chose to have two 30 mm fans (instead of 25 mm) and for the hotend fan we chose a 40 mm fan (also instead of 25 mm). To beef up the fan sizes we needed new brackets and shrouds (green). We also needed to switch out the main structural part (yellow) which encloses the hotend heatsink. We also made an adapter (red) which we can switch out if we want to use a different fan size.
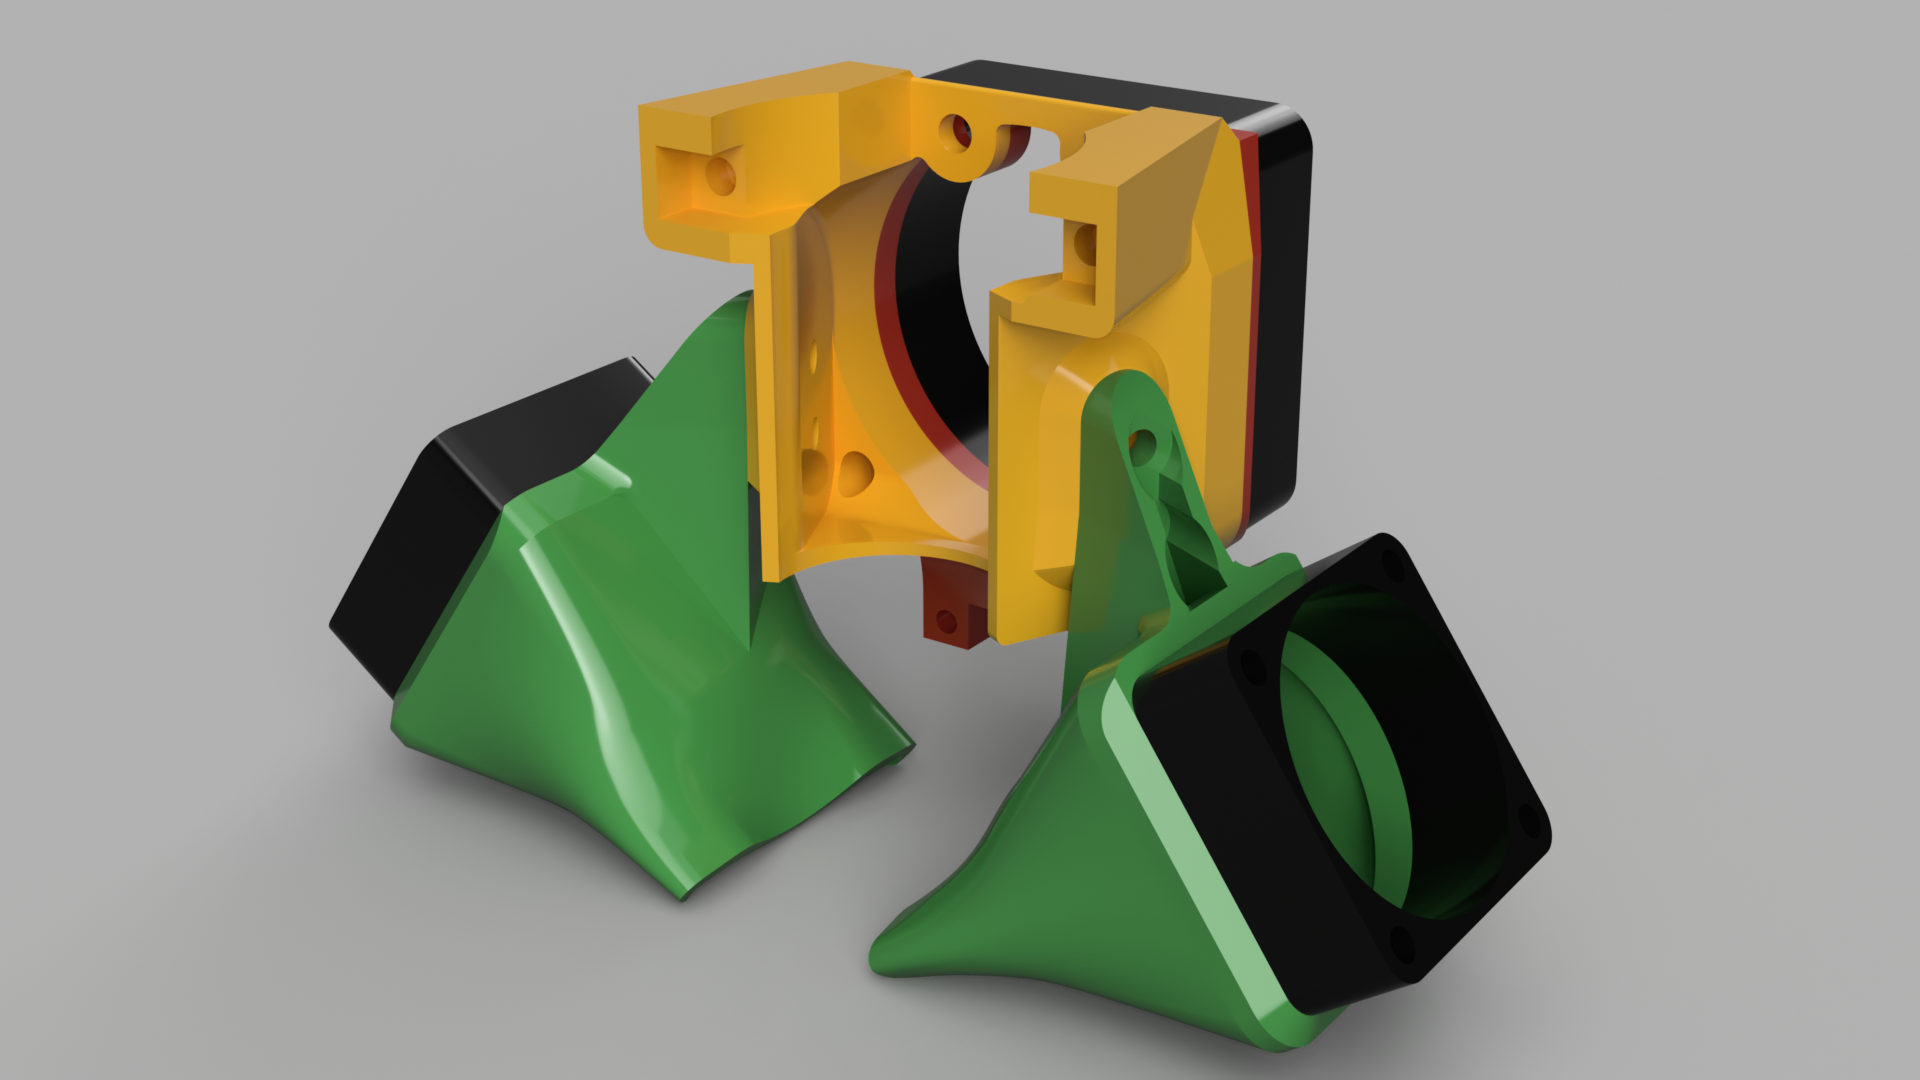
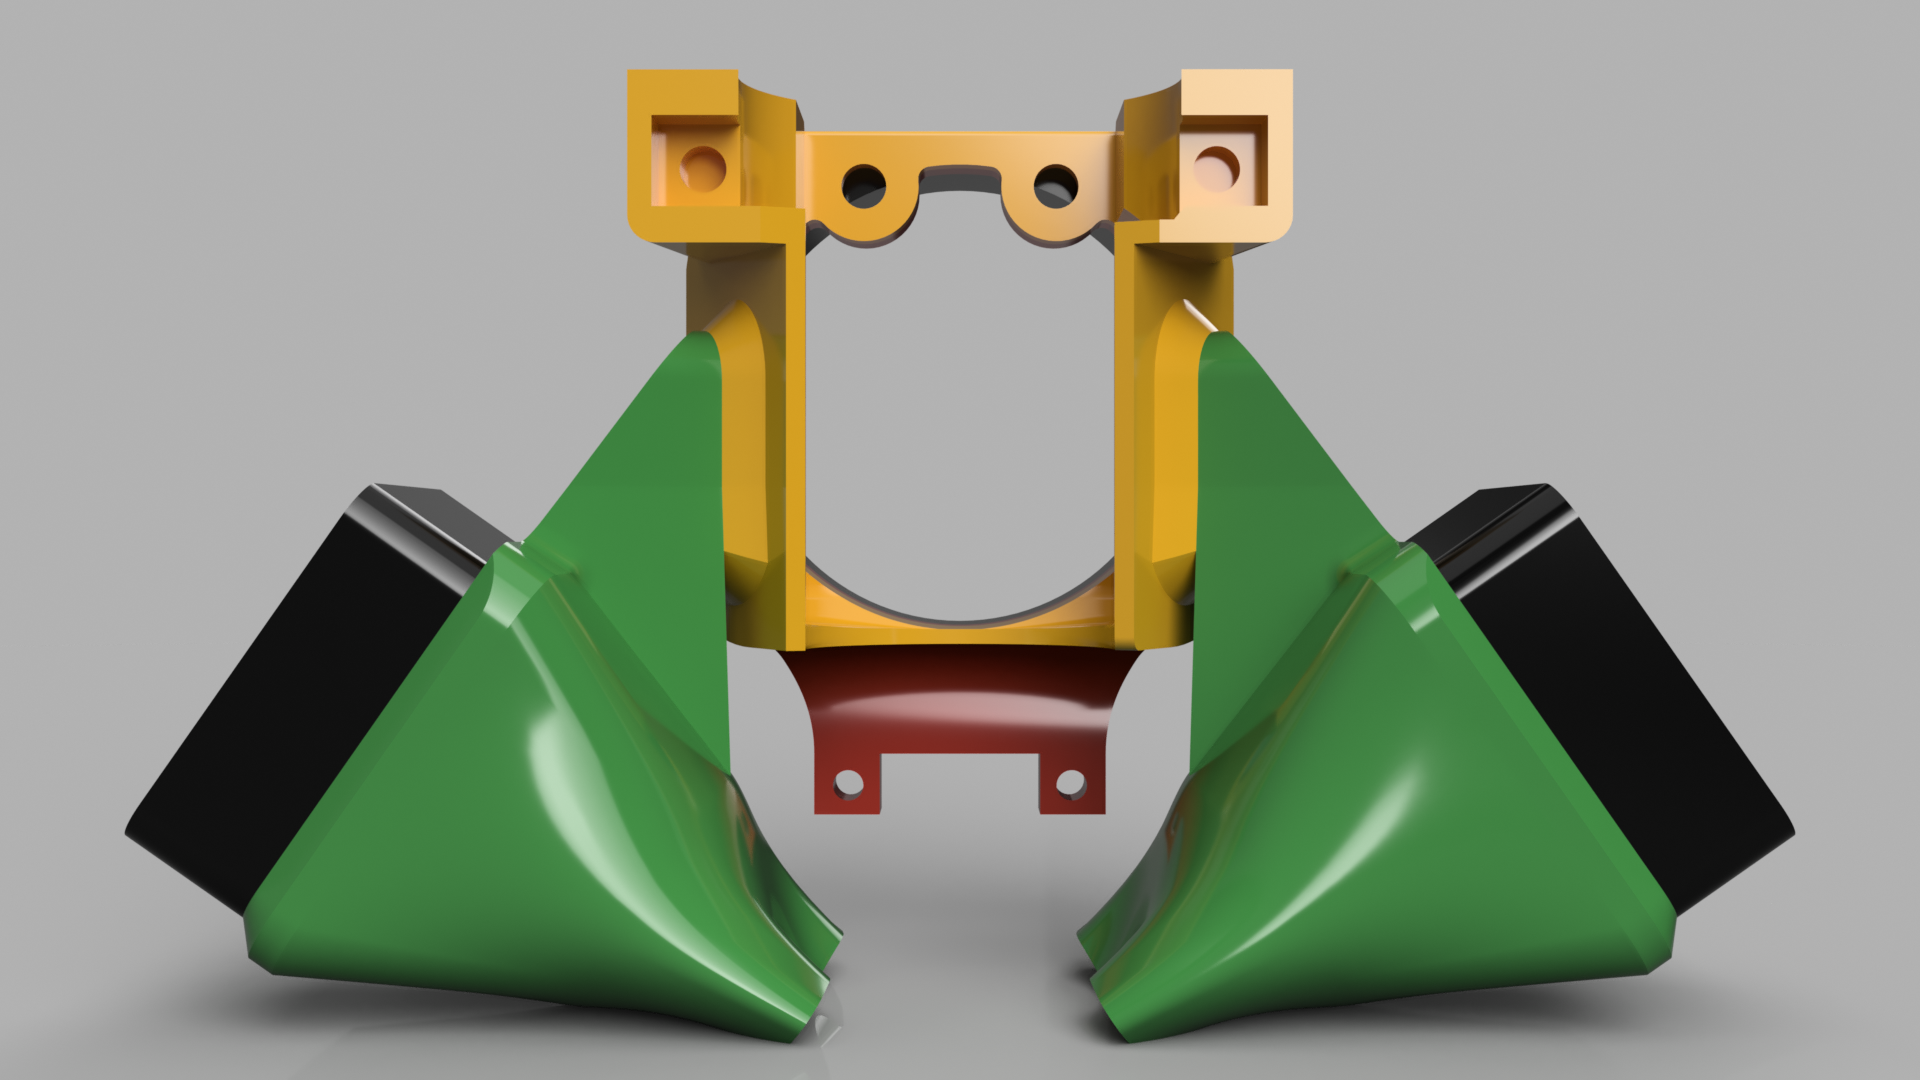
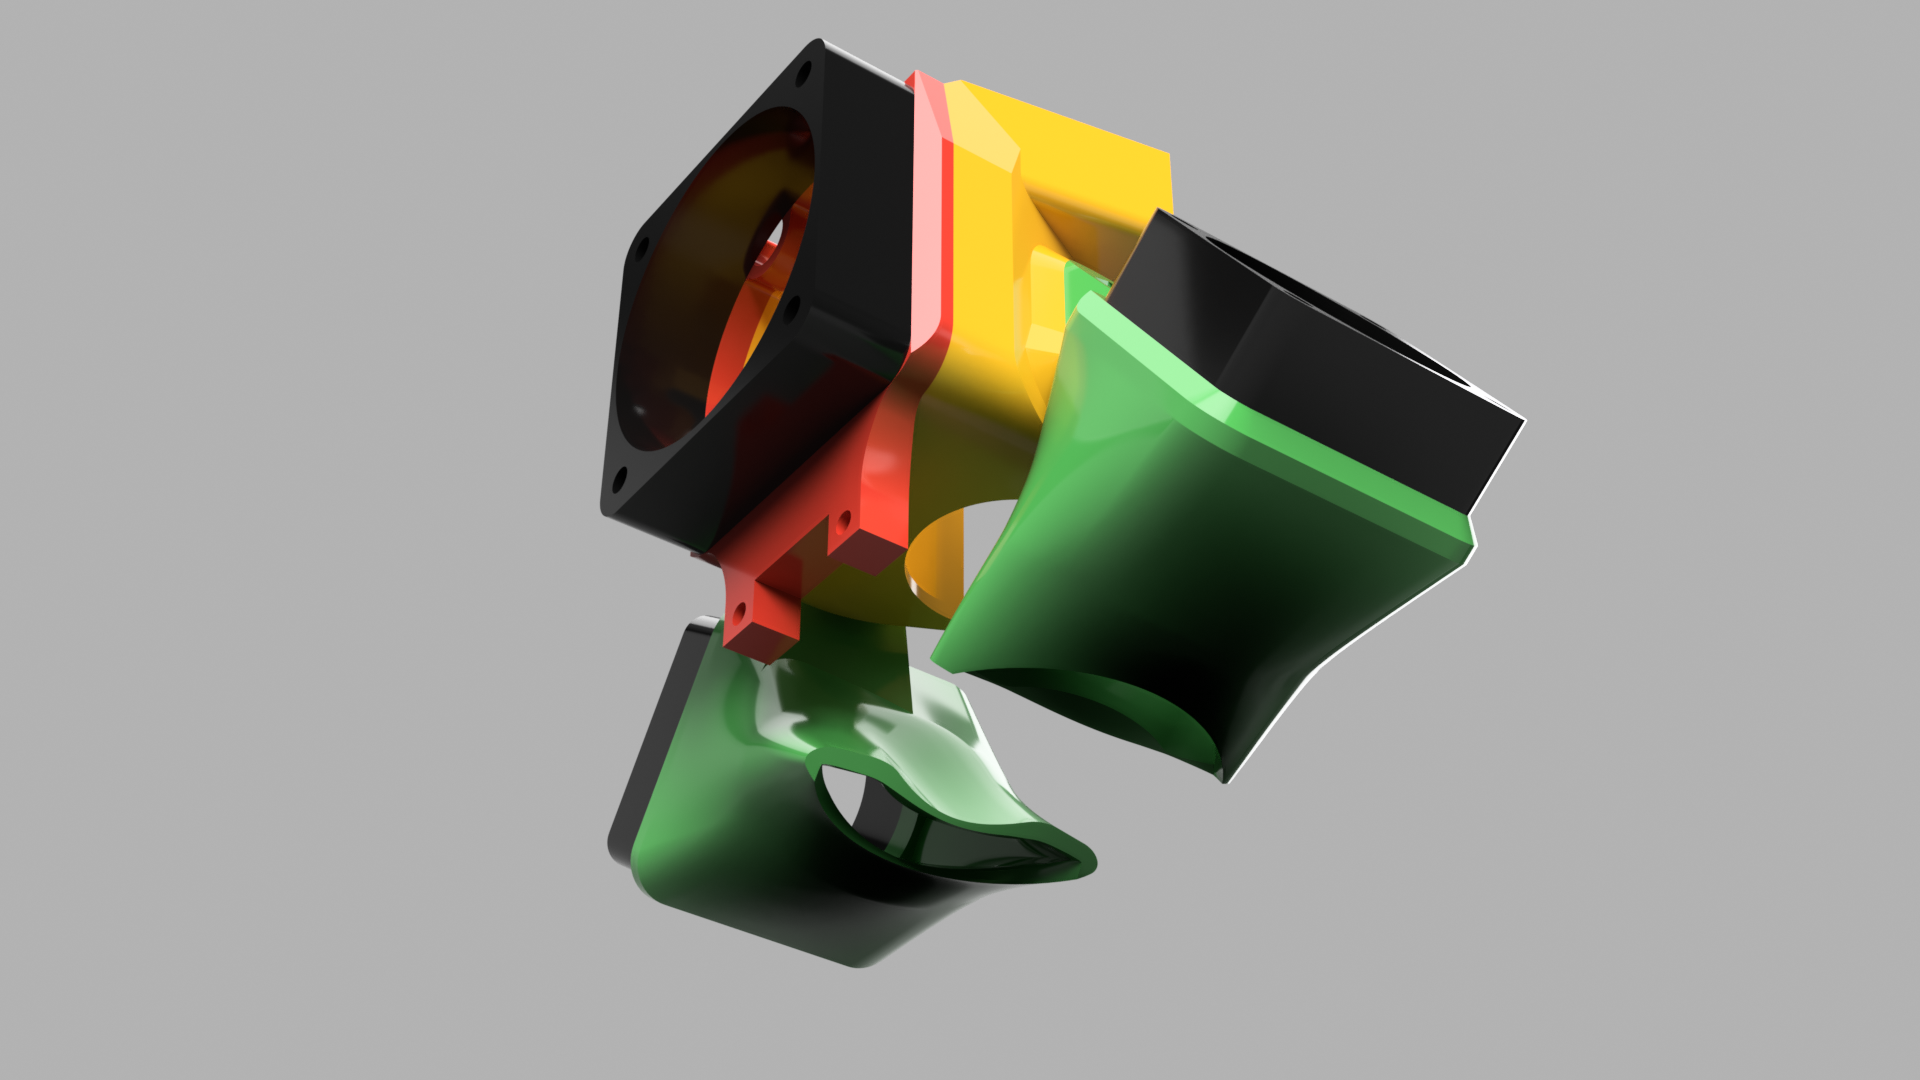
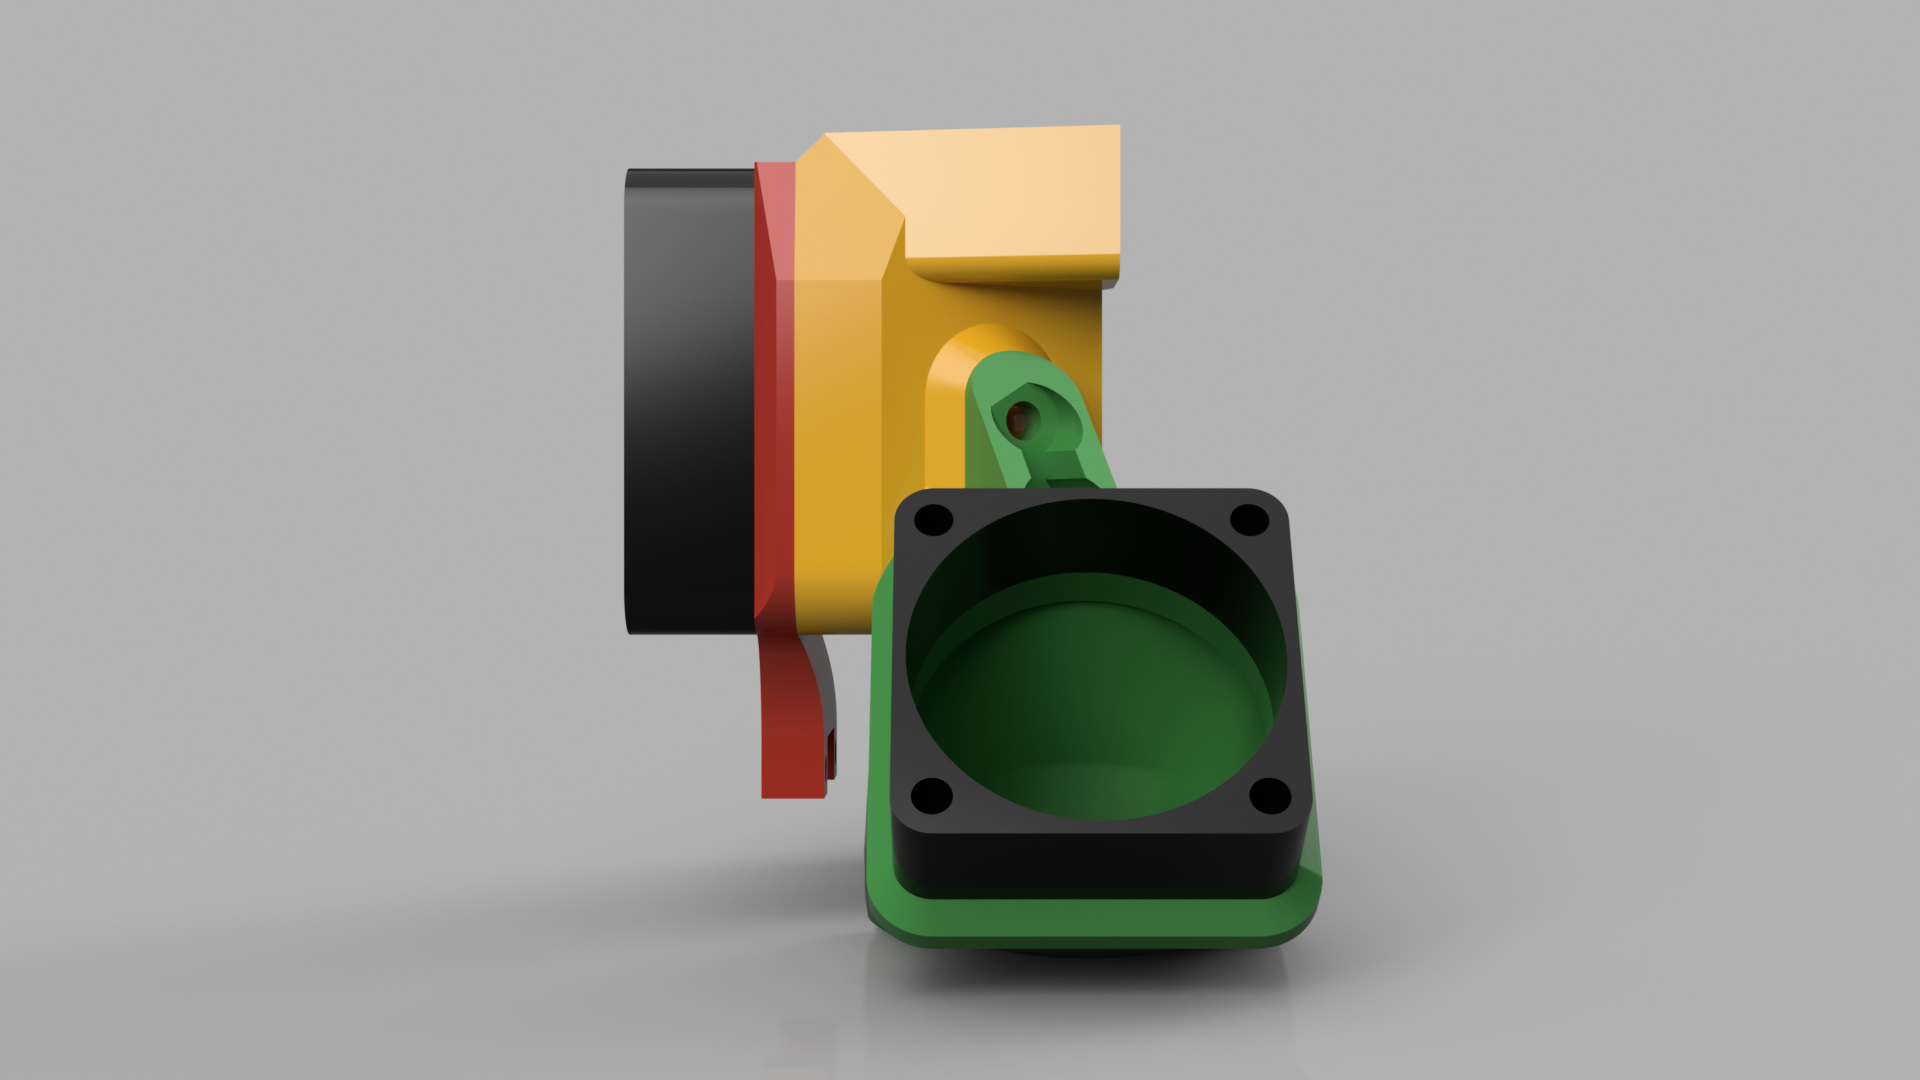
A lot of the features on the yellow part needed to be mimicked from the original to fit the upper part of the effector as well as the hotend. Since the fan is much larger than the previous one, the airflow needed to be funneled around the heatsink. As for the part fans, the shrouds are designed such that the airflow will avoid the hotend. We designed the brackets/shrouds to be a single part instead of bracket->fan->shroud. With this mod we’ve also tried to get the IR board as close to the nozzle as possible.

The Result
We have talked about part cooling before, and this is vital to achieve good prints. By replacing the stock fans the print results increased dramatically, as seen below.
Further Modding and Replacing Flex3Drive Parts
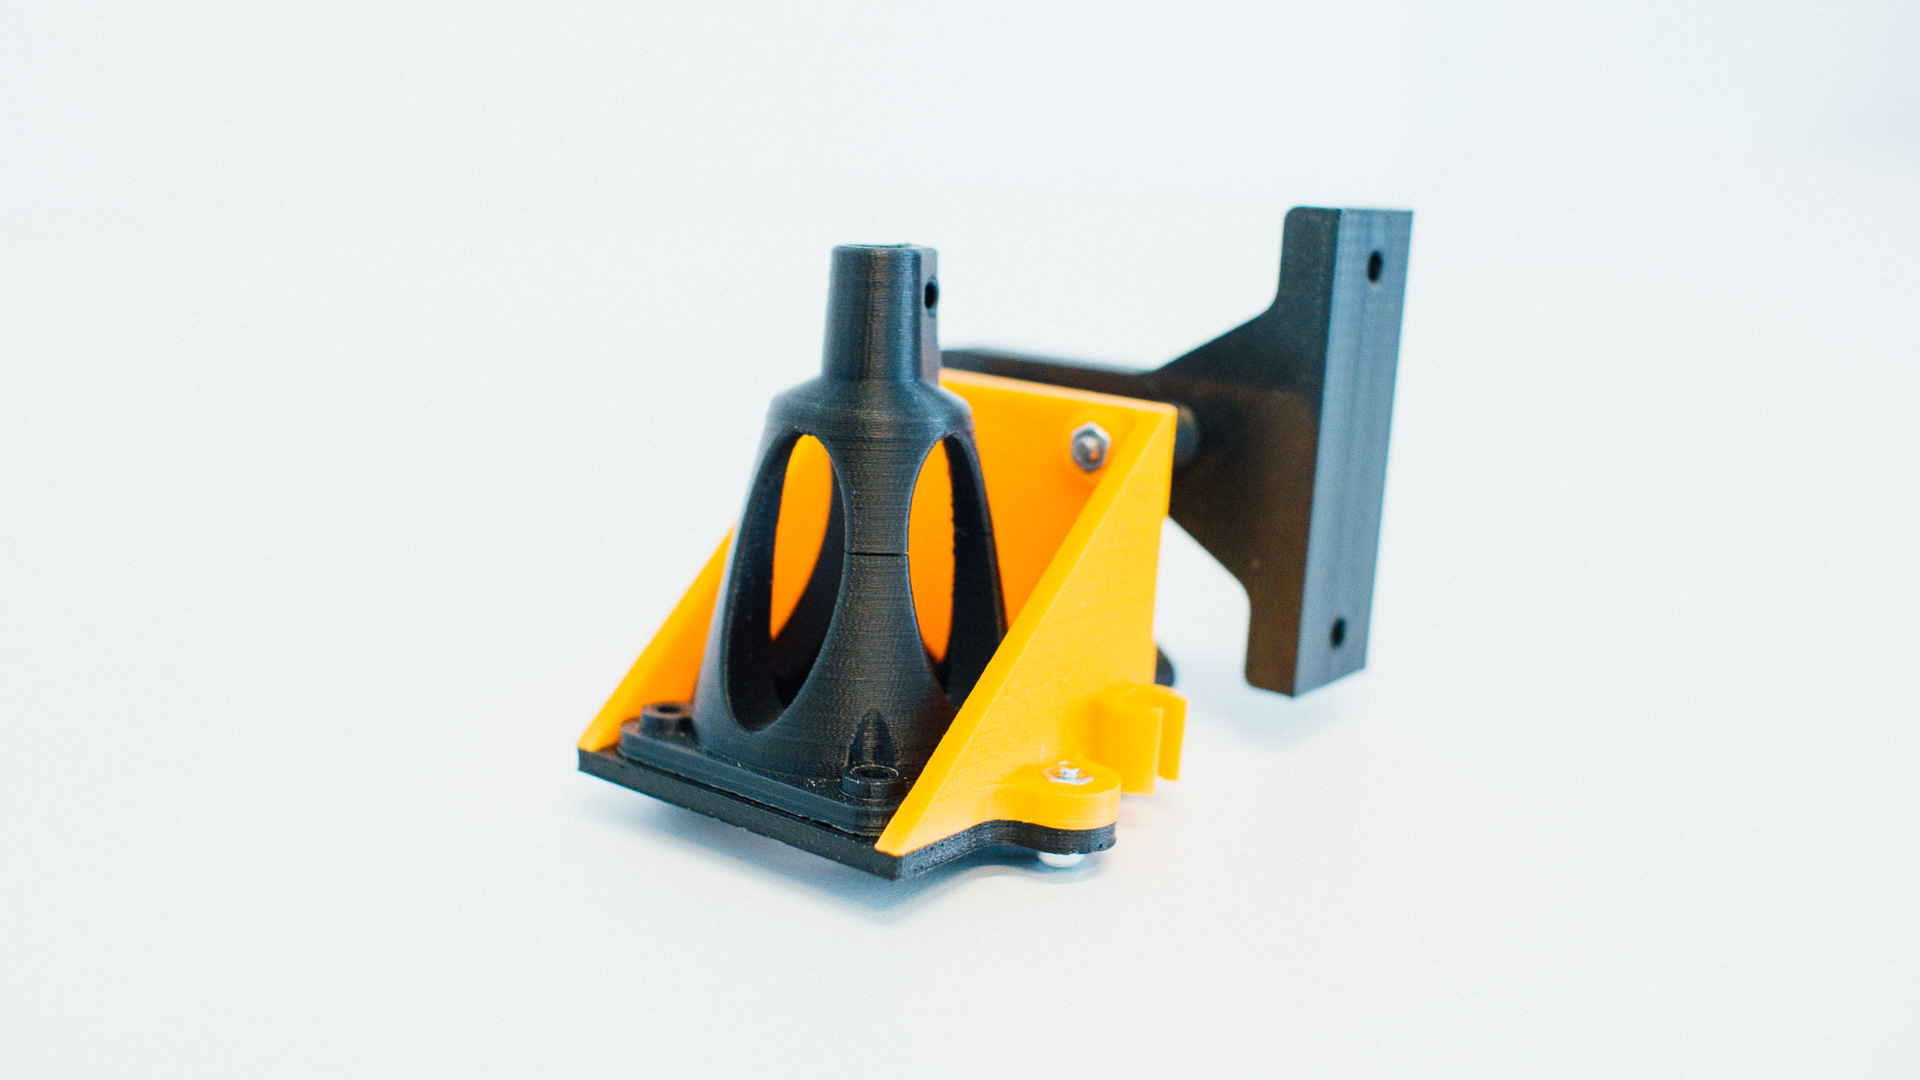
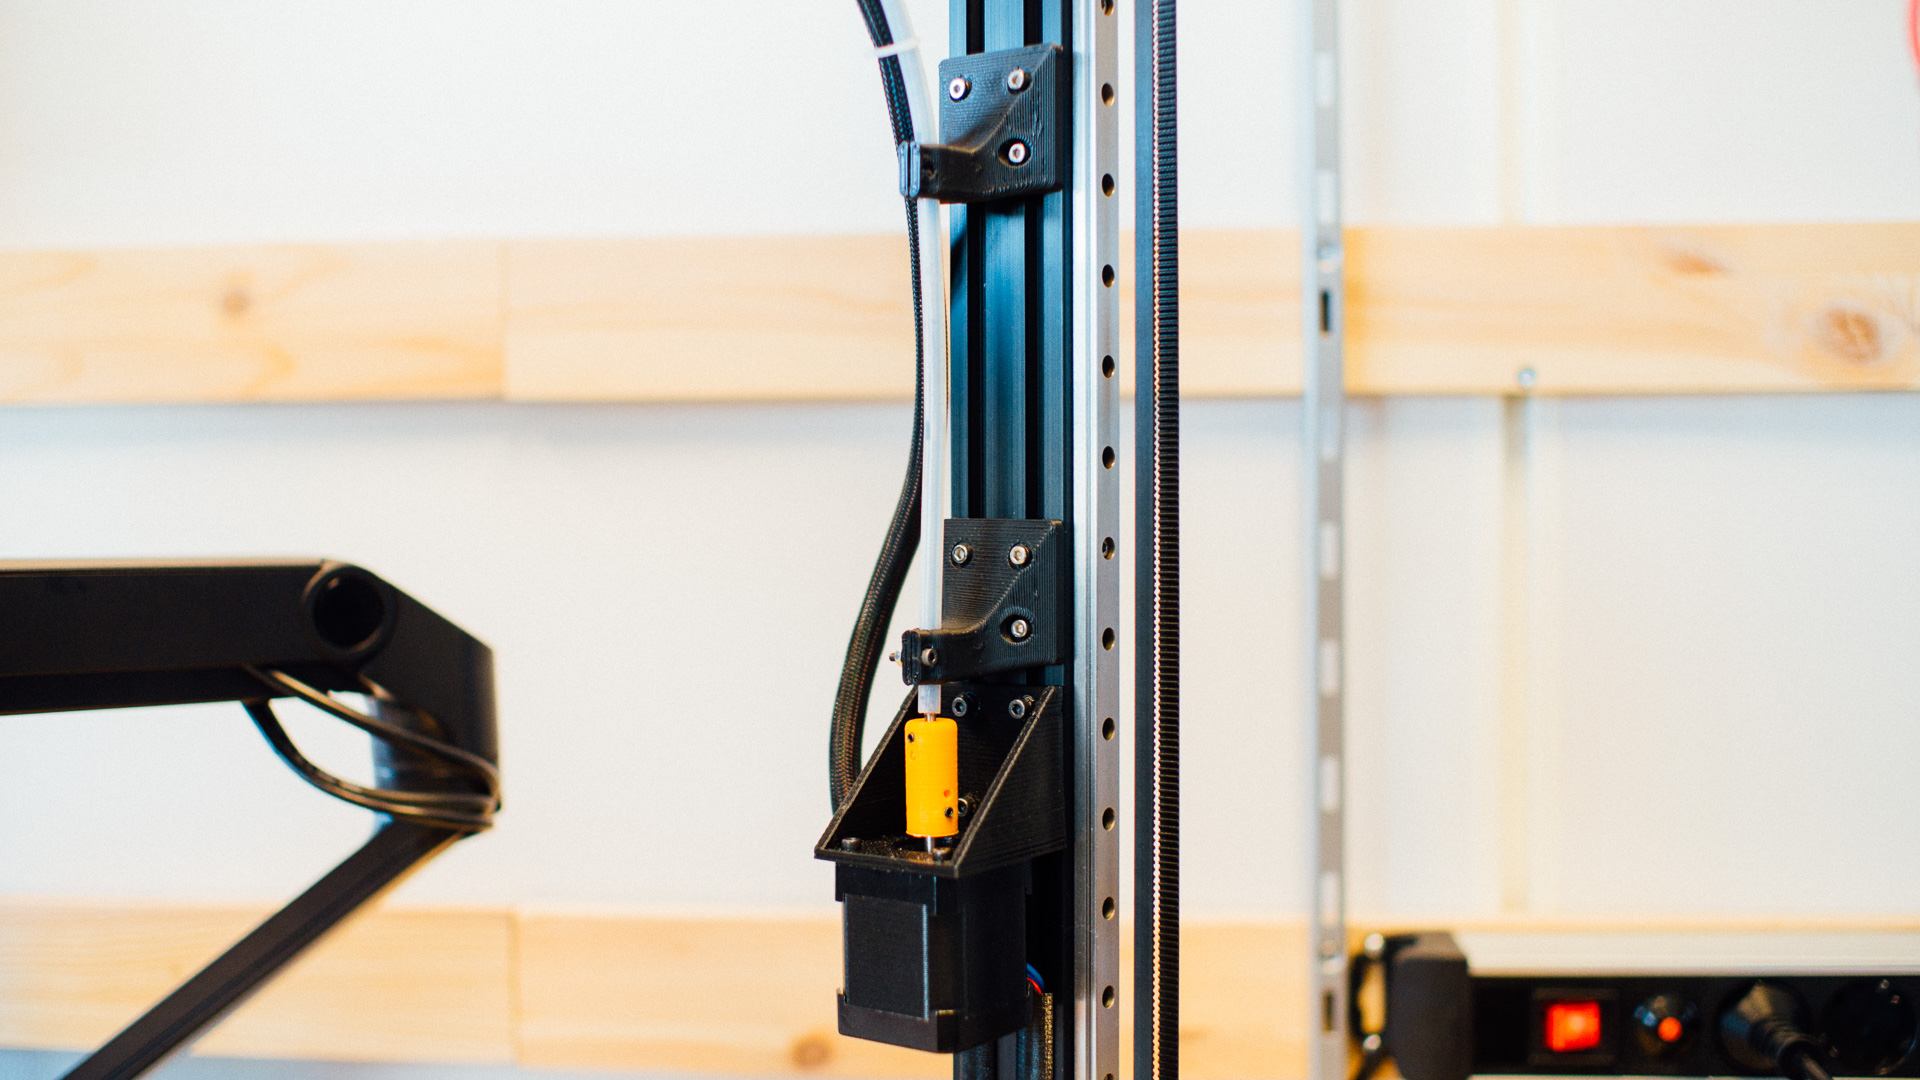
Bundled with the effector shipment from Flex3Drive came the bracket for the extruder motor. We started using this, but since we have such a long flexible driveshaft, the tension on the bracket got too big and it broke between layers, as seen in the image below.
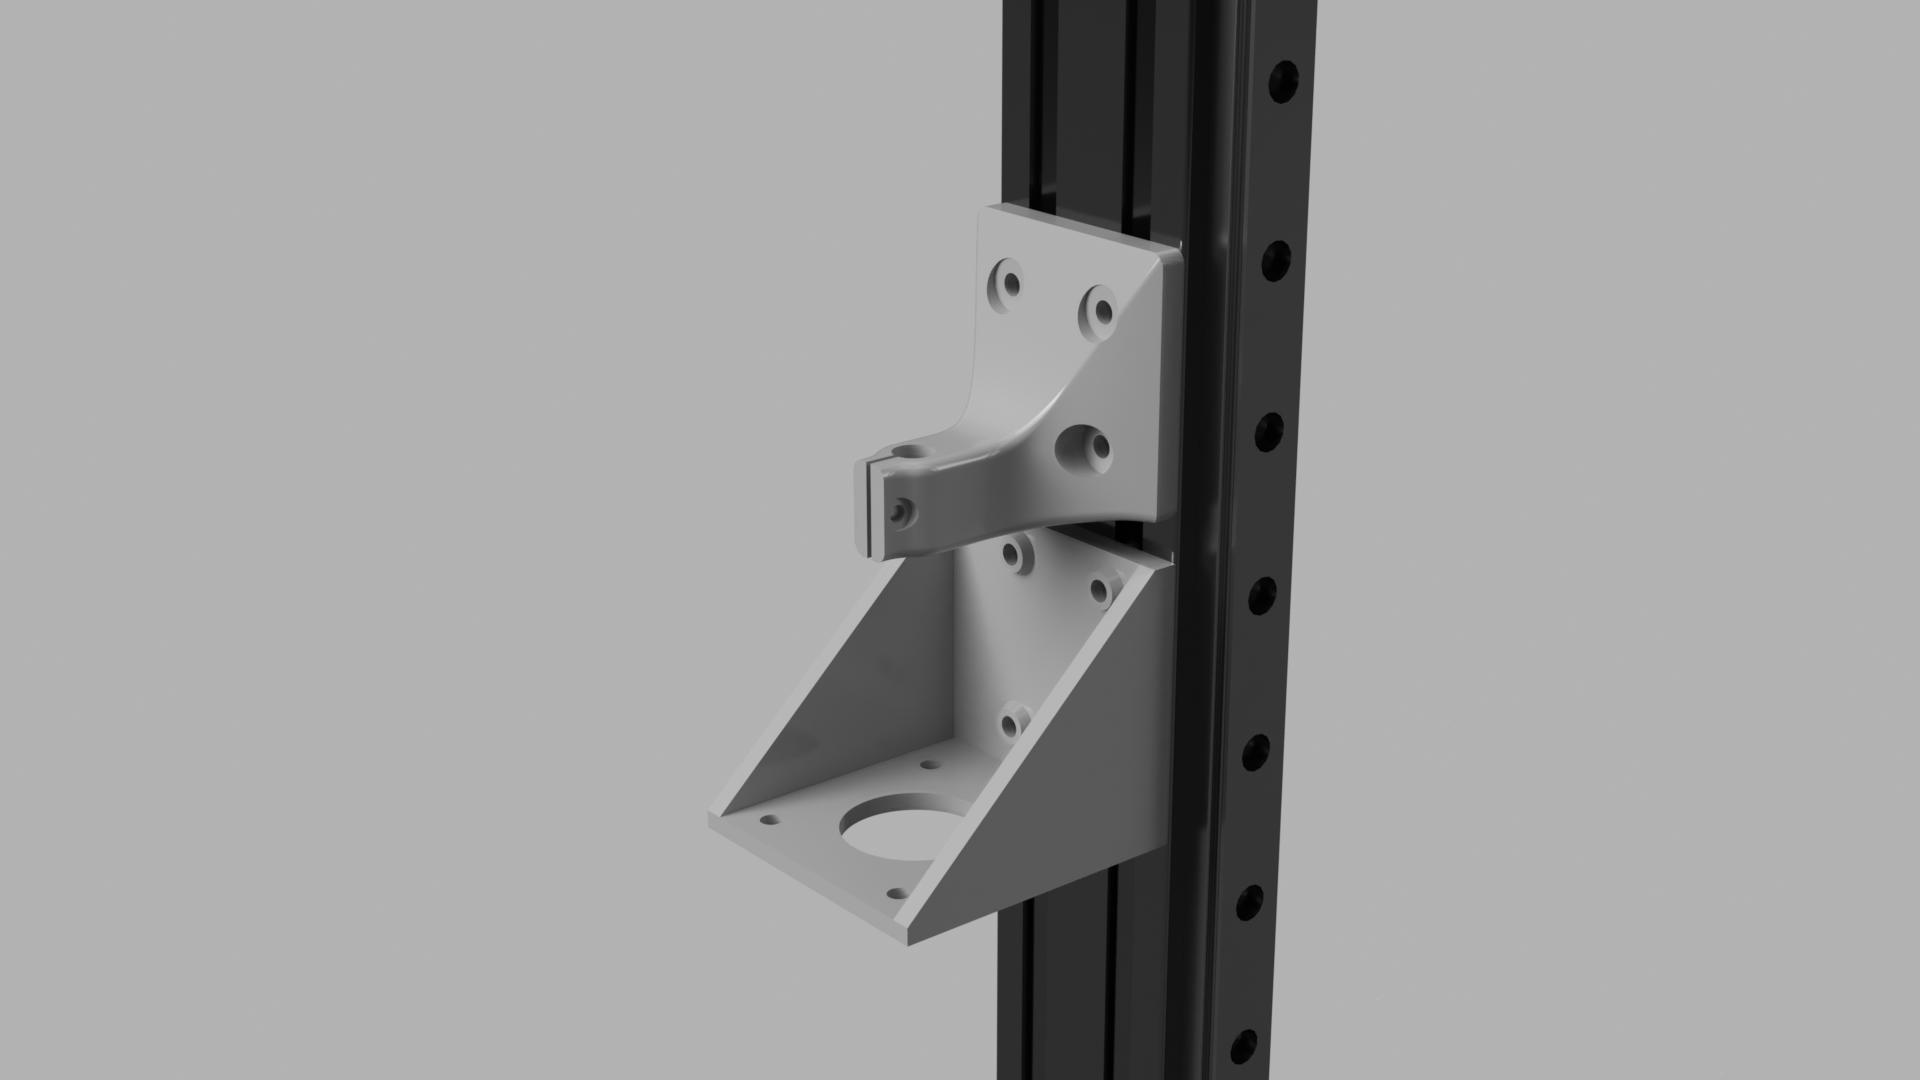
So we decided we had to make a more sturdy construction. The main bracket ended up quite similar to the original, except that it is designed to be mounted directly on the frame, both to make it more compact and more sturdy. We then designed and 3D printed two “tension relievers” to be mounted over the motor. We’re still using the original coupler between the motor and driveshaft. This new setup seems to be rock solid and is working flawlessly.
Current Status and Further Blog Plans
These days we are tweaking config parameters and Simplify3D slicer settings to achieve as good and fast prints as possible, and it’s starting to look really good.
Before ending this series we have other things to write about, such as a customized touch screen casing, filament holder, filament out sensor, config parameters, slicer settings, Printbite and the list goes on.
However, in the next post in this series we show you a behind-the-scenes video from the building process.


