This is a short tutorial on how to avoid unwanted rendering behavior for coincident faces in Fusion 360. However, this is a principle that probably will work elsewhere as well, given you have access to similar dielectric priority options.
Coincident Faces
When modelling a container with a content like fluid, or anything else that completely fills a portion of the container, you will get coincident faces. This means that the faces of the content occupies the same space as the inner faces of the container. There’s nothing wrong with this by itself. However, if you want to make this look nice when rendering it, and the container is transparent, you might get some issues.
Coincident faces aren’t limited to containers as described above. If you create a box on top of another box you will get a coincident face as well.
Rendering Transparent Bodies and Coincident Faces
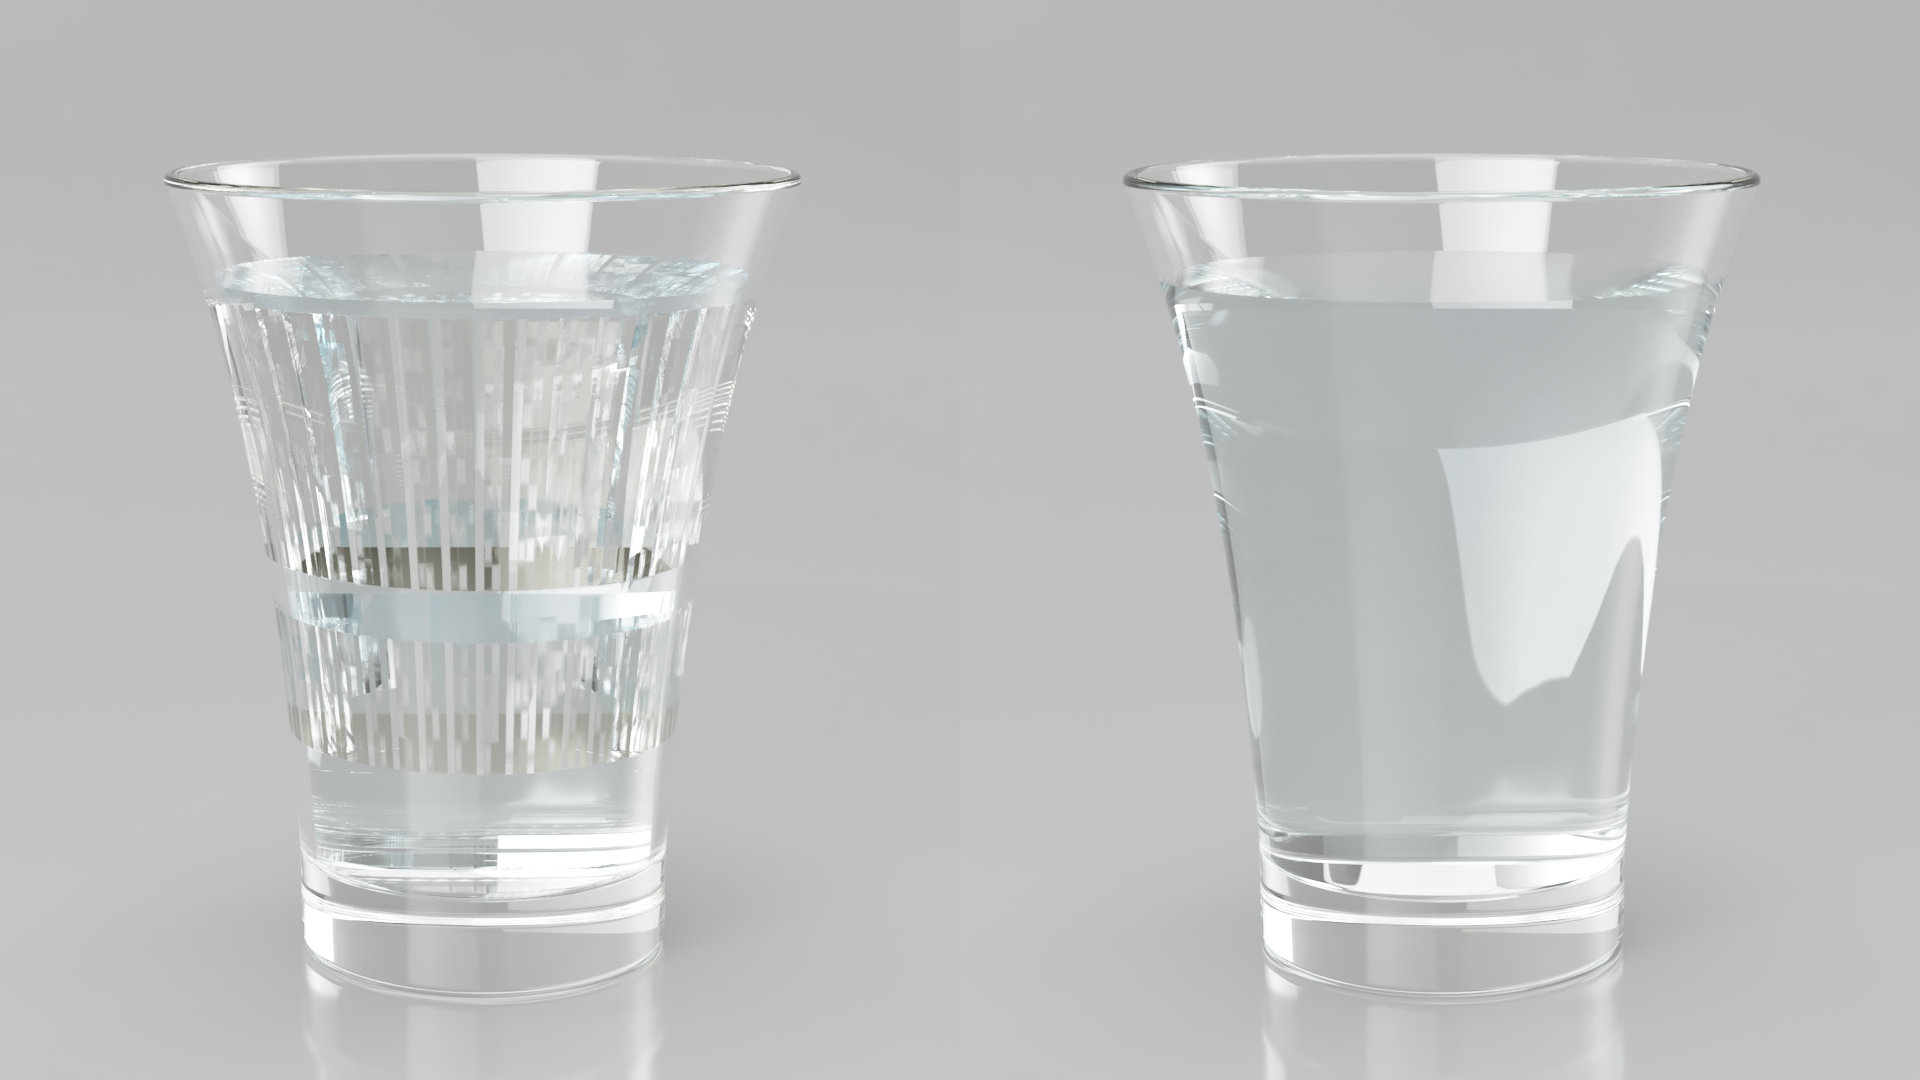
By default, when rendering a glass of water (if the water perfectly fills the glass), you will get artifacts where the water and glass meet. This can be seen to the left in the image above. Whether the rendering engine interprets the water as penetrating and reaching inside the glass body, or staying on the outside like it should, is arbitrary. Thus we get this weird unnatural pattern.
There are a few ways to handle this. The easiest is to make the glass 100% opaque, but where’s the fun in that? Another approach is to make the water body a bit smaller. This is a quick fix that may work, but the result might not get you quite where you want – the water is not really filling the glass as it should. A third option is to use dielectric priority.
Using Dielectric Priority
Dielectric priority gives some bodies priority over others. This means that where two bodies with different dielectric priorities overlap, the one with the highest priority gets rendered instead of the other. Overlap is a keyword here, which we need to address further.
Overlapping
In our case, the water needs to be increased in volume such that all of its faces that were coincident with the glass get completely enclosed by the glass body. This can potentially be tricky, depending on the complexity of the bodies.
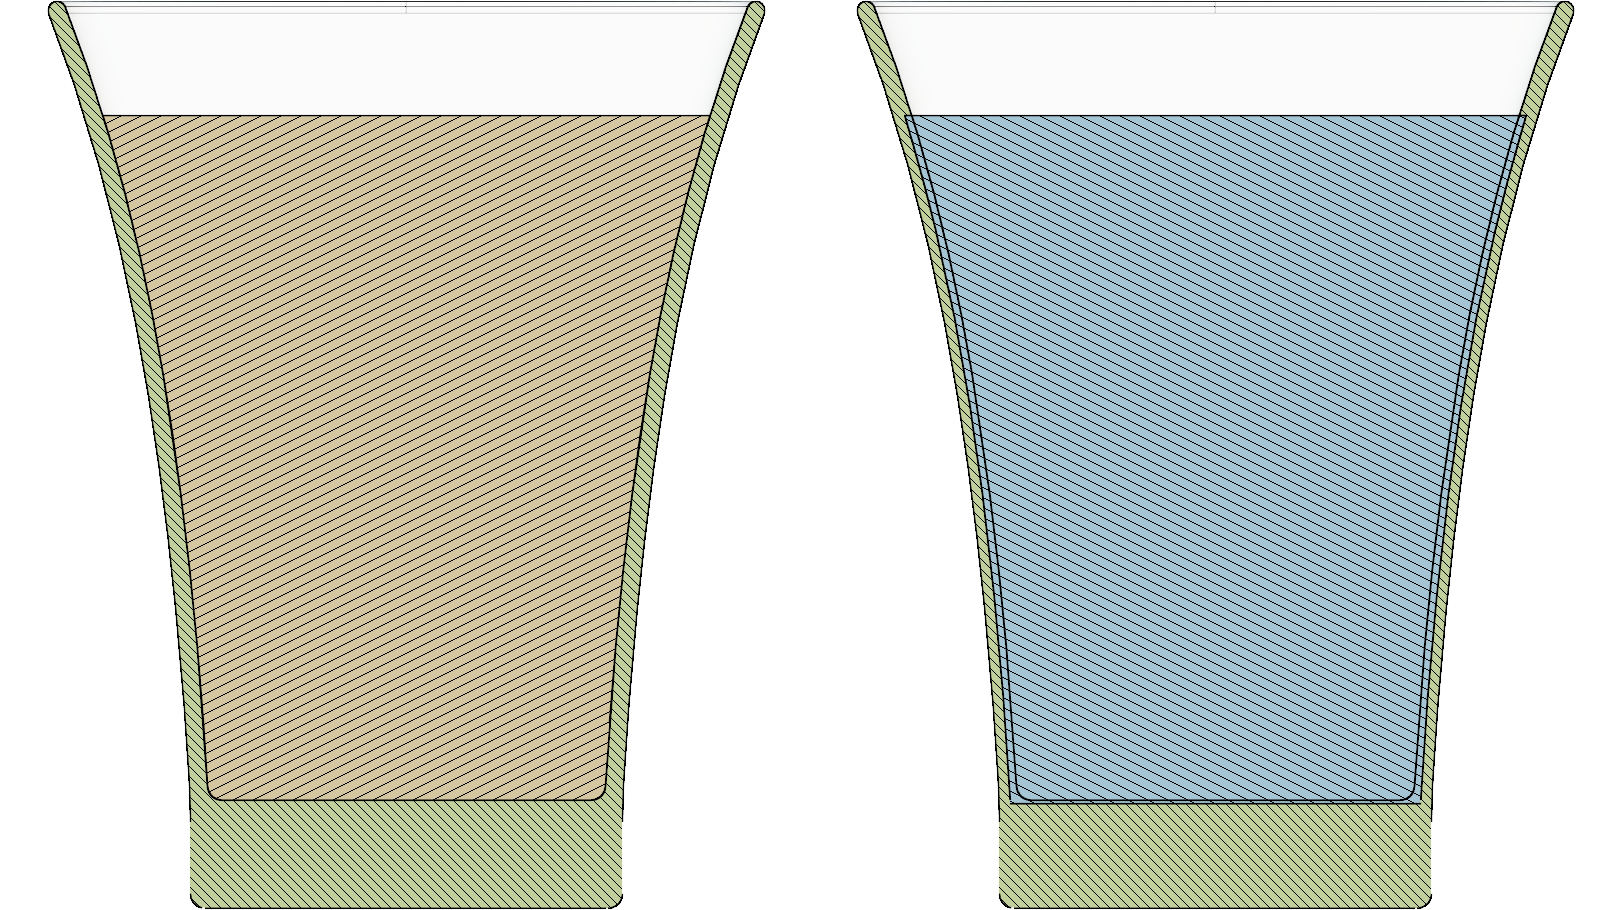
Setting the Priority
Once you have overlaps where you need them, you need to set a proper priority.
Enter the render workspace, right-click one of the components or bodies (depending on what you operate with) and select Dielectric Priority Control.
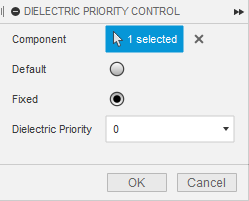
Change the option from Default to Fixed and choose a priority. Repeat this for all components or bodies that need a specific dielectric priority.
Important: the lower the number is, the higher the priority is! This means that 0 is the highest priority. In our case we want to give the glass the highest priority, so we’ll keep that at priority 0. We’ll give the water priority 1 since we want to render glass, and not water, where they overlap.
By going through these easy steps we get the right side result in the top image of this post instead of the left one.
Happy rendering!