One and a half year back we wrote an introductory blog post about FFT and Arduino, which today is one of our most popular blog posts.
This time we’ll upgrade the hardware to a Teensy 3.2 and see which advantages this gives us compared to the good ol’ Arduino Uno (with the ATmega328P microcontroller).
Limitations on the Arduino Uno
There were several limiting factors to the performance of the Uno used last time.
Memory
The Uno only has 2KB RAM, which severely limits how many samples we can work with. Last time we had to make do with 128 samples (64 bins). This resulted in a very poor resolution for the results of the FFT.
Speed
With 16 MHz clock frequency, the Uno isn’t the quickest of the bunch. On top of that, we’re using the analogRead() function, which on the Uno takes 100 μs to run according to the Arduino reference documentation. However, when testing this for ourselves, it takes 208 μs to read an analog input on the Uno. Changing the ADC prescaler to 16 from the default 128 leads to 28 μs for the exact same operation, which is a significant improvement. This is not without drawbacks, however. A lower prescaler leads to more noise in the measurements. One can also use the ADC in Free Running mode utilizing interrupts. How both of these methods are done is explained well here.
With a bit of safety margins on the 16 prescaler ADC setting we can get to around 30 KHz. This is not terrible, but there is still room for improvement.
The Teensy 3.2 Performance
The Teensy has a bit more power and juice under the hood, which definitely comes in handy when fiddling with FFT-related stuff.
Memory
Increasing the RAM from 2KB to 64KB is significant! This doesn’t only give us a larger resolution in the results, but it also enables us to analyze a larger chunk of data. Where we got up to 128 samples on the Uno, we can get up to 2048 samples on the Teensy.
Speed
The clock frequency is increased from 16 MHz to 96 Mhz on the Teensy. An identical analogRead() test, as with the Uno, gives us 13 μs with the default prescaler.
On top of this, we can alter the ADC resolution all the way up to 16 bits. The default is 10 bits, equal to the Arduino Uno’s ADC. Changing the resolution can be done by calling the analogReadResolution() function with the number of bits as the argument. However, this will slow down the ADC process. A similar test as before, only with 16-bit resolution, takes 311 μs. Testing these different resolutions actually gave us surprising results. Already at 11 bit, the analogRead() function took 309 μs. Further down in this post we will show you one way to drastically increase the speed of conversions higher than 10 bits.
If we stay at default ADC settings, we can increase the sample rate compared to the Arduino. By how much depends on how “safe” we want to be. 70 KHz is on the limit, so let’s be super conservative and go for 50 KHz. This makes it possible to analyze frequencies up to 25 KHz.
Real-time Analysis
Running the FFT continuously and visualizing the results with a decent refresh rate introduces a completely new set of requirements. You will then need to read analog values as many times as you have samples, run the FFT algorithm AND display the results between each time you want to refresh the results. Let’s investigate how fast we can get decent results.
Sampling
First we need to sample. How long this chunk of the process takes depends on 2 factors:
- Sampling frequency
- Number of samples
We have set the sampling frequency to 50 KHz based on the speed of the ADC. We could squeeze out a higher sampling frequency than this, but let’s keep it at 50 KHz for now. Let’s take 512 samples as an example. This part will then take 10.24 ms.
On the Uno with 128 samples and 30 KHz sampling frequency, the sampling part will only take 4.22 ms due to the low amount of samples. Remember that you have to change the prescaler to 16 to be able to use this sampling frequency.
FFT
This is the most time-demanding part of the process and is only dependent on the number of samples we have.
We have run a few tests using the same code as in the previous post, with and without the line where we find the peak frequency. These examples are with 512 samples.
- Without peak calculation: 57.88 ms
- With peak calculation: 58.69 ms
Not much difference, as you can see.
The Uno falls short here, using 65.99 ms on the same job without peak calculation with only 128 samples.
Displaying the Results
There’s no secret that Arduino’s Serial.print() function is quite slow. Regardless, we will use it to print out all the bins. The speed of this operation is heavily dependent on baud rate. We’ve used 115200 as the baud rate for all examples and tests in this post.
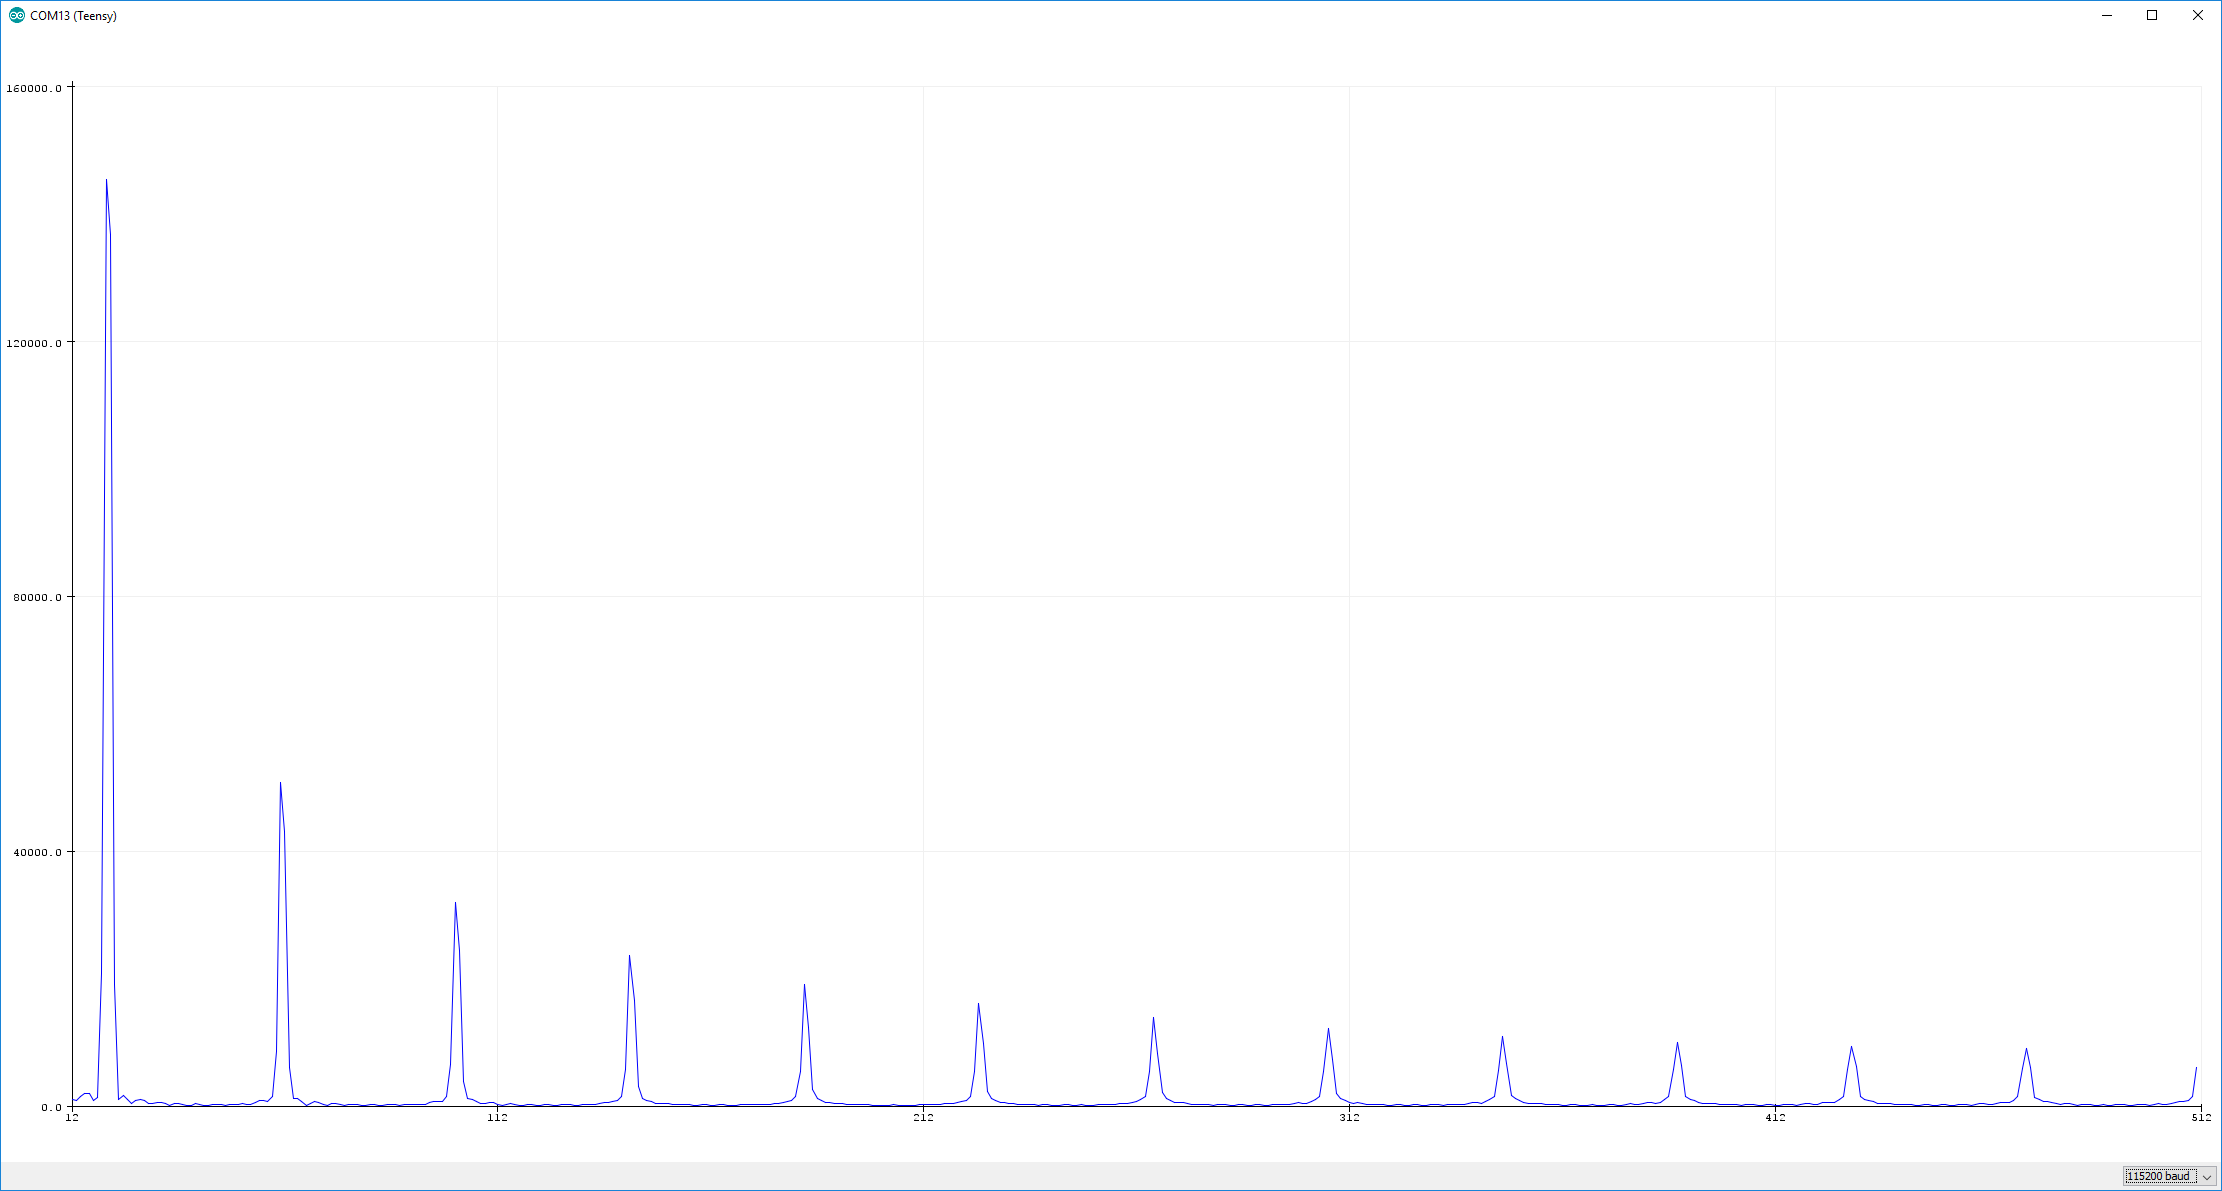
Printing 256 bins over serial takes 5.74 ms, and is thus the least time-demanding part of the process. However, in the case of using the Arduino IDE plotter we need to zero-pad the results since the plotter always shows 500 elements. Printing 256 bins plus 244 zero elements takes 6.65 ms.
In comparison, printing 64 bins on the Uno takes 23.14 ms. Printing 64 bins plus 436 zero elements takes 134.4 ms on the Uno, which is a huge difference from the Teensy.
Is This Doable and How Does the Teensy Compare to the Uno?
Adding these parts together gives us a total of 75.58 ms, which, if we continue staying on the safe side, makes it possible to display FFT results with a 10 Hz refresh rate on the Teensy with our current algorithm. If we push the limits a bit more (70 KHz sampling rate and shorter buffer for refresh rate), we might reach 14 Hz.
This is linear with the number of samples, so increasing that to 1024 will force us down to 5 Hz and 7 Hz respectively. Decreasing our number of samples to 128, equal to what we can work with on the Uno, we could display the result with a refresh rate at at least 40 Hz. And that’s when we’re being conservative.
On the Uno, however, we would struggle to get anywhere near this. Adding up the Uno durations we end up at 93.35 ms without padding. If we’re really pushing it, we can reach 10 Hz refresh rate. With padding we reach 204.61 ms i.e. around 4 Hz. The Arduino IDE plotter and the Serial.println() function are the real killers here. Avoid using them and the Uno will get a bit more useful and versatile on the real-time FFT front.
Teensy Real-time Code
Here’s a working code running on the Teensy 3.2 for real-time display in the Arduino IDE plotter.
#include "arduinoFFT.h"

#define SAMPLES 512               //Must be a power of 2
#define SAMPLING_FREQUENCY 50000  //Hz
#define REFRESH_RATE 10           //Hz
#define ARDUINO_IDE_PLOTTER_SIZE 500

arduinoFFT FFT = arduinoFFT();

unsigned long sampling_period_us;
unsigned long useconds_sampling;

unsigned long refresh_period_us;
unsigned long useconds_refresh;

double vReal[SAMPLES];
double vImag[SAMPLES];

uint8_t analogpin = A0;

void setup() {
  Serial.begin(115200);

  sampling_period_us = round(1000000*(1.0/SAMPLING_FREQUENCY));
  refresh_period_us = round(1000000*(1.0/REFRESH_RATE));

  pinMode(analogpin, INPUT);
}

void loop() {
  useconds_refresh = micros();

  /*SAMPLING*/
  for(int i=0; i<SAMPLES; i++)
  {
	useconds_sampling = micros();

	vReal[i] = analogRead(analogpin);
	vImag[i] = 0;

	while(micros() < (useconds_sampling + sampling_period_us)){
	  //wait...
	}
  }

  /*FFT*/
  FFT.Windowing(vReal, SAMPLES, FFT_WIN_TYP_HAMMING, FFT_FORWARD);
  FFT.Compute(vReal, vImag, SAMPLES, FFT_FORWARD);
  FFT.ComplexToMagnitude(vReal, vImag, SAMPLES);

  /*PRINT RESULTS*/
  for(int i=0; i<(SAMPLES/2); i++){
	Serial.println(vReal[i], 1);
  }
  for(int i=0; i<(ARDUINO_IDE_PLOTTER_SIZE - (SAMPLES/2)); i++){
	Serial.println(0);
  }

  while(micros() < (useconds_refresh + refresh_period_us)){
	//wait...
  }
}
As previously mentioned, the Arduino IDE plotter always shows 500 elements at a time, so we have to print exactly that number of samples over Serial, hence the zero-padding. If we had chosen to use 1024 samples, we could’ve printed the first 500 bins and just missed out on the last 12, or, as we did in the screenshot above, print the last 500 and skipped the first 12.
The Teensy ADC Library
Downloading and including the ADC library made for the Teensy makes it easier to alter the ADC settings. We haven’t delved too far into tweaking the ADC parameters, but we did run a quick test where we set the number of bits to 10 and number of averaging to 1, and that took 9 μs instead of the default 13 μs. More importantly, a 16-bit conversion with the same amount of averaging, took only 11 μs, where our previous result was 311 μs. Increasing the amount of averaging to 10 with 10-bit and 16-bit resolution takes 75 μs and 88 μs, respectively. This gives you an impression of the impact the averaging process has.
Moreover, according to tests done by the creator of this library, you should be able to reach 500 KHz sampling frequency in continuous mode using “high ADC speed” at 10-bit resolution and 414 KHz at 16-bit resolution, both without averaging. Full overview of these tests an be found in the examples included in the library.
Conclusion
Upgrading the hardware from a regular Arduino Uno to something like the Teensy 3.2 enables you to perform more demanding real-time tasks such as this. With the Teensy you can also still code in the simple Arduino language, thanks to the Teensyduino add-on.
You still might be able to use the Uno as a real-time FFT machine, but the sampling frequency and resolution won’t be as good as with the Teensy. If using the Arduino IDE plotter, the refresh rate won’t be anywhere near as good either.
There are ways to further improve the performance on both platforms, particularly by tweaking the ADC settings and not using the Serial.println() function at all. Tweaking the FFT algorithms themselves is also possible.
That was a lot of numbers and comparisons, but hopefully it gave you an OK overview over how the Teensy 3.2 performs compared to the Arduino Uno.