So, you want to step it up a notch and create an awesome project using a stepper motor?
Great, it’s super easy and I will show you how.
Pre requirements
Software:
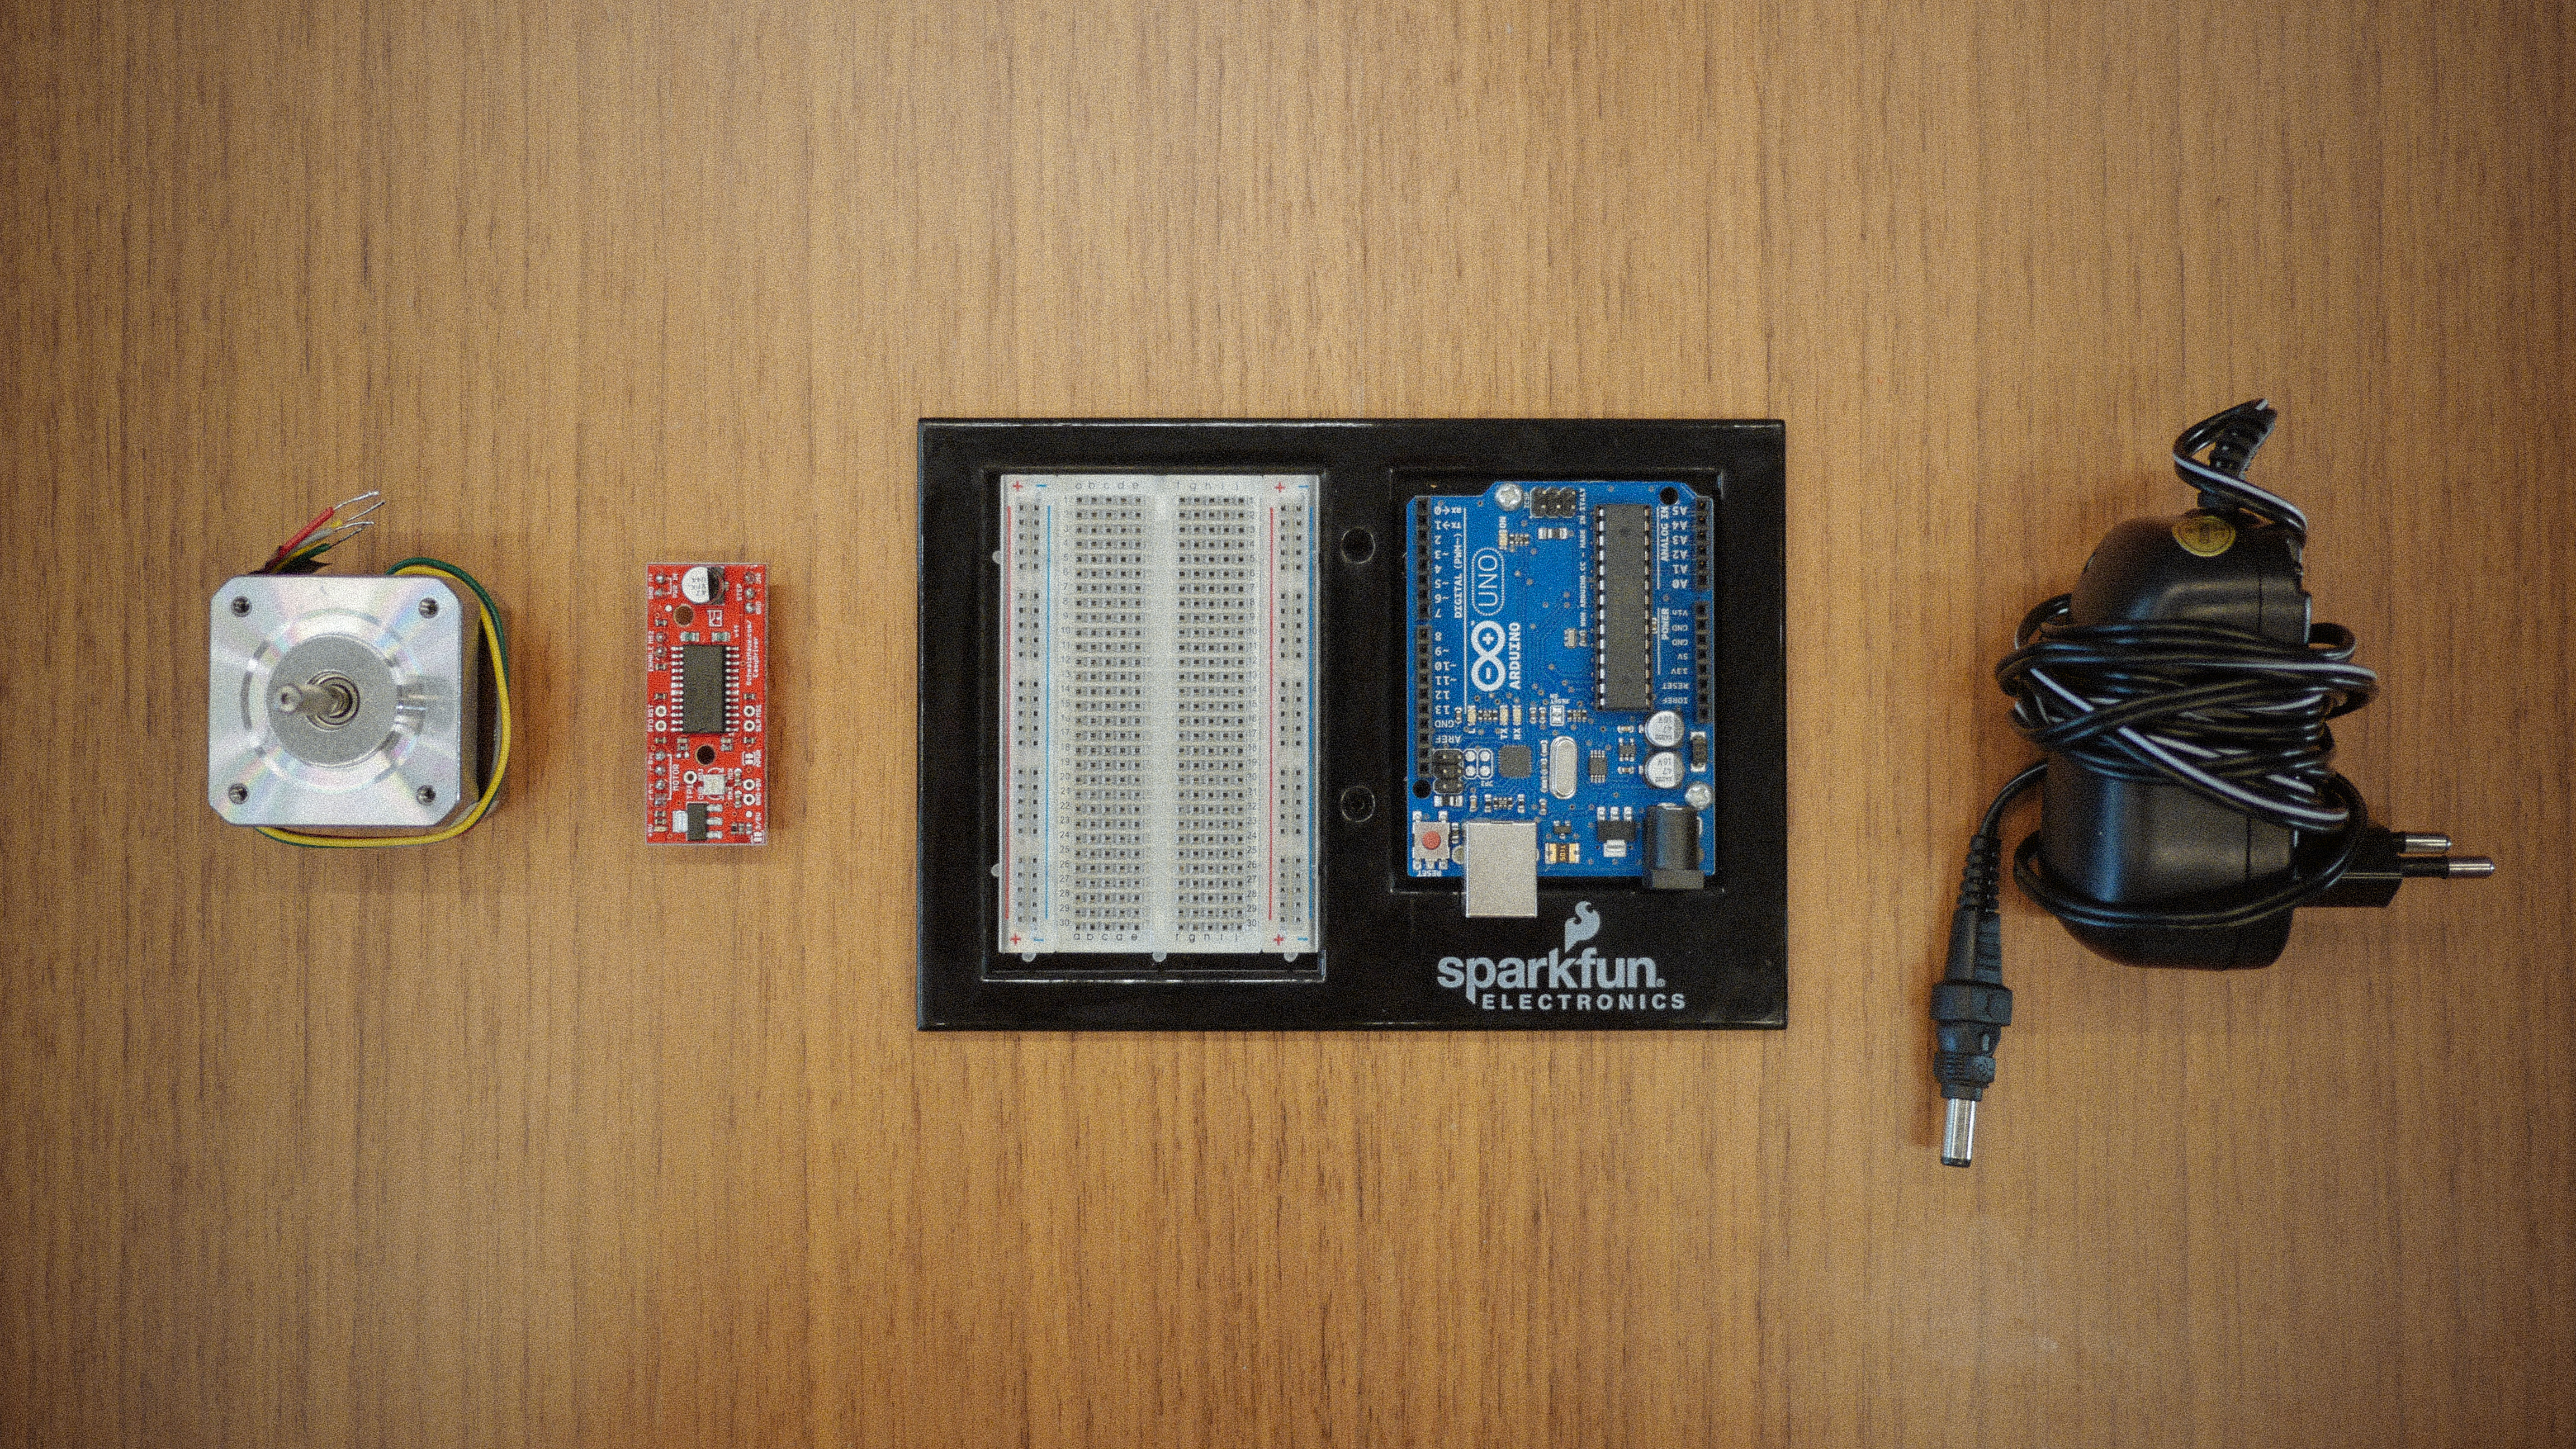
Hardware:
- Arduino Uno (it can be another controller, but for this tutorial I use the Uno)
- Stepper motor (I used this one, but you can use whichever you want)
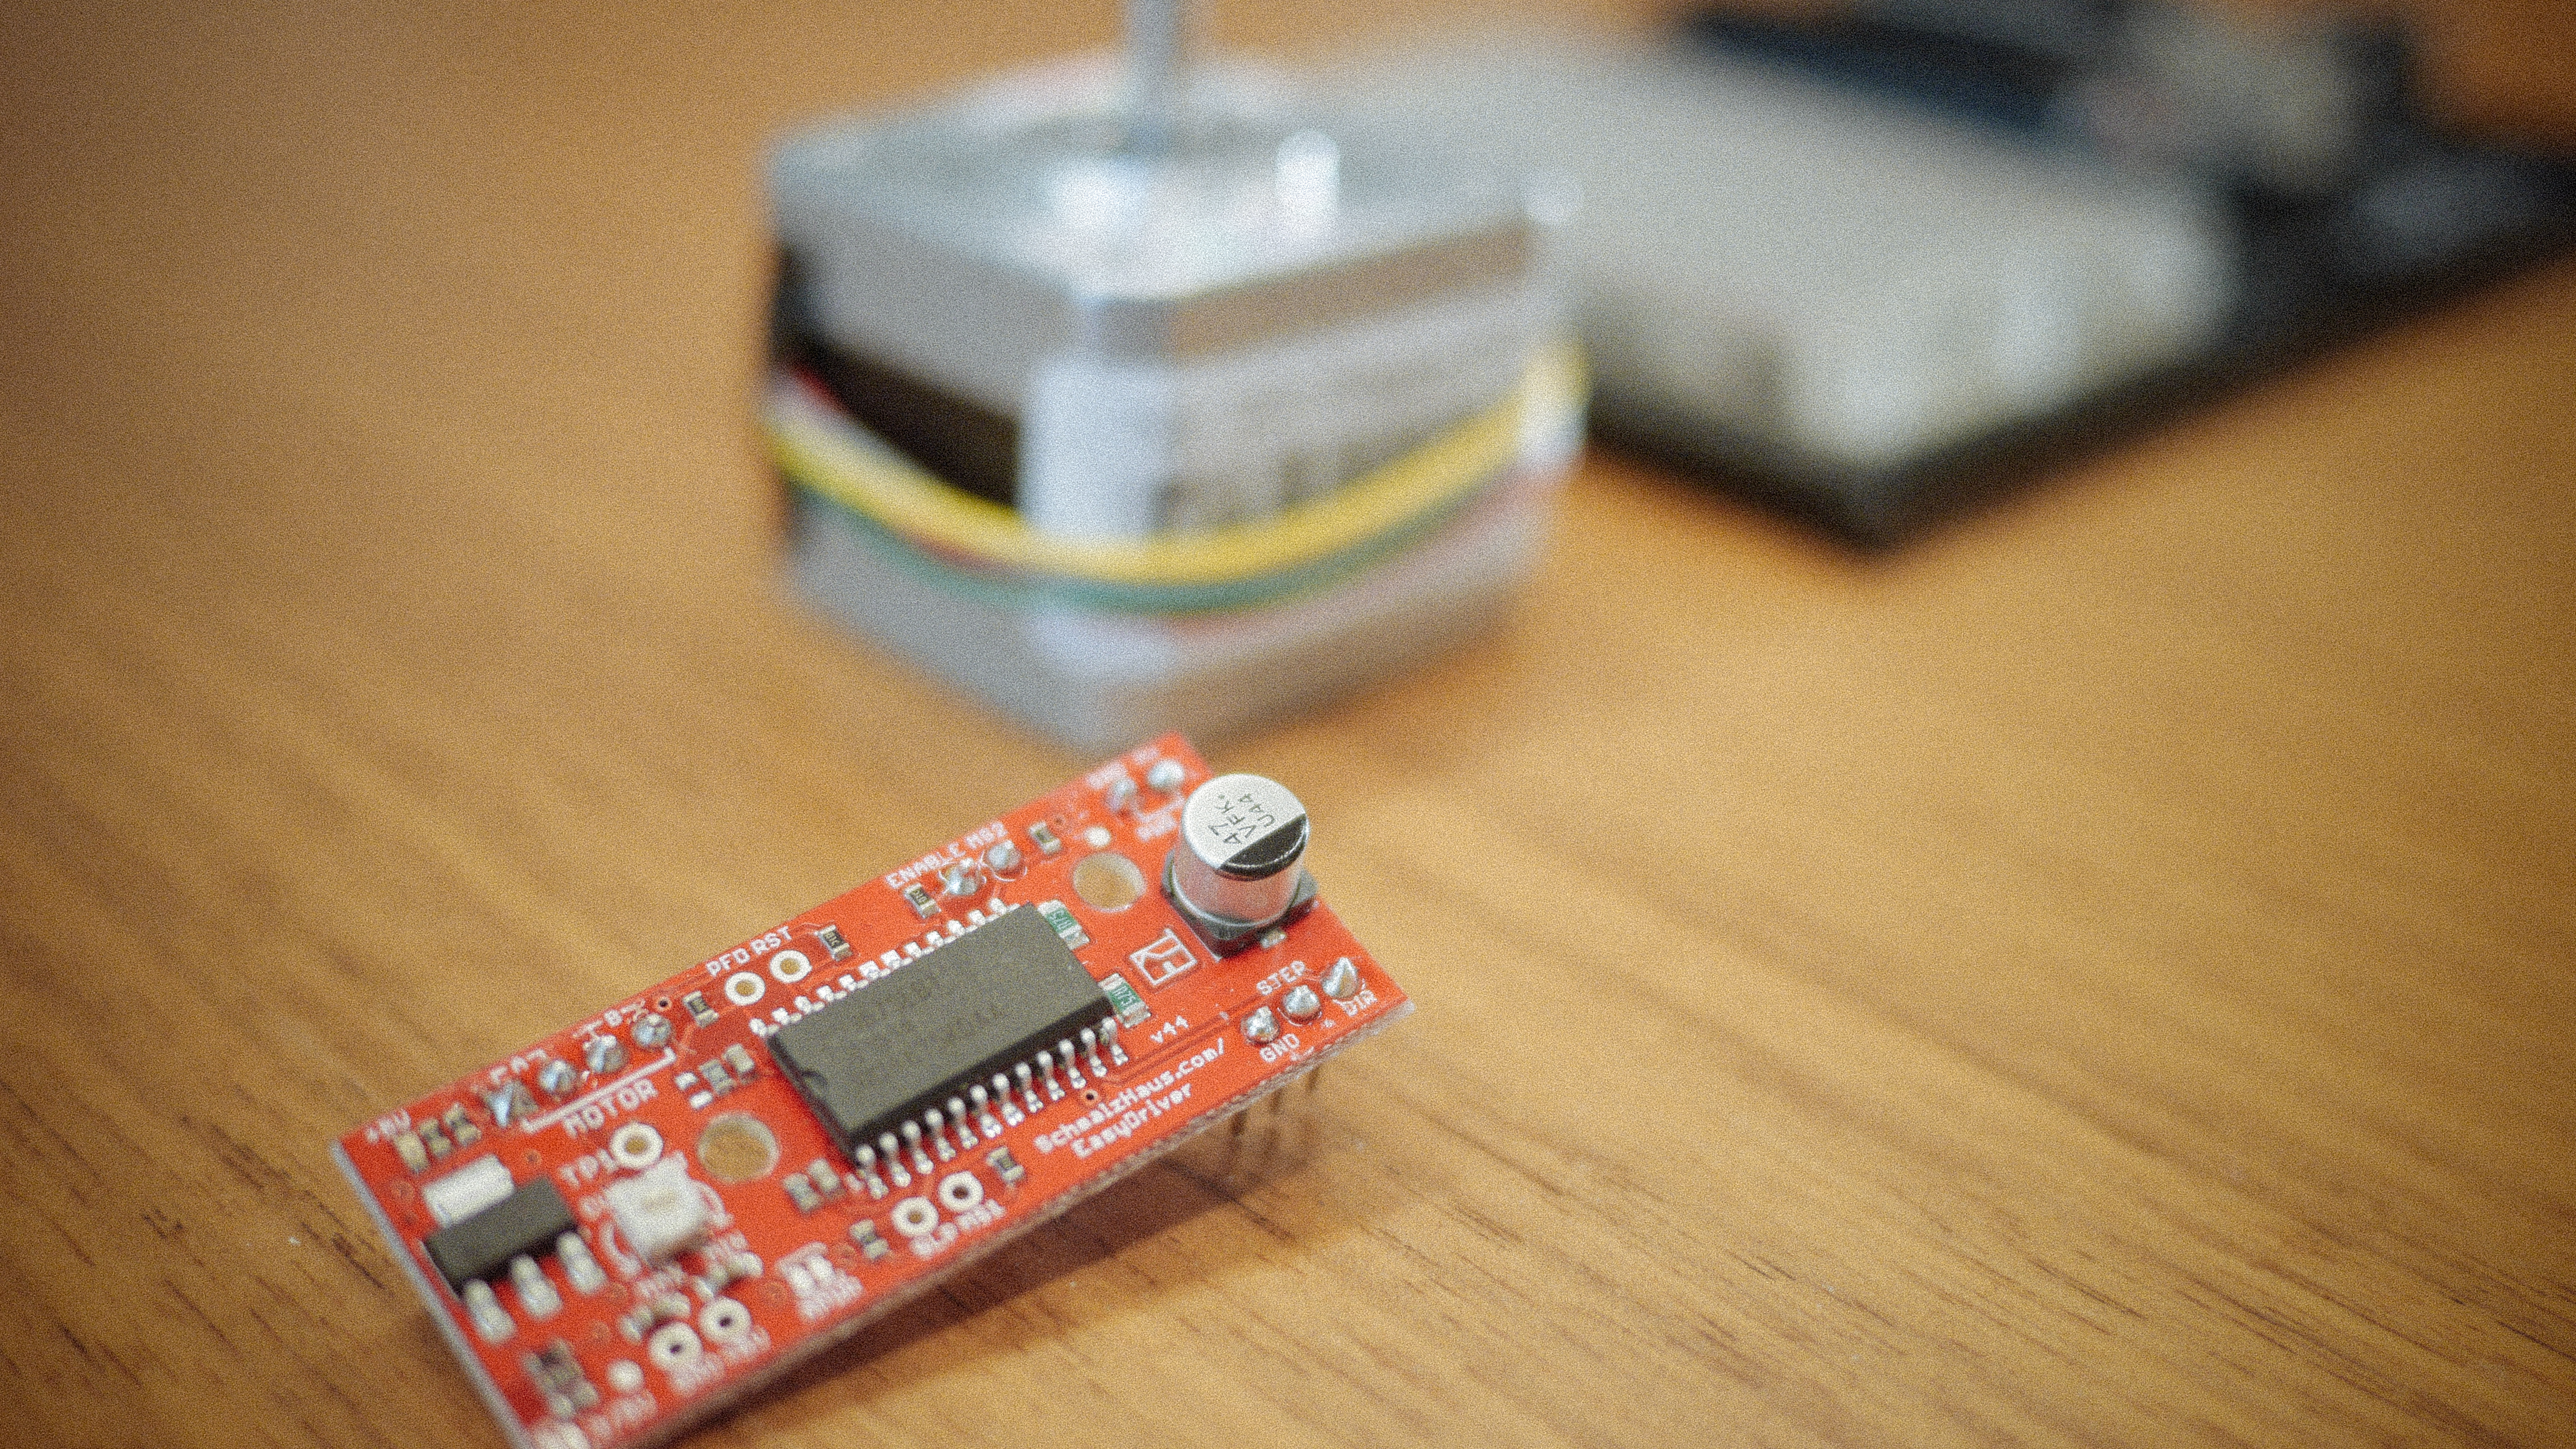
- EasyDriver
- Breadboard
- 12v Power Supply
What is a stepper motor and why should you care?
A stepper motor is an electrical motor that turn in steps, this is in contrast to a conventional motor that moves smoothly. The steps are measured in degrees and vary from motor to motor.
So, why do you want an “unsmooth”-motor?
Because you can do awesome things!
Since the motor moves precisely x amount of degrees per step, you can easily control just how much it is going to move, and easily count how much it has moved. For example the motor I am using in this tutorial moves 1.8 degrees per step, this equals to 200 steps for a 360 degrees rotation. (Each step is then divided into minor micro steps, so in reality it needs more micro steps to turn 360 degrees. (Mine needed 1600 steps))
This makes the stepper motor perfect for applications where you have to move something precisely, and to know the position.
Great, I’m ready. Let’s go!
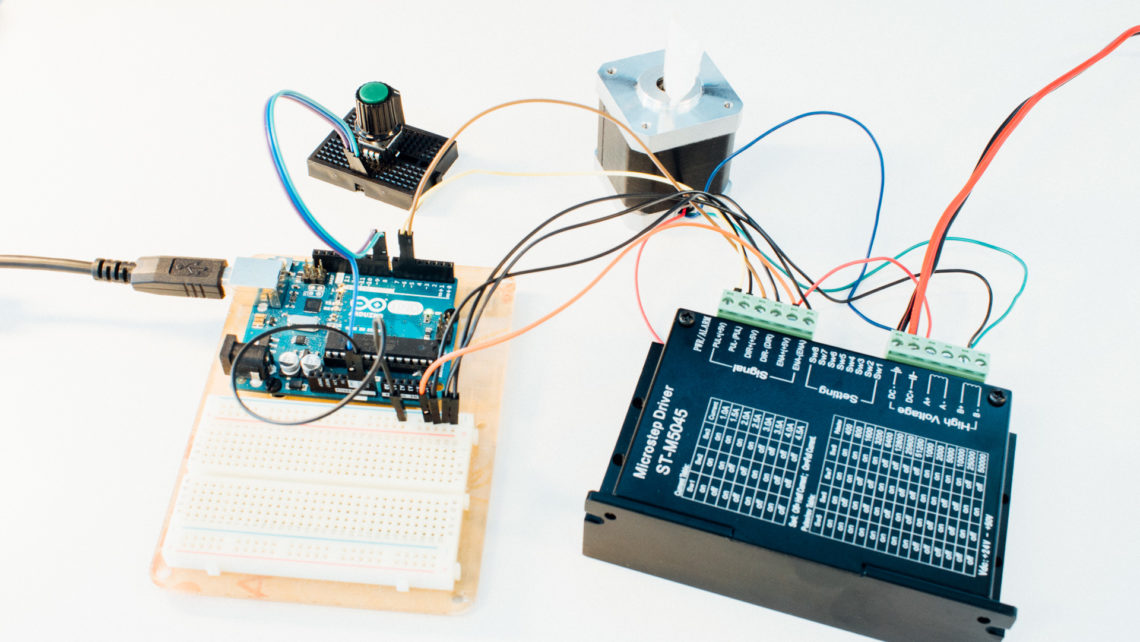
Hook the hardware up like this:
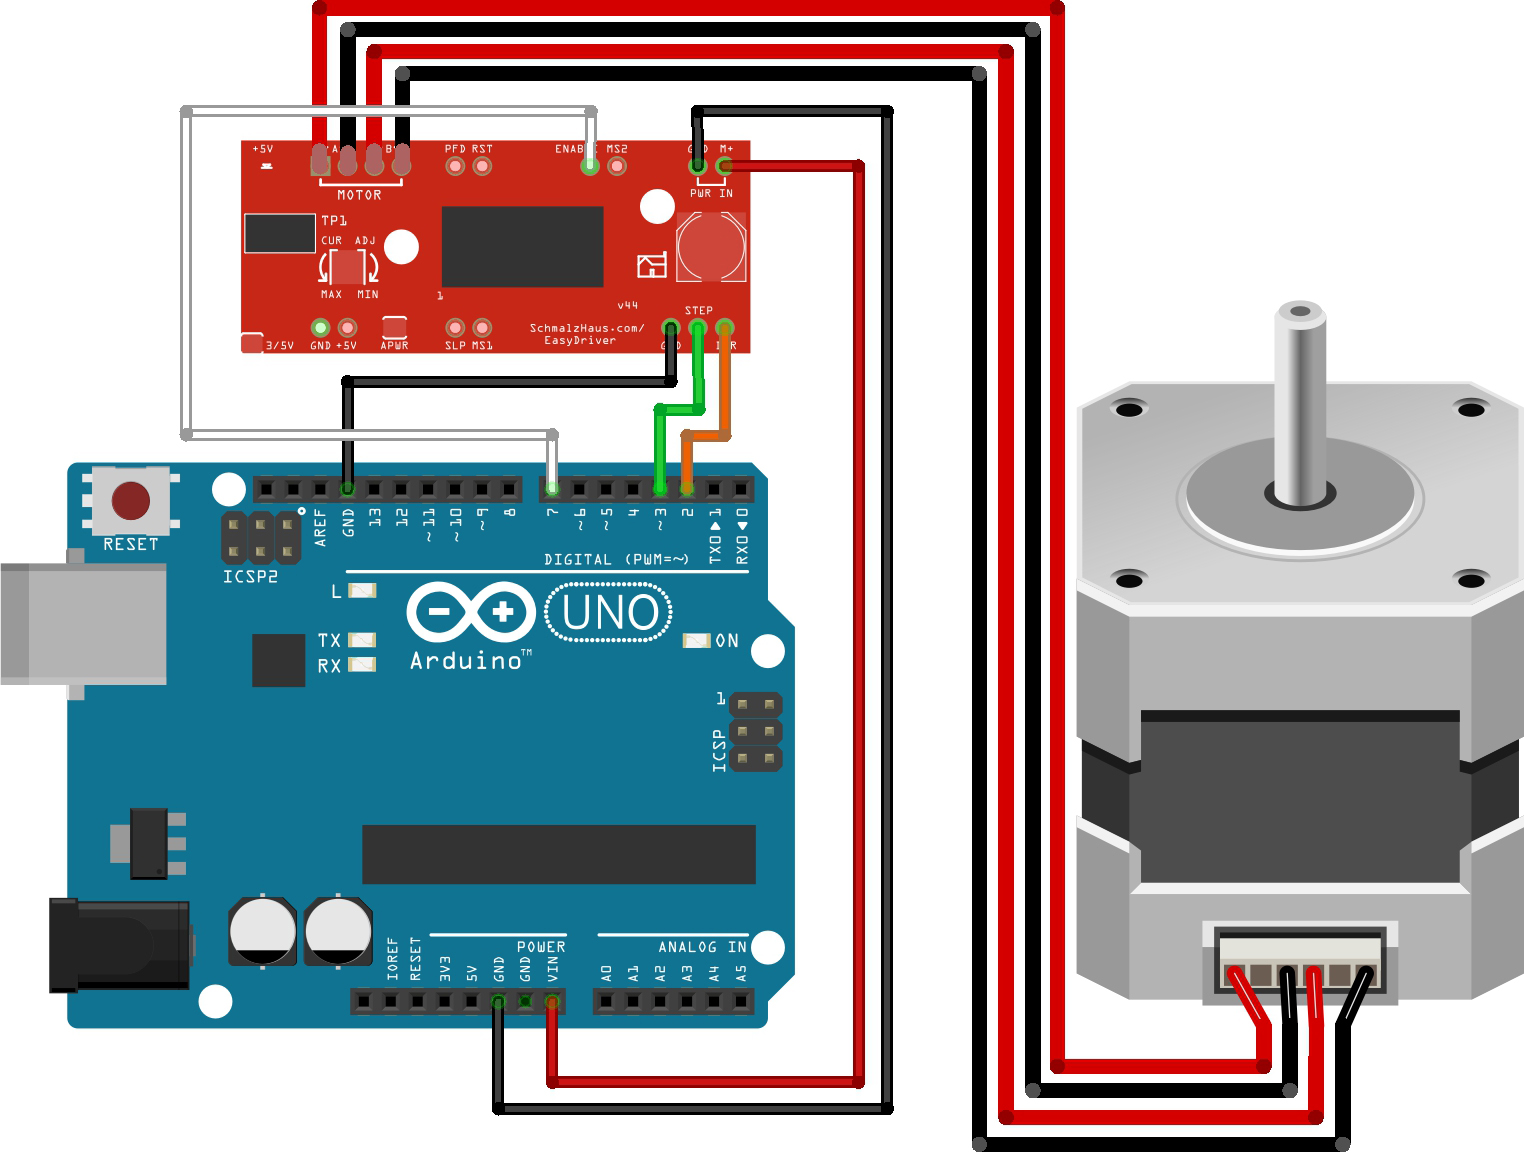
Remember:
! The cable from ENABLE (on the EasyDriver) to PIN 7 (on the Arduino) is not required but recommended. It will be explained further down in the article.
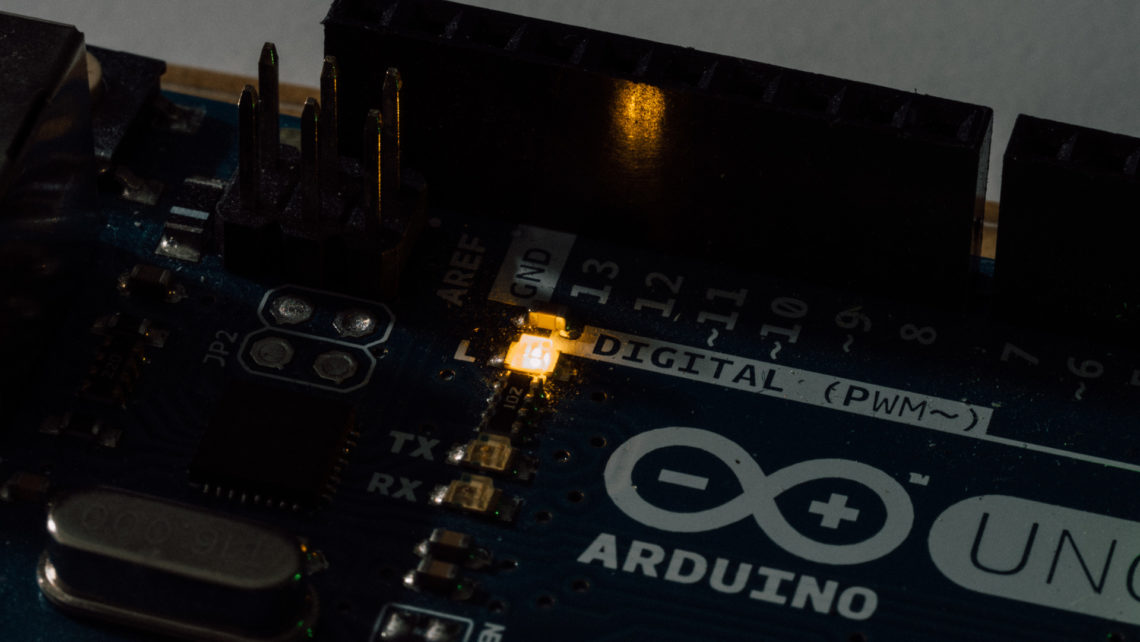
! The stepper motor will behave odd with only USB power, so remember to hook up your Arduino with an external 12v power supply.
The code
Once the hardware is hooked up correctly, open your Arduino IDE and copy/paste one of the following code snippets to see the magic happen.
I will present three different code snippets that goes from “super basic” to a more optimised one:
The 101
This is the most basic code needed to run the motor and is presented as an entry level just to get the motor up and running. It is made to be super easy to understand, so you get a hunch of how to code the stepper motor with EasyDriver.
int smDirectionPin = 2; //Direction pin
int smStepPin = 3; //Stepper pin

void setup(){
  /*Sets all pin to output; the microcontroller will send them(the pins) bits, it will not expect to receive any bits from thiese pins.*/
  pinMode(smDirectionPin, OUTPUT);
  pinMode(smStepPin, OUTPUT);

  Serial.begin(9600);
}

void loop(){
  digitalWrite(smDirectionPin, HIGH); //Writes the direction to the EasyDriver DIR pin. (HIGH is clockwise).
  /*Slowly turns the motor 1600 steps*/
  for (int i = 0; i < 1600; i++){
    digitalWrite(smStepPin, HIGH);
    delayMicroseconds(700);
    digitalWrite(smStepPin, LOW);
    delayMicroseconds(700);
  }

  delay(1000); //Pauses for a second (the motor does not need to pause between switching direction, so you can safely remove this)

  digitalWrite(smDirectionPin, LOW); //Writes the direction to the EasyDriver DIR pin. (LOW is counter clockwise).
  /*Turns the motor fast 1600 steps*/
  for (int i = 0; i < 1600; i++){
    digitalWrite(smStepPin, HIGH);
    delayMicroseconds(70);
    digitalWrite(smStepPin, LOW);
    delayMicroseconds(70);
  }

  delay(1000);
}
Sex
Instead of putting everything inside the loop method (as in the 101), we will place the motor controller code inside a function, which will take the amount of micro steps and the speed as arguments. It’s just more sexy.
int smDirectionPin = 2; //Direction pin
int smStepPin = 3; //Stepper pin

void setup(){
  /*Sets all pin to output; the microcontroller will send them(the pins) bits, it will not expect to receive any bits from thiese pins.*/
  pinMode(smDirectionPin, OUTPUT);
  pinMode(smStepPin, OUTPUT);

  Serial.begin(9600);
}

void loop(){
  /*Here we are calling the rotate function to turn the stepper motor*/
  rotate(800, 0.1); //The motor rotates 800 steps clockwise with a speed of 0.1 (slow)
  delay(5000);
  rotate(1600, 0.5); //The motor rotates 1600 steps clockwise with a speed of 0.5 (medium)
  delay(5000);
  rotate(-1600, 1); //The motor rotates 1600 steps counter clockwise with a speed of 1 (fast)
  delay(5000);
}

/*The rotate function turns the stepper motor. Tt accepts two arguments: 'steps' and 'speed'*/
void rotate(int steps, float speed){
  /*This section looks at the 'steps' argument and stores 'HIGH' in the 'direction' variable if */
  /*'steps' contains a positive number and 'LOW' if it contains a negative.*/
  int direction;

  if (steps > 0){
    direction = HIGH;
  }else{
    direction = LOW;
  }

  speed = 1/speed * 70; //Calculating speed
  steps = abs(steps); //Stores the absolute value of the content in 'steps' back into the 'steps' variable

  digitalWrite(smDirectionPin, direction); //Writes the direction (from our if statement above), to the EasyDriver DIR pin

  /*Steppin'*/
  for (int i = 0; i < steps; i++){
    digitalWrite(smStepPin, HIGH);
    delayMicroseconds(speed);
    digitalWrite(smStepPin, LOW);
    delayMicroseconds(speed);
  }
}
Sex and cigar
This code will be the same as the sexy code above, but with the addition of controlling the ENABLE pin on the EasyDriver (which turns the motor on and off).
int smDirectionPin = 2; //Direction pin
int smStepPin = 3; //Stepper pin
int smEnablePin = 7; //Motor enable pin

void setup(){
  /*Sets all pin to output; the microcontroller will send them(the pins) bits, it will not expect to receive any bits from thiese pins.*/
  pinMode(smDirectionPin, OUTPUT);
  pinMode(smStepPin, OUTPUT);
  pinMode(smEnablePin, OUTPUT);

  digitalWrite(smEnablePin, HIGH); //Disbales the motor, so it can rest untill it is called uppond

  Serial.begin(9600);
}

void loop(){
  /*Here we are calling the rotate function to turn the stepper motor*/
  rotate(800, 0.1); //The motor rotates 800 steps clockwise with a speed of 0.1 (slow)
  delay(5000);
  rotate(1600, 0.5); //The motor rotates 1600 steps clockwise with a speed of 0.5 (medium)
  delay(5000);
  rotate(-1600, 1); //The motor rotates 1600 steps counter clockwise with a speed of 1 (fast)
  delay(5000);
}

/*The rotate function turns the stepper motor. Tt accepts two arguments: 'steps' and 'speed'*/
void rotate(int steps, float speed){
  digitalWrite(smEnablePin, LOW); //Enabling the motor, so it will move when asked to

  /*This section looks at the 'steps' argument and stores 'HIGH' in the 'direction' variable if */
  /*'steps' contains a positive number and 'LOW' if it contains a negative.*/
  int direction;

  if (steps > 0){
    direction = HIGH;
  }else{
    direction = LOW;
  }

  speed = 1/speed * 70; //Calculating speed
  steps = abs(steps); //Stores the absolute value of the content in 'steps' back into the 'steps' variable

  digitalWrite(smDirectionPin, direction); //Writes the direction (from our if statement above), to the EasyDriver DIR pin

  /*Steppin'*/
  for (int i = 0; i < steps; i++){
    digitalWrite(smStepPin, HIGH);
    delayMicroseconds(speed);
    digitalWrite(smStepPin, LOW);
    delayMicroseconds(speed);
  }

  digitalWrite(smEnablePin, HIGH); //Disbales the motor, so it can rest untill the next time it is called uppond
}
! By turning the motor off when not in use, it will stay cool, and you will be able to manually adjust it. On the opposite side, if the motor is enabled at all times, it will continuously draw current to hold position, and you will not be able (without force) to adjust the motor. If you don’t need the motor to be locked, I recommend disabling the motor when it is finished with its rotation.
It’s a wrap!
That’s it. You now have a working stepper motor! Good job, and now it is your turn to stepp’ around and make something cool! Post a link to your creation under, and we will talk about it in our office and maybe give you a big shout-out 😉
But, wait! What about the heat, adjustable current and cables?
As we were working on the project were the stepper motor was going to be used, we came across some challenges related to the motor getting really hot, how we were going to adjust the current controller and how the h**k we were going to connect the cables when there was no explanation on which cables was what in the datasheet. Well, you are probably asking your self some of these questions. Don’t worry; we got you covered in the section below.
Too hot to handle?
Don’t worry if the motor get’s hot. It isn’t damaging for the motor until it reaches around 90 degrees Celsius (194 degrees Fahrenheit). For a comparison: When our motor was too hot to touch for more than 2 seconds, we measured it to be 55 degree Celsius (130 degree Fahrenheit), so it feels very hot even though it isn’t damaging.
Even though it can handle the hotness, an electrical device thrives when in a colder condition, and therefore you should turn the motor off every time it isn’t used (moving or holding). This can be achieved with the ENABLE pin on the EasyDriver (as in the “sex and cigar” code snippet).
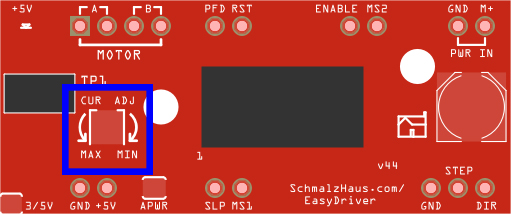
The adjustable current controller
On the EasyDriver there is an adjustable current controller. This goes from 150mA to 750mA. The motor I am using in this tutorial operates at 350 mA, so I turned the controller a little under half way up (I did it the non-scientific way and used my gut feeling).
A simple rule is this:
More current equals more torque, more heat, less speed and more motor noise
Less current equals less torque, less heat, more speed and less noise
How to apply the rule; turn the current all the way to MIN, and turn it gradually up to the point where the motor no longer skips step(s). And voila! You are all set! (Remember, the faster the motor is set to move, the higher is the risk of skipping steps, so do this test when the motor is set to operate at the fastest speed).
I got four cables that goes out from my stepper motor, but they are in different color then yours?
Since it won’t hurt the motor if you plug the cables in wrong, try all the different combination until the motor behaves as expected from the code. (There is only 4^2 different combinations 😉 ). But seriously, although this method is somewhat lazy, it is an acceptable approach.