This blog post series is about the creation of the “Focus Box”. A box that creates “noisy ambient sounds” to mask out background noise to enhance personal productivity.
- In the first blog post you can read more about the “big idea”.
- And in the second blogpost you can read about the internals. You will also find all the code here!
We will in this blogpost go into the packaging. How is everything mechanically connected together? You can also find open source 3D-models of the creation at the bottom of this post!
What We Needed
Electronics without a casing would in this case just be a PCB, wires, knobs and connectors in a messy pile. The basic need for a casing is pretty self-explanatory: hide the electronics you don’t want to expose as well as provide a nice interface for the user.
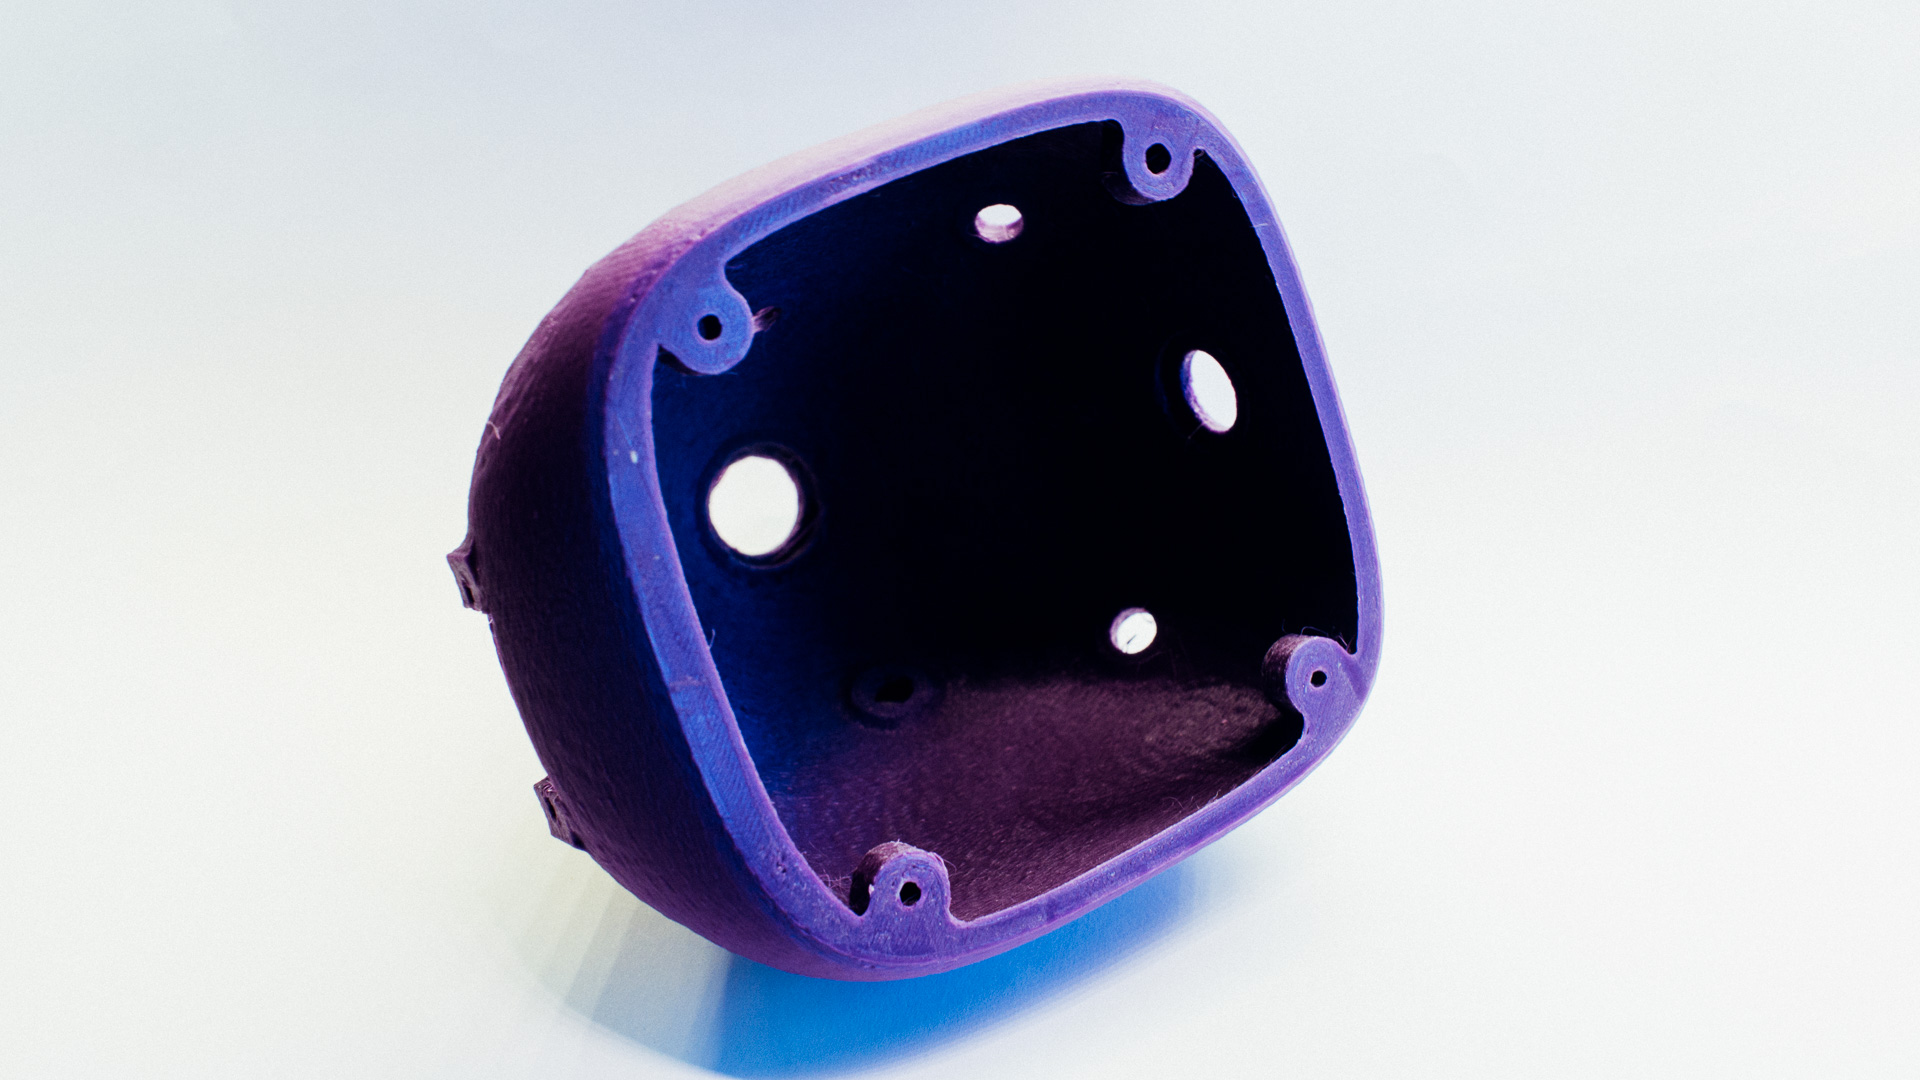
So, what we needed was a casing to encapsulate and hide the electronics as well as create a “skeleton” to mount the knobs and connectors to. We also needed some sort of a lid to be able to open and close the casing.
Designing It
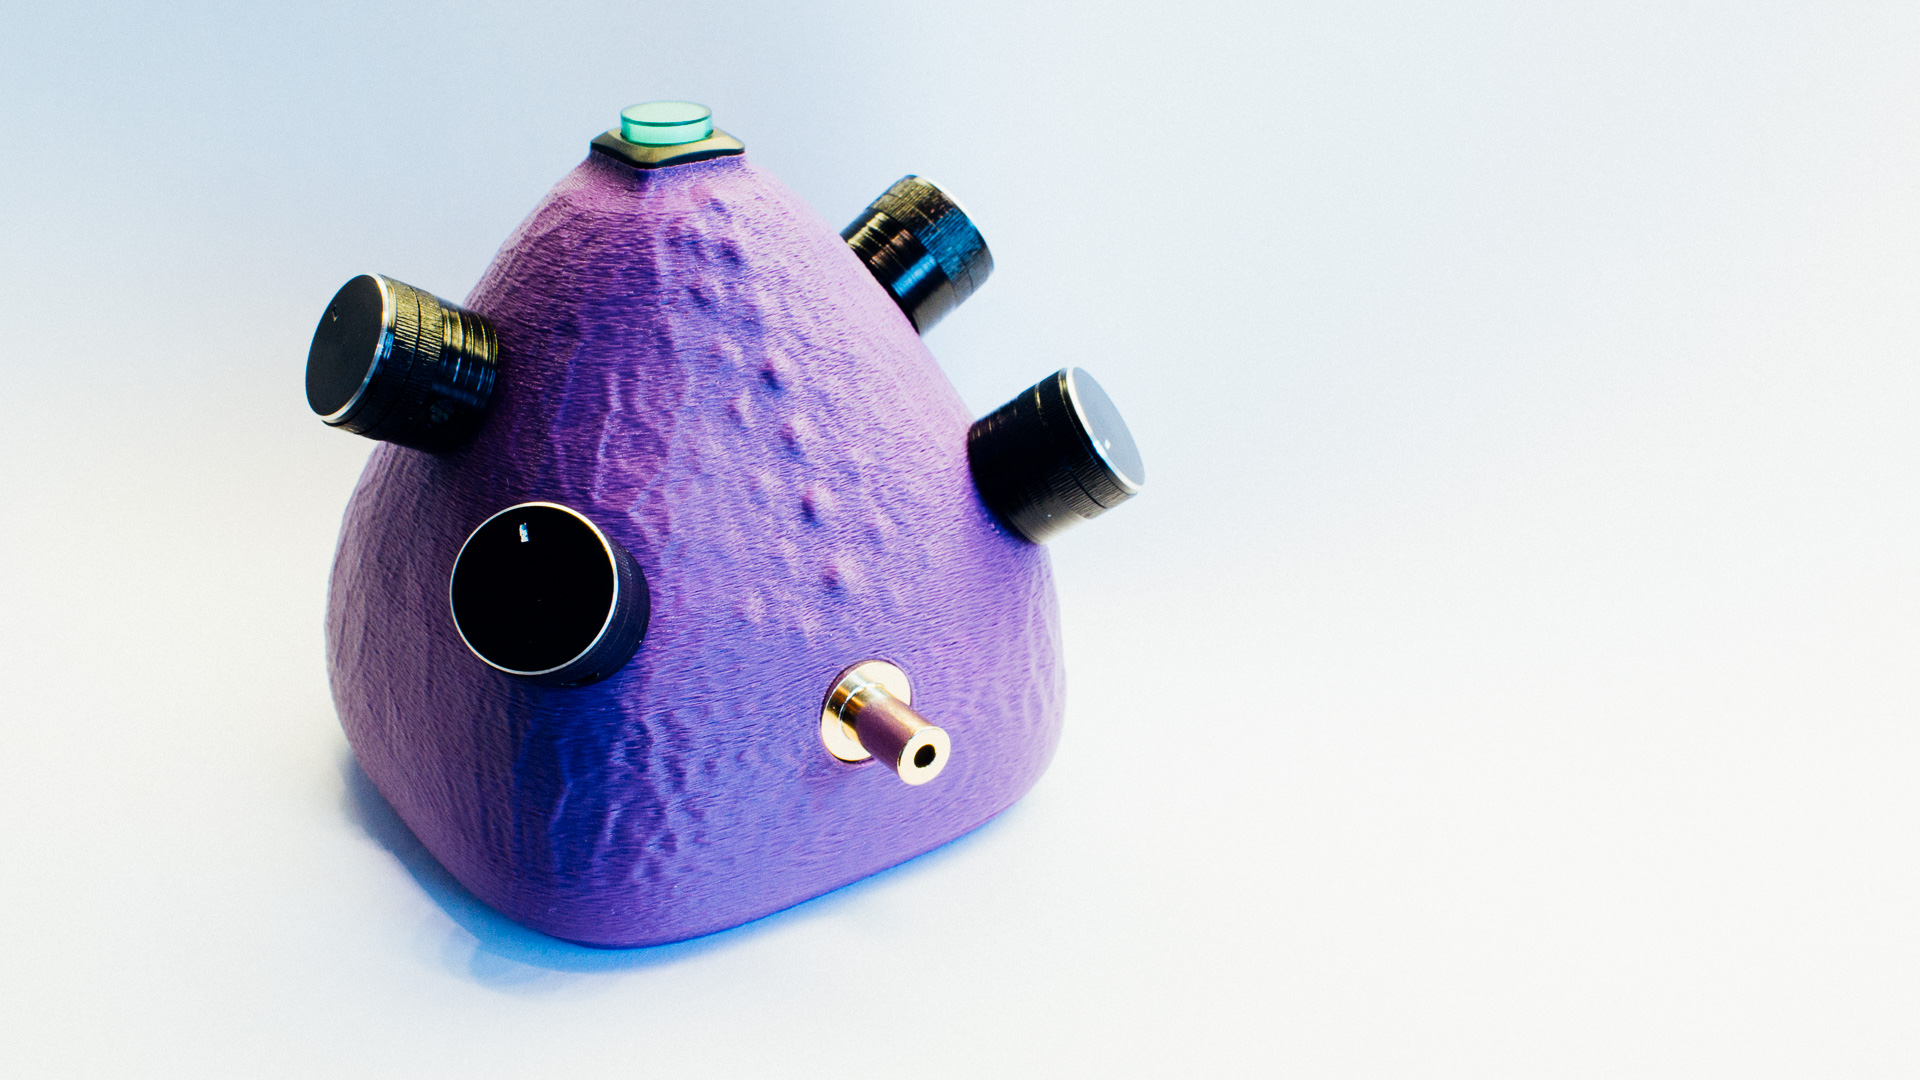
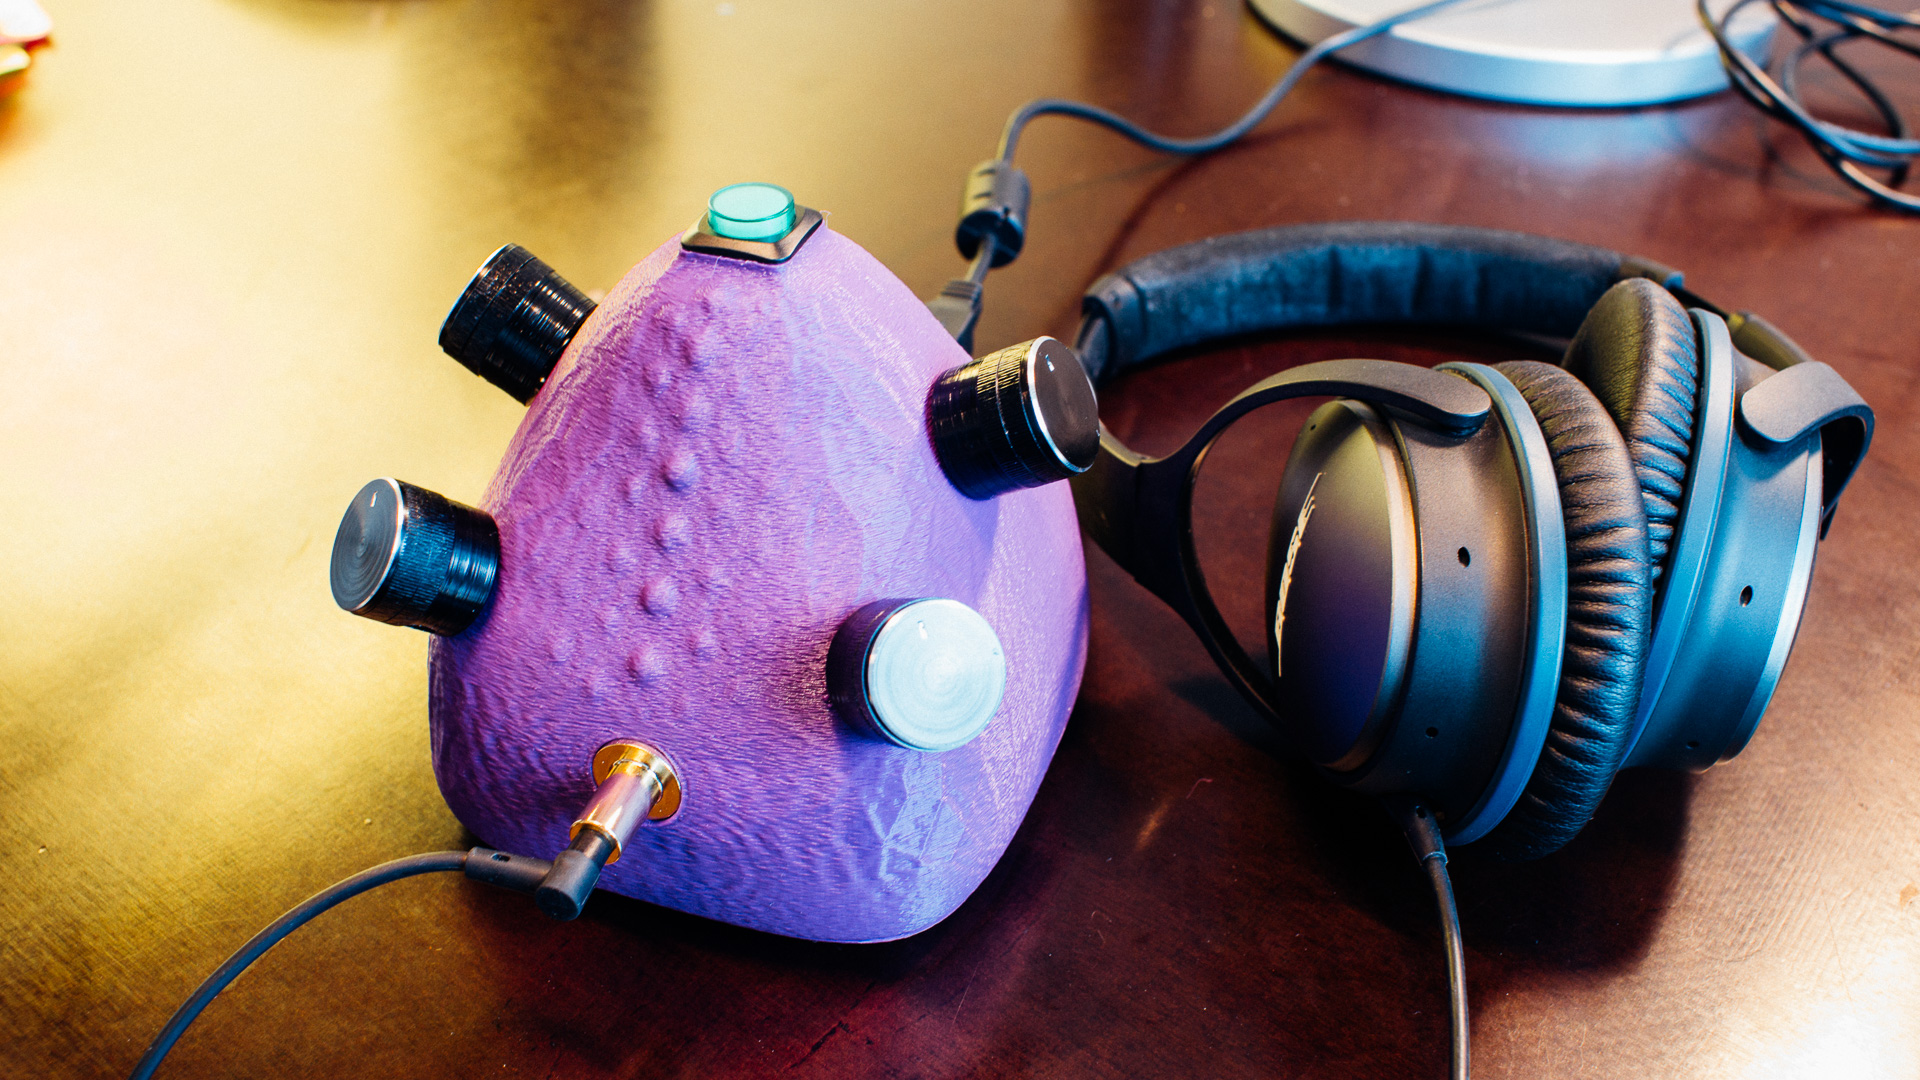
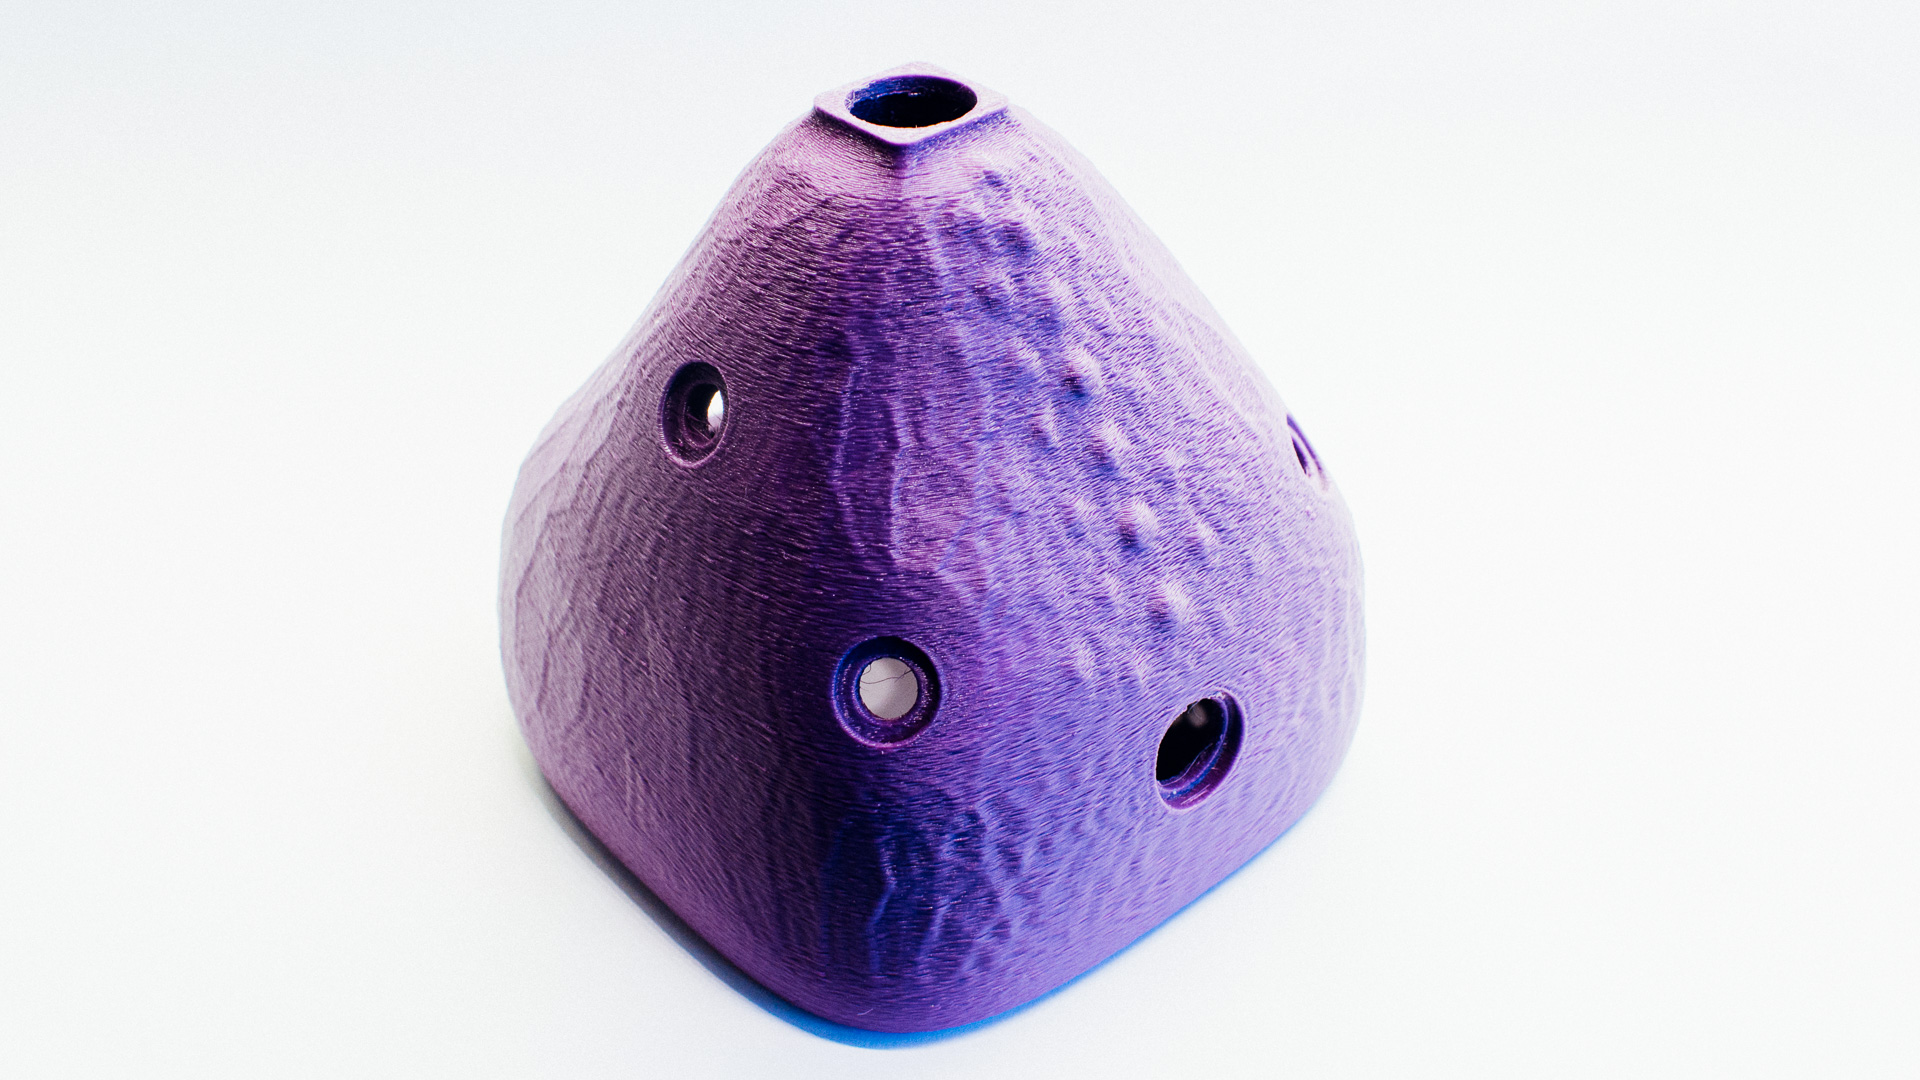
We wanted to give the casing a different look than a regular casing box. More like an organic blob.
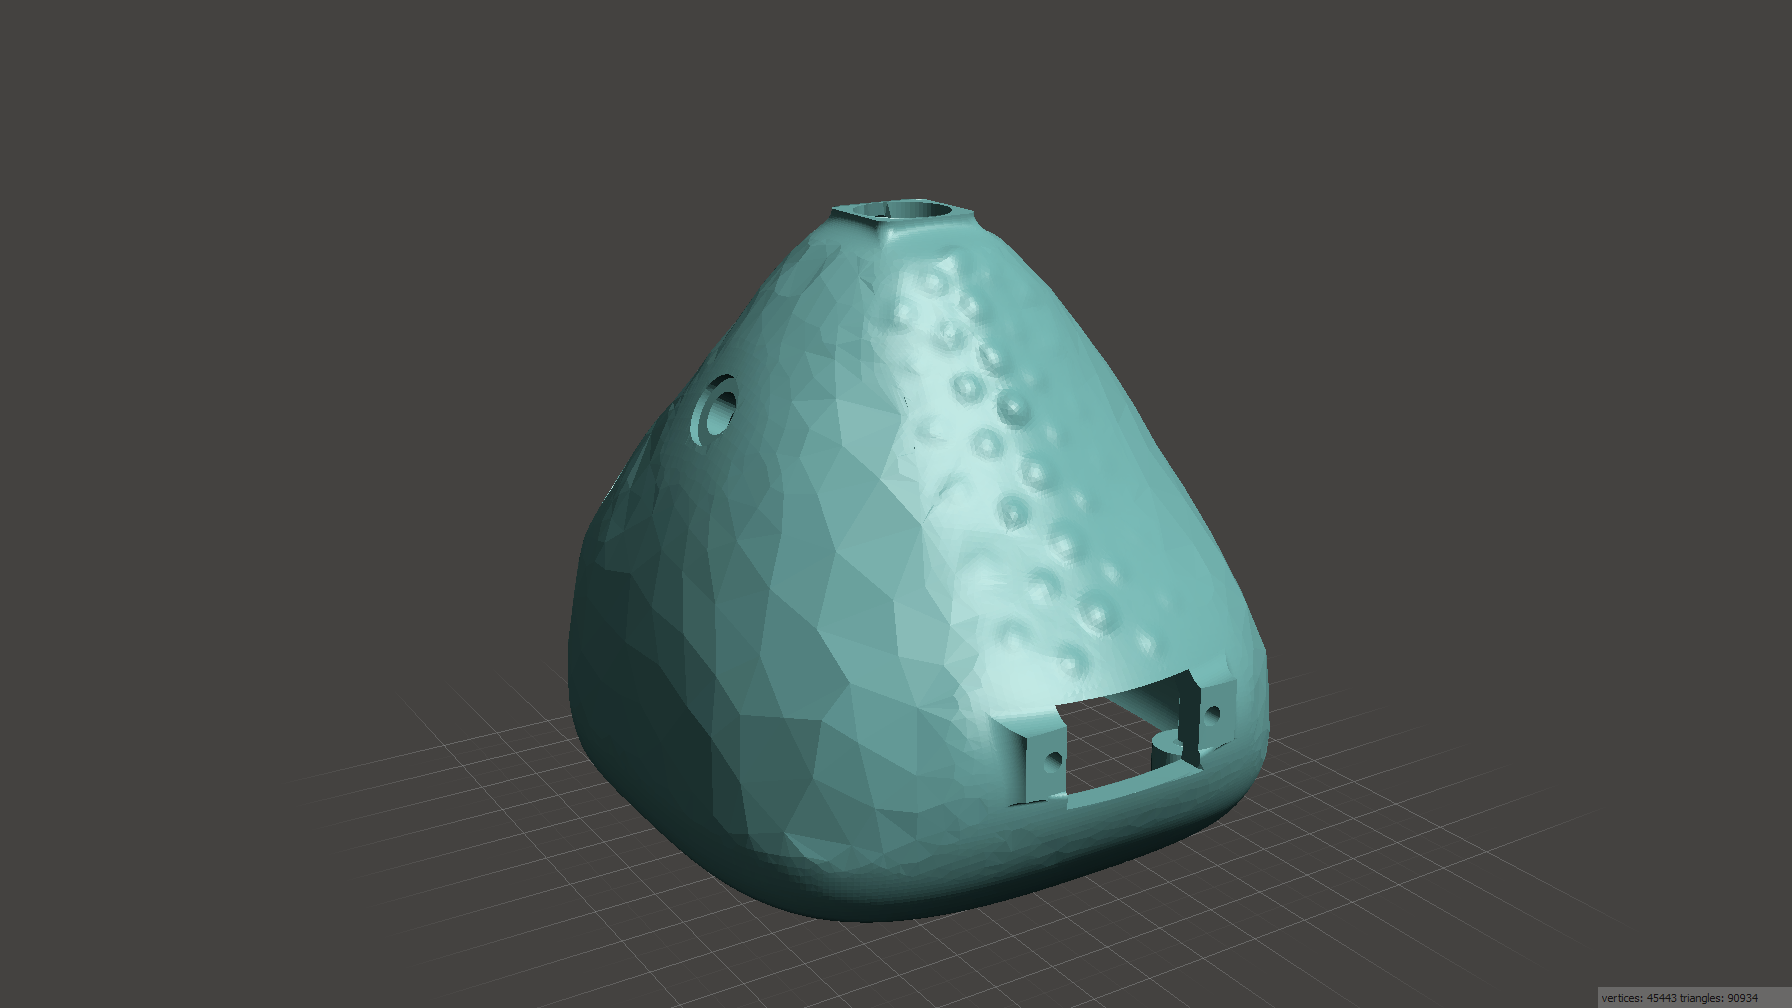
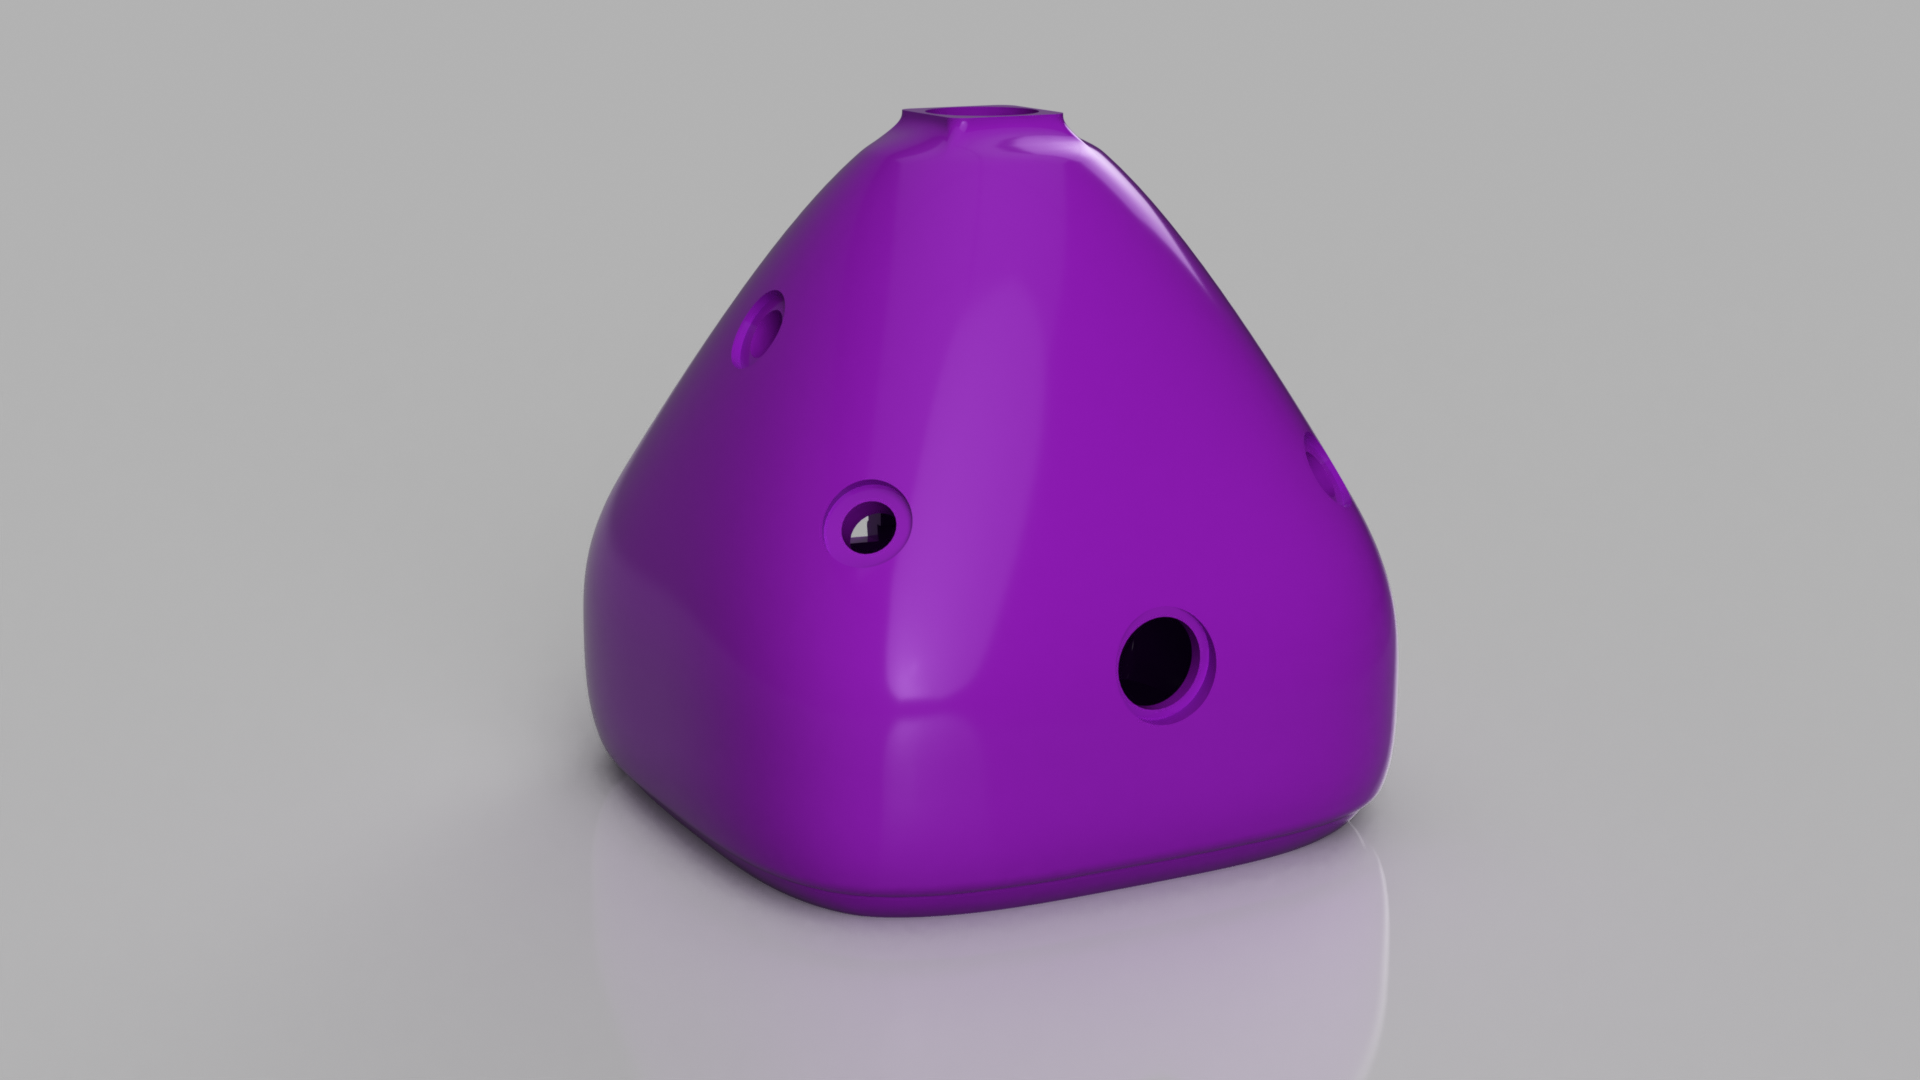
We started with the main shape with the approximate dimmensions we wanted on the outside and needed on the inside to contain the electronics. The blob was hollowed out with a proper wall thickness and the bottom lid was sliced off from the rest of the body. We then modelled all the connectors, knobs and the button and used those to create correctly dimensioned and positioned holes in the main body. This is a piece of cake on boring casings, but on more irregular shapes like this, many fun challenges arise along the way. The last thing we did with the functionality design was to able the lid to be mounted and dismounted at our discretion.


We wanted to give it a bit of texture to enhance that organic look, so we used some of the functionality in the free STL-editor Meshmixer. We reduced the amount of polygons on the surface to make it less smooth as well as gave it some “boils” along the one of the center planes, all without altering the functional-critical parts on the body.
Making it
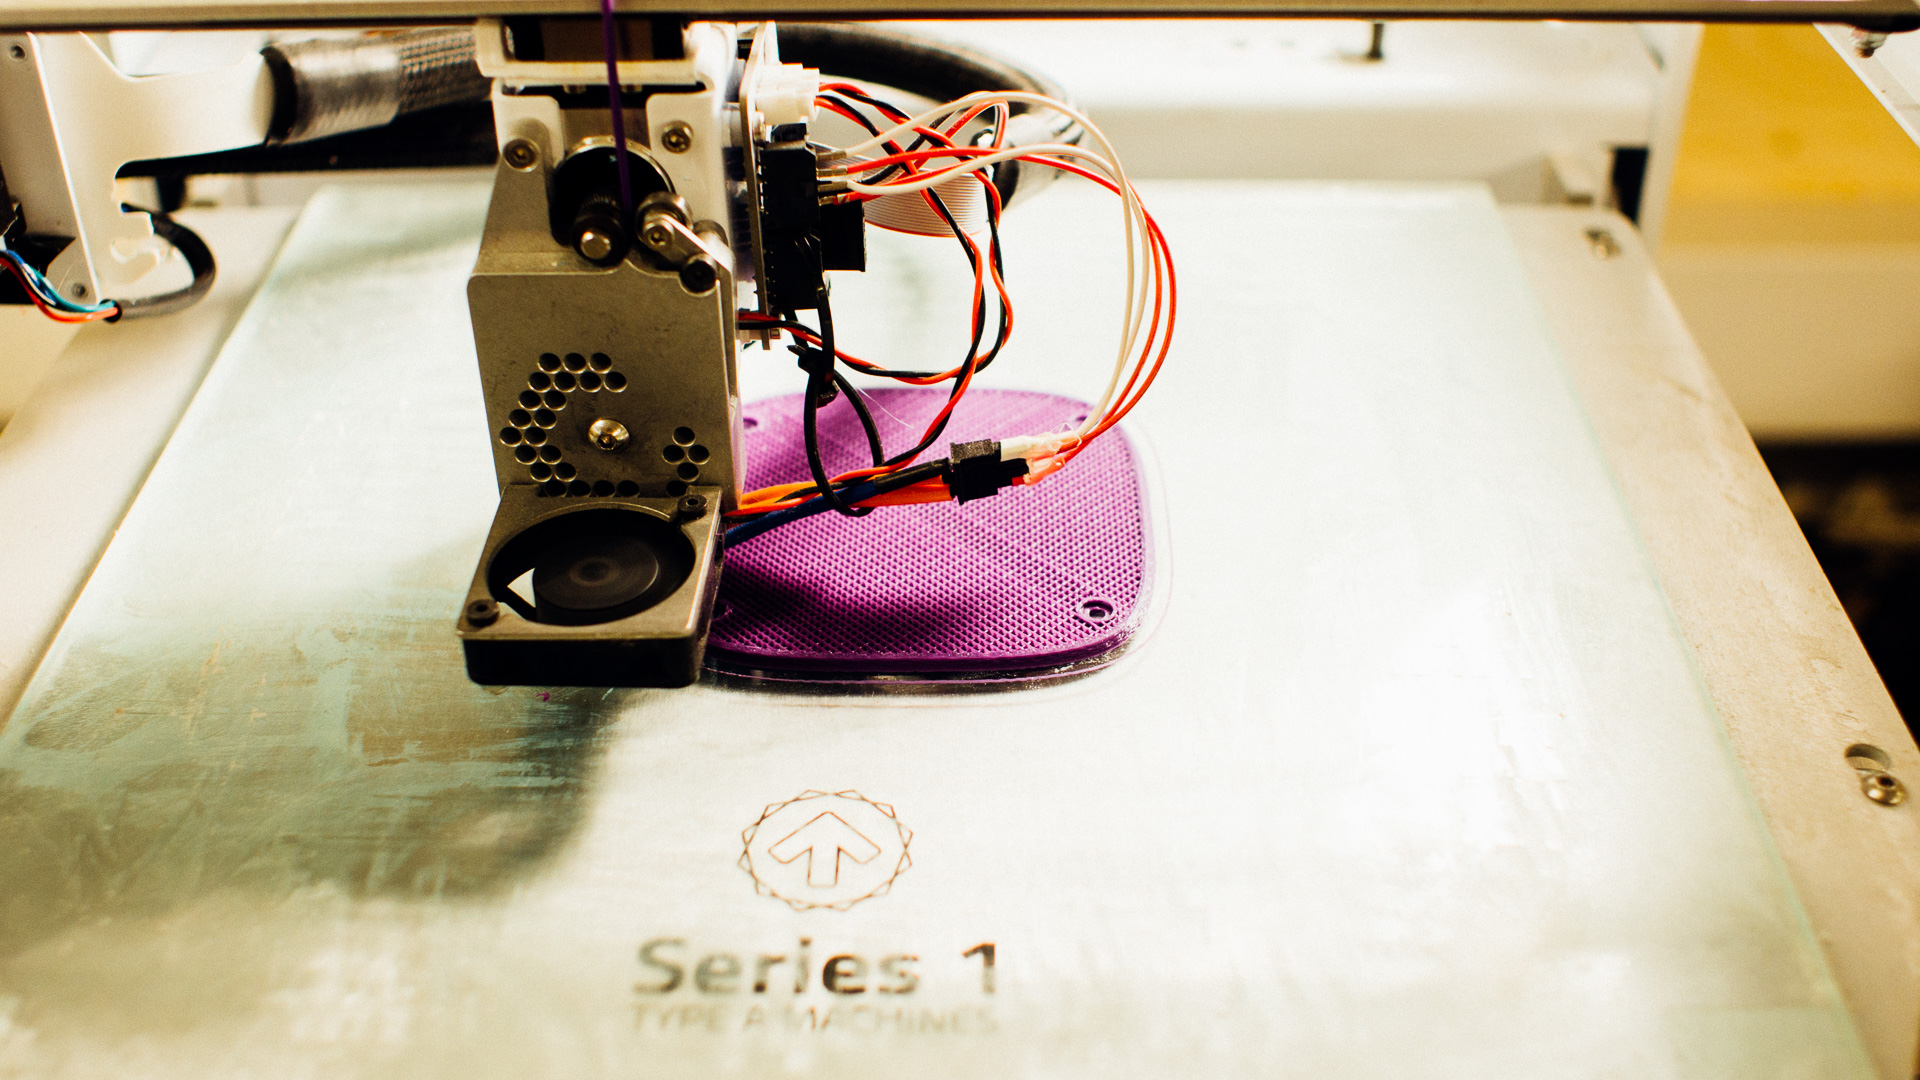
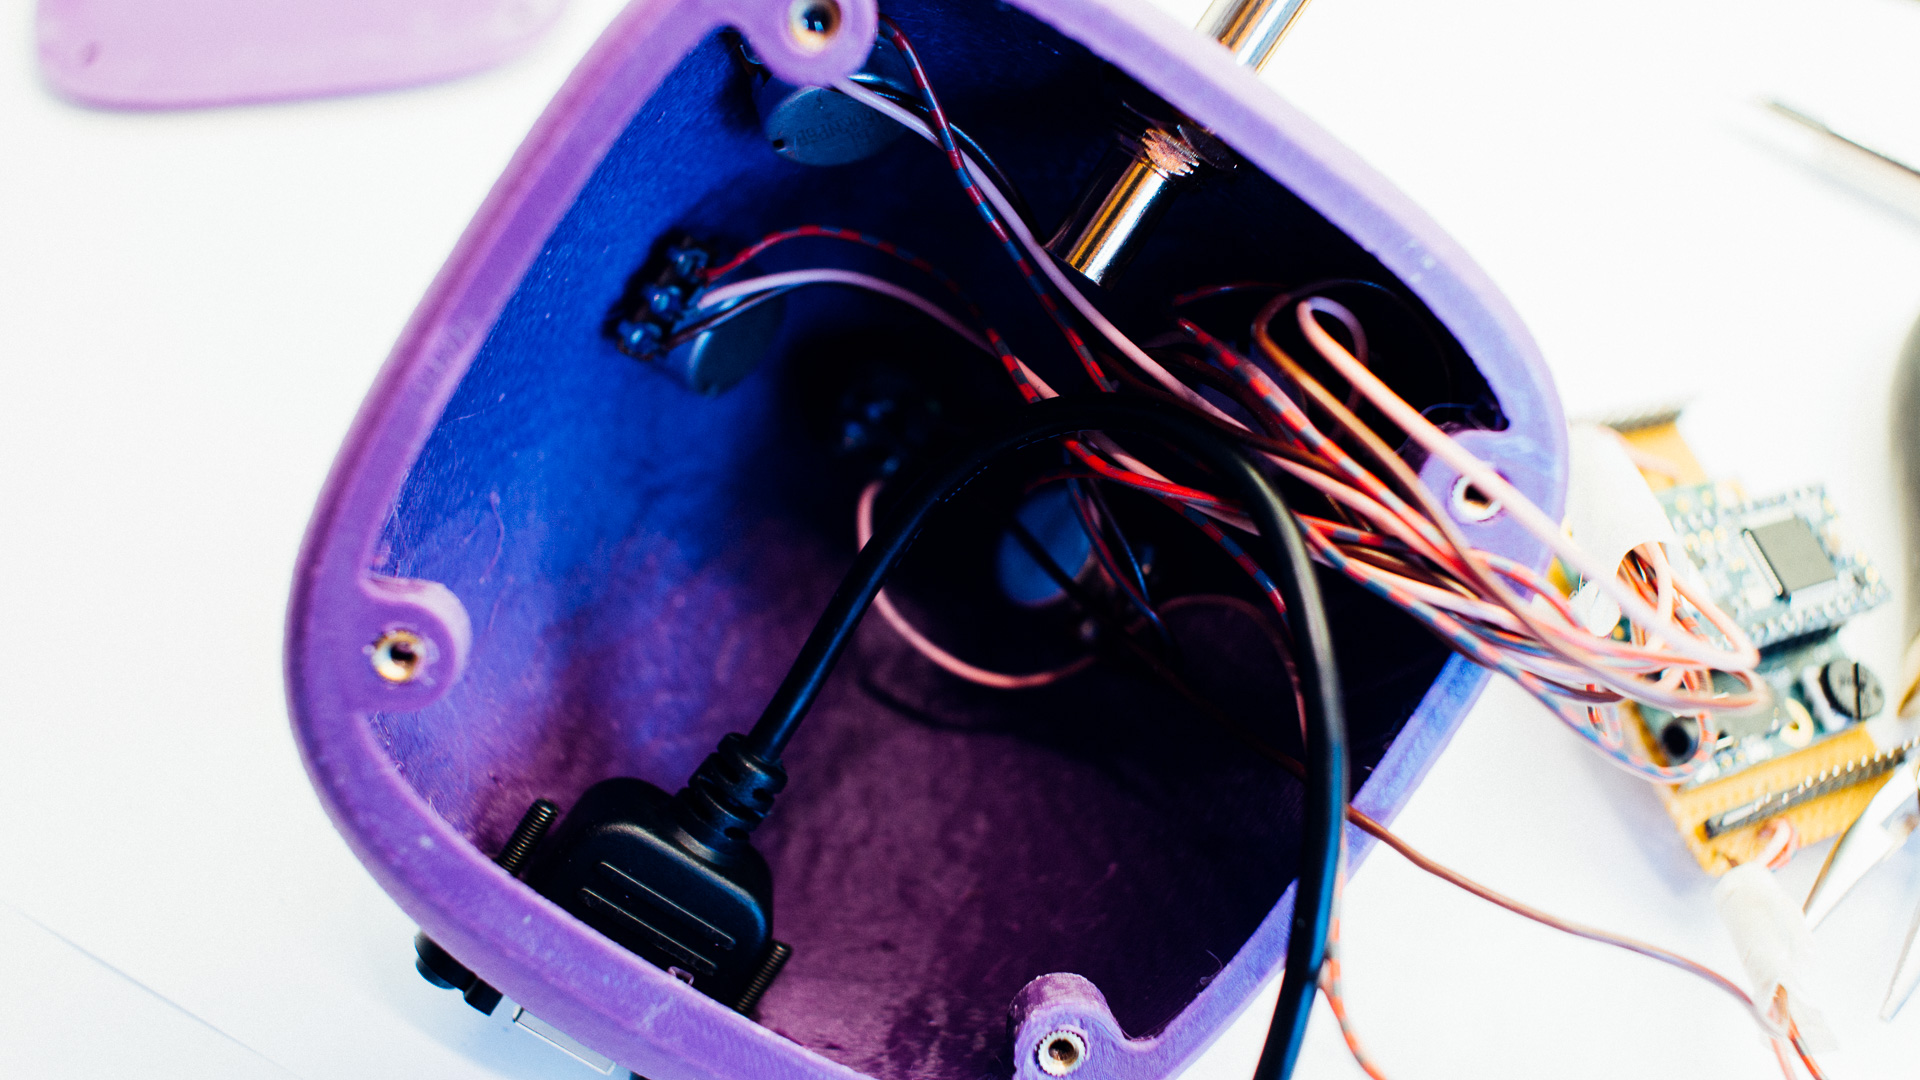
Then it was just to fire up the 3D printer. The result was pretty good so we started mounting all the components.
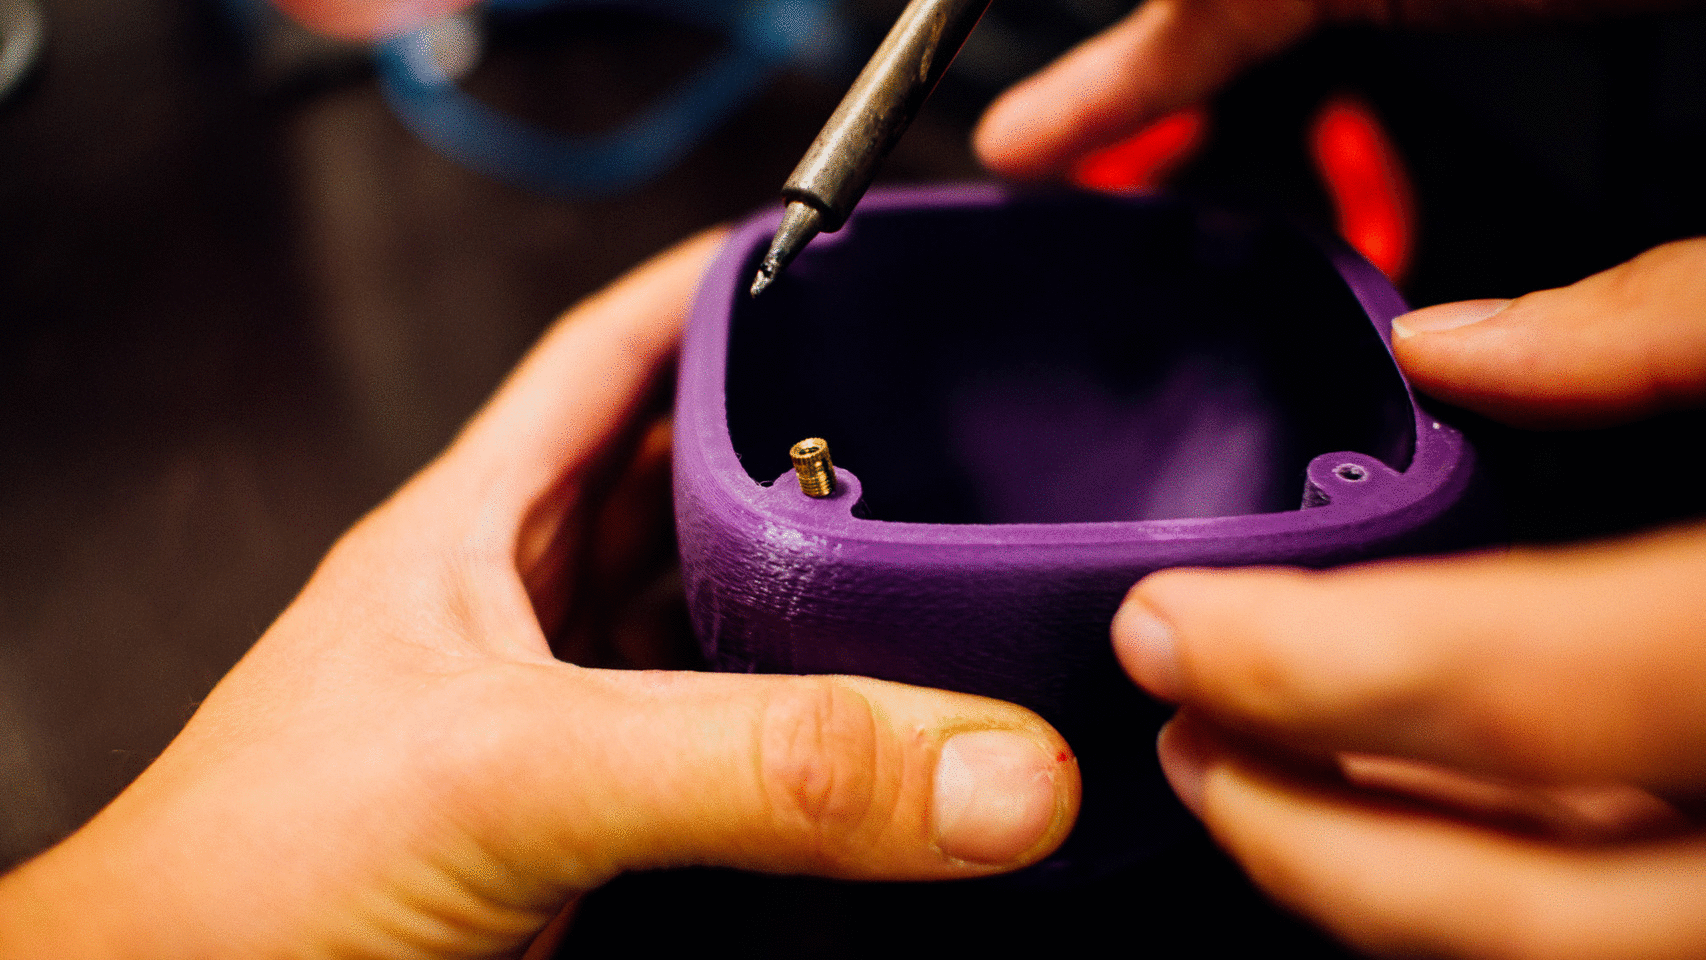
First up was to fasten the M3 insterts which is used to keep the lid in place. This is a technique we often use when we don’t have access to “the other side” (like inside a box like this) or if we want to save space. We use a soldering iron (not our most expensive) to heat up the insert and then slide it into a suitably large hole. The plastic initially melts before solidifying again, keeping the insert in place. The process is illustrated in the gif below.


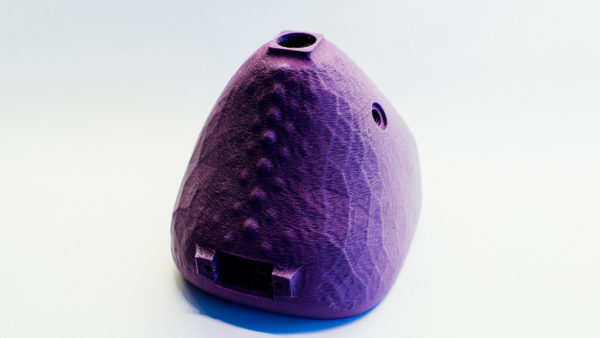

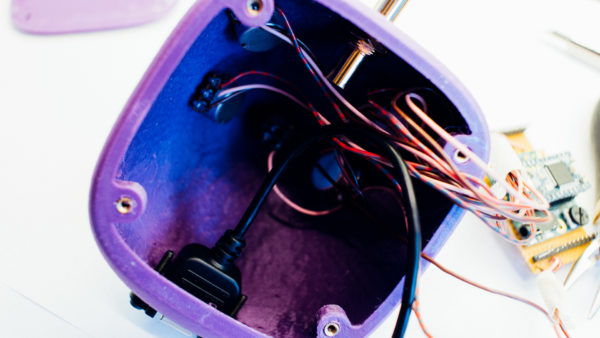

We then mounted all the components to the main body before fastening the bottom lid. An voila: we suddenly had a finished working Focus Box on our desk.
“Outside” components used:
- 3D-printed casing (both top and bottom)
- M3-brass-inserts
- M3-bolts
- 4 * 10k linear potentiometers
- 3.5mm Stereo coupler adapter: Aliexpress
- Pushbutton w. LED: Adafruit
- 4 Knobs for the potentiometers: Futurlec
- USB connector: Aliexpress
Last words
This box works great! This is another example of how simple it can be to make it nice on the outside:)
Files

This work is licensed under a Creative Commons Attribution-ShareAlike 4.0 International License.
You can download the original “unmodified” main body (.STL) 3D-model here.
You can download the finished main body (.STL) 3D-model here.


