Last October I made a prototype for a custom hardware controller to FreeStyler 512(Stage lighting software). The goal was to make a controller I can use when I’m running a preprogrammed light show (not a programming console, maybe next version?). For those who know FreeStyler 512 this controller is made to control the “Sub-Master” section of FreeStyler 512, with opportunities to expand easily of course.
So what do I need to control:
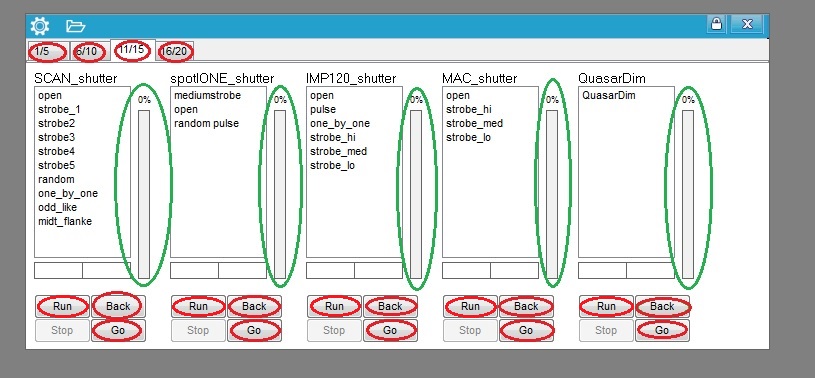
This is a screenshot of the sub-master section from one of my lighting jobs. Since I’ve preprogramming everything I run the lightshow from the sub-master only.
This means that I needed a controller for the sub-master section so I can react fast to the music. To those that now screams “BCF2000″ I say: yes I have one, but it didn’t fulfill my requirements to run the show with sub-masters and the lack of a “Run-All” button. But I use a BCF2000 when I program the show.
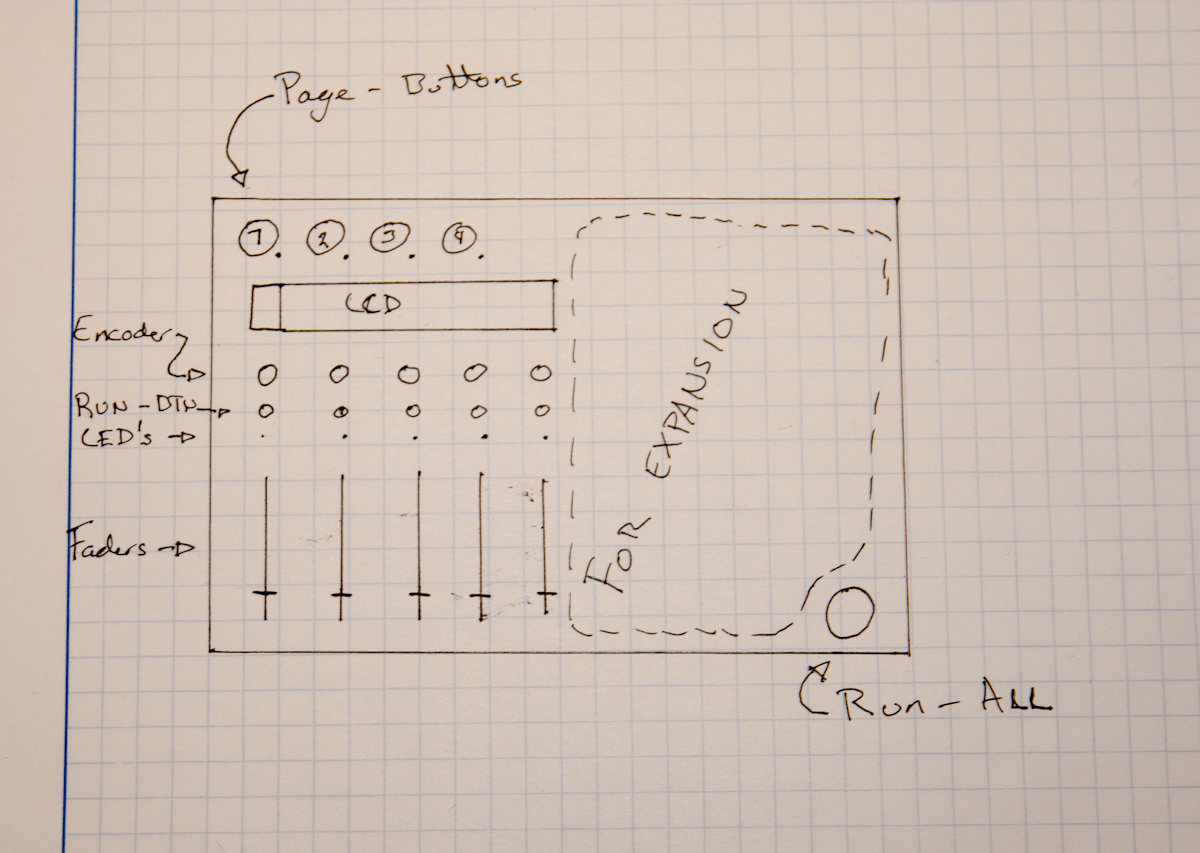
In the figure over: Green circles is a fader and Red circle is button. The “Back” and “Go” buttons is actually up/down in the list (you chose what to run) so physically I replaced those with a encoder to make it user friendly. And now comes the big deal breaker for me to use a BFC2000: When I run a show I need a “Run-All” button. So when a break in the music comes, I could push “Run-all” and many things changes: color, shutter, and Pan/Tilt all at the same time!!
In FreeStyler there is no option for this, so then I thought: why just I don’t make a controller that sends the 20 midi messages at the same time when I press a “Run-all” button.
Then, after some thinking and drawing I ended up with this sketch:
And a sketch of the electronics:
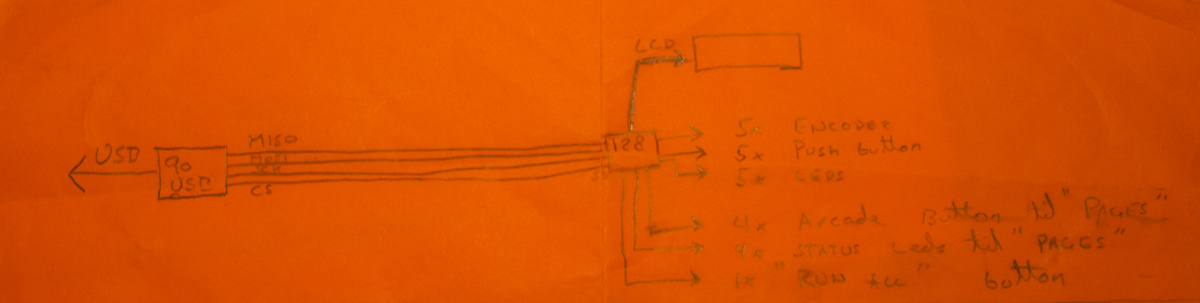
The “90USB” is a AT90USB1287 microcontroller, which is connected to an ATMEGA128 via SPI. The AT90USB is the main controller while the ATMEGA128 is the controller on one daughter board. This design allows me to connect more “daughter boards” to the AT90USB using SPI.
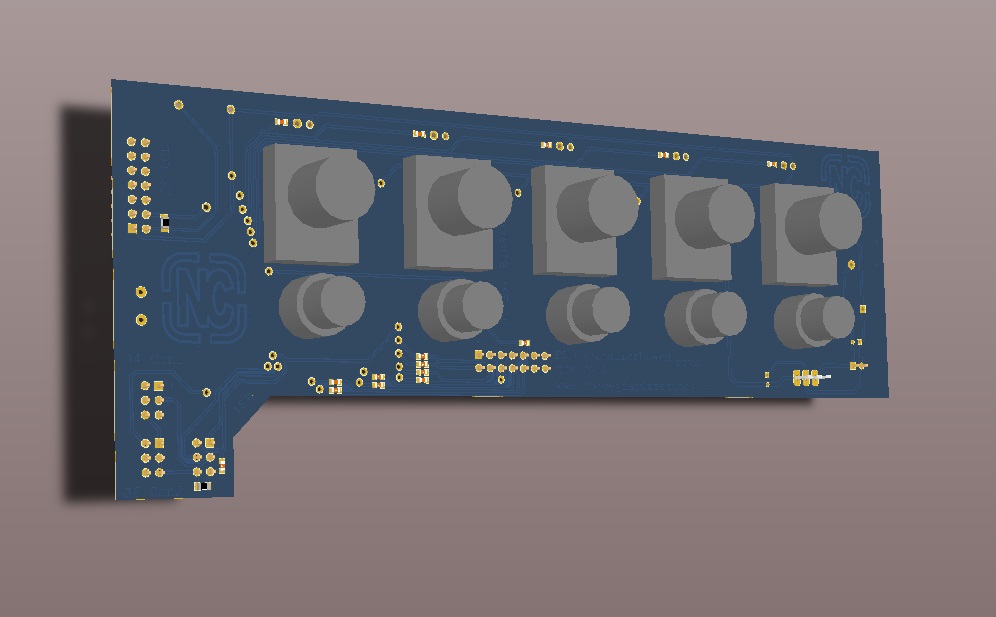
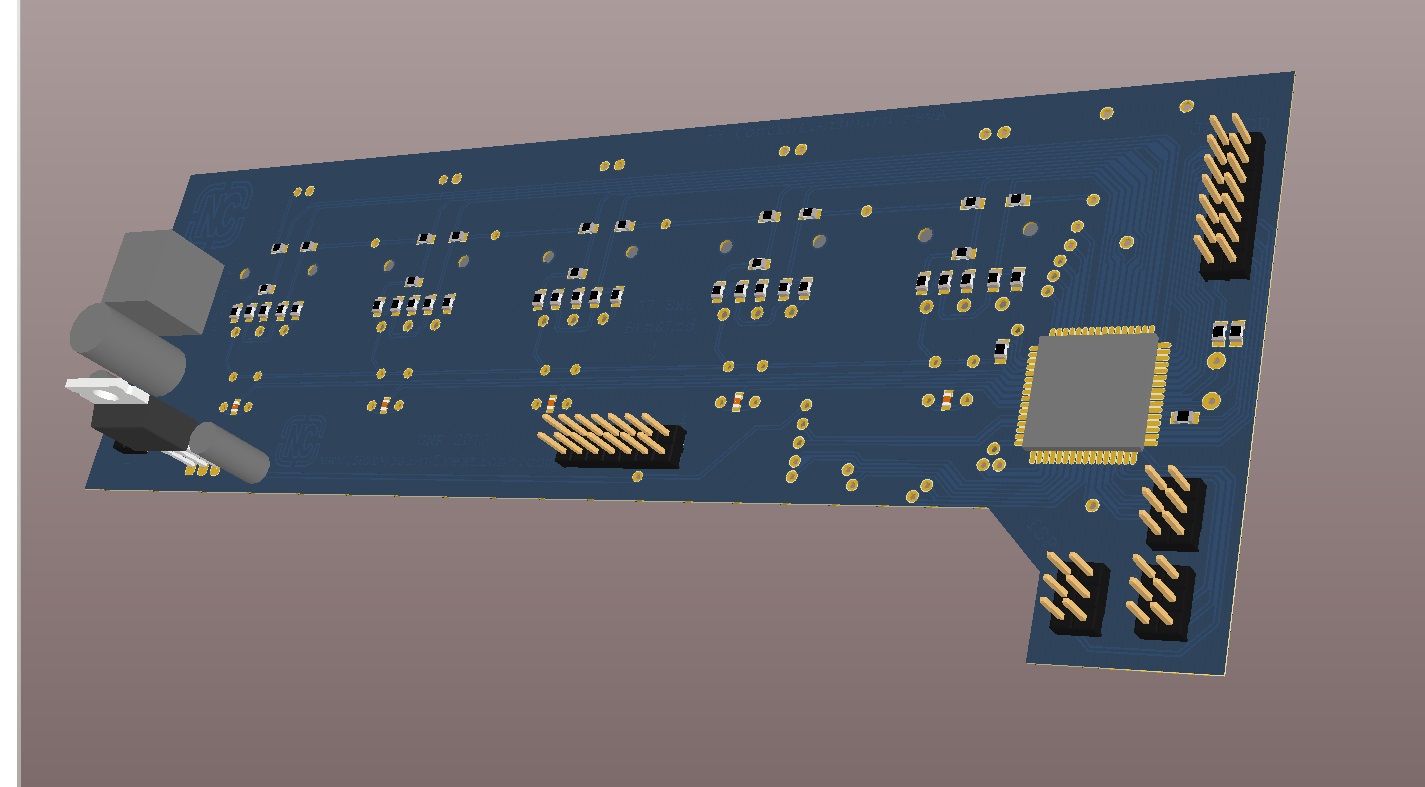
Next thing up was to make the daughter board with the ATMEGA128 and all of the peripherals.
That was all for now! In the next part of FScontroller you will start to see all of the things starting to become a physical controller ![]()