Many pet feeders already exist, but we wanted to make one ourselves. The author of this blog post has a dog with separation anxiety which makes it difficult for him to be left alone in the house. A small machine like this he can hopefully make him have an easier time being alone by giving him a few treats now and then.
Setup
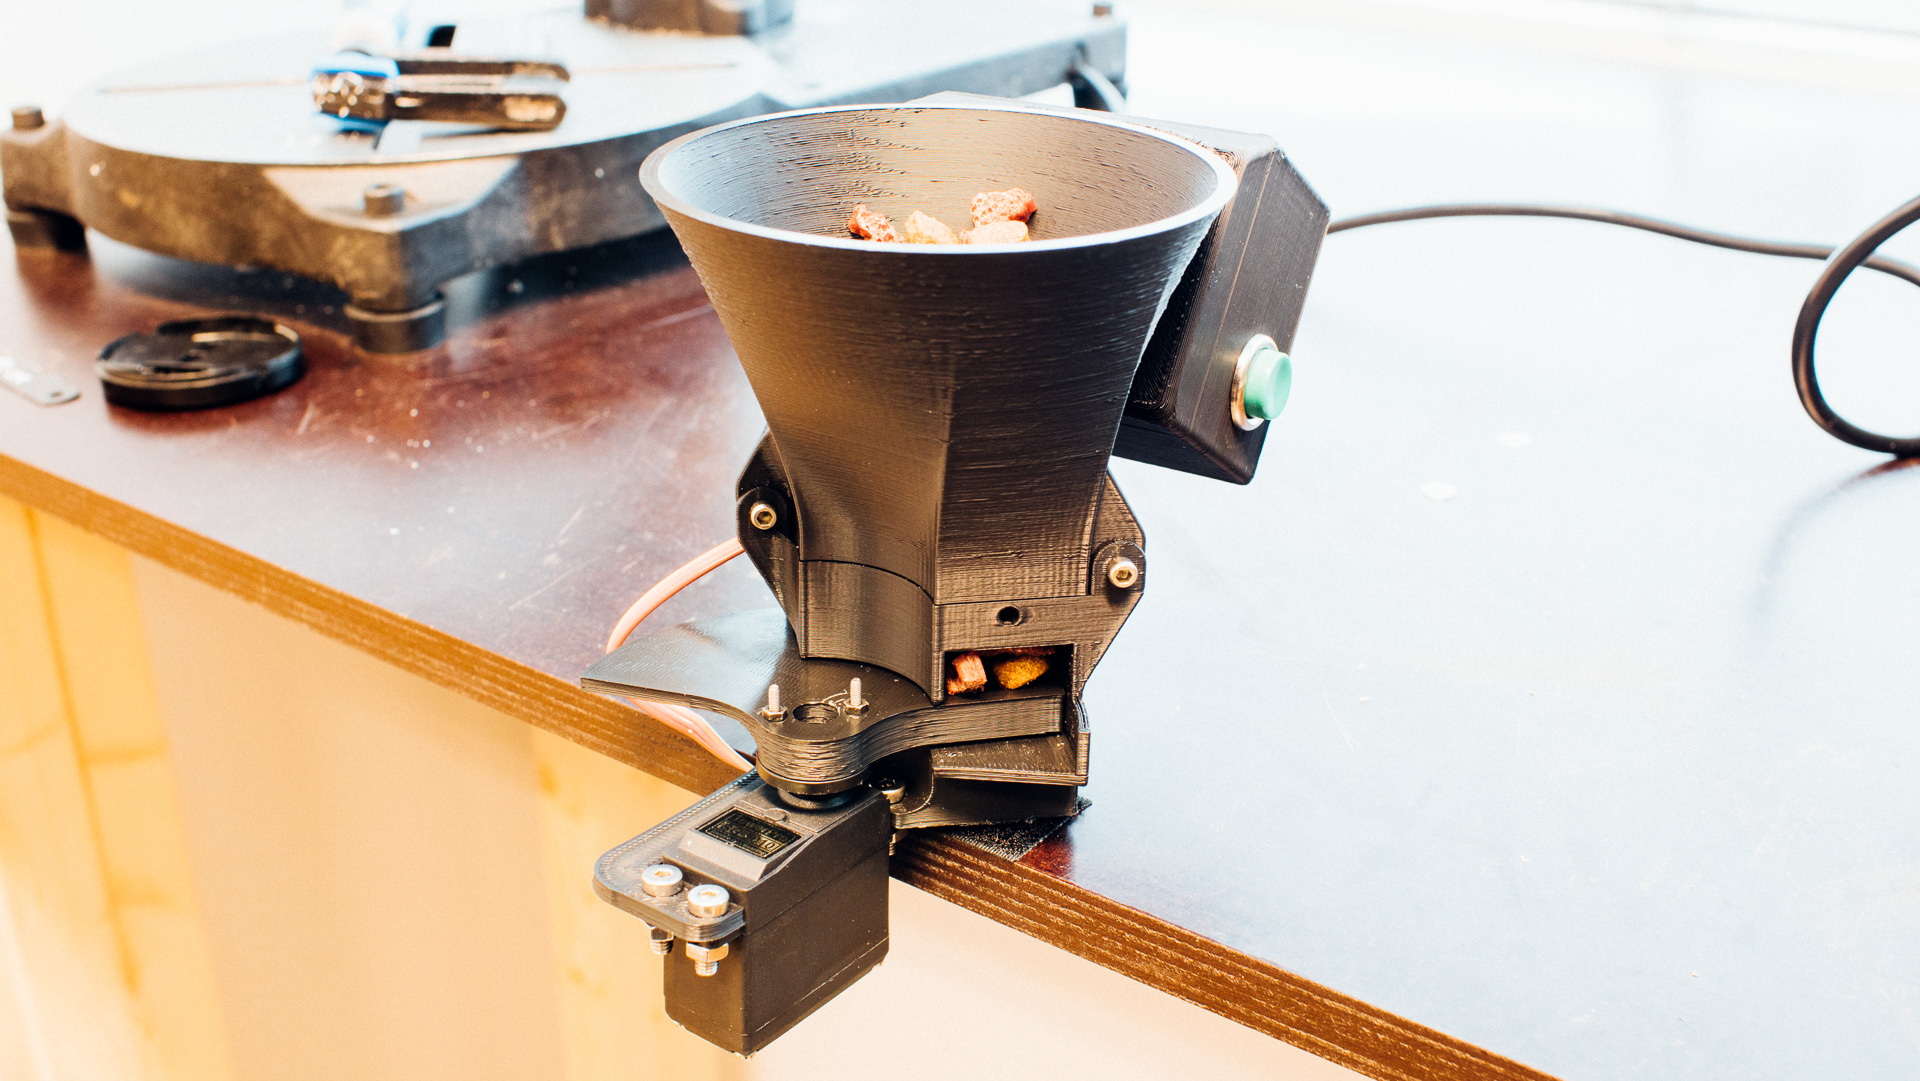
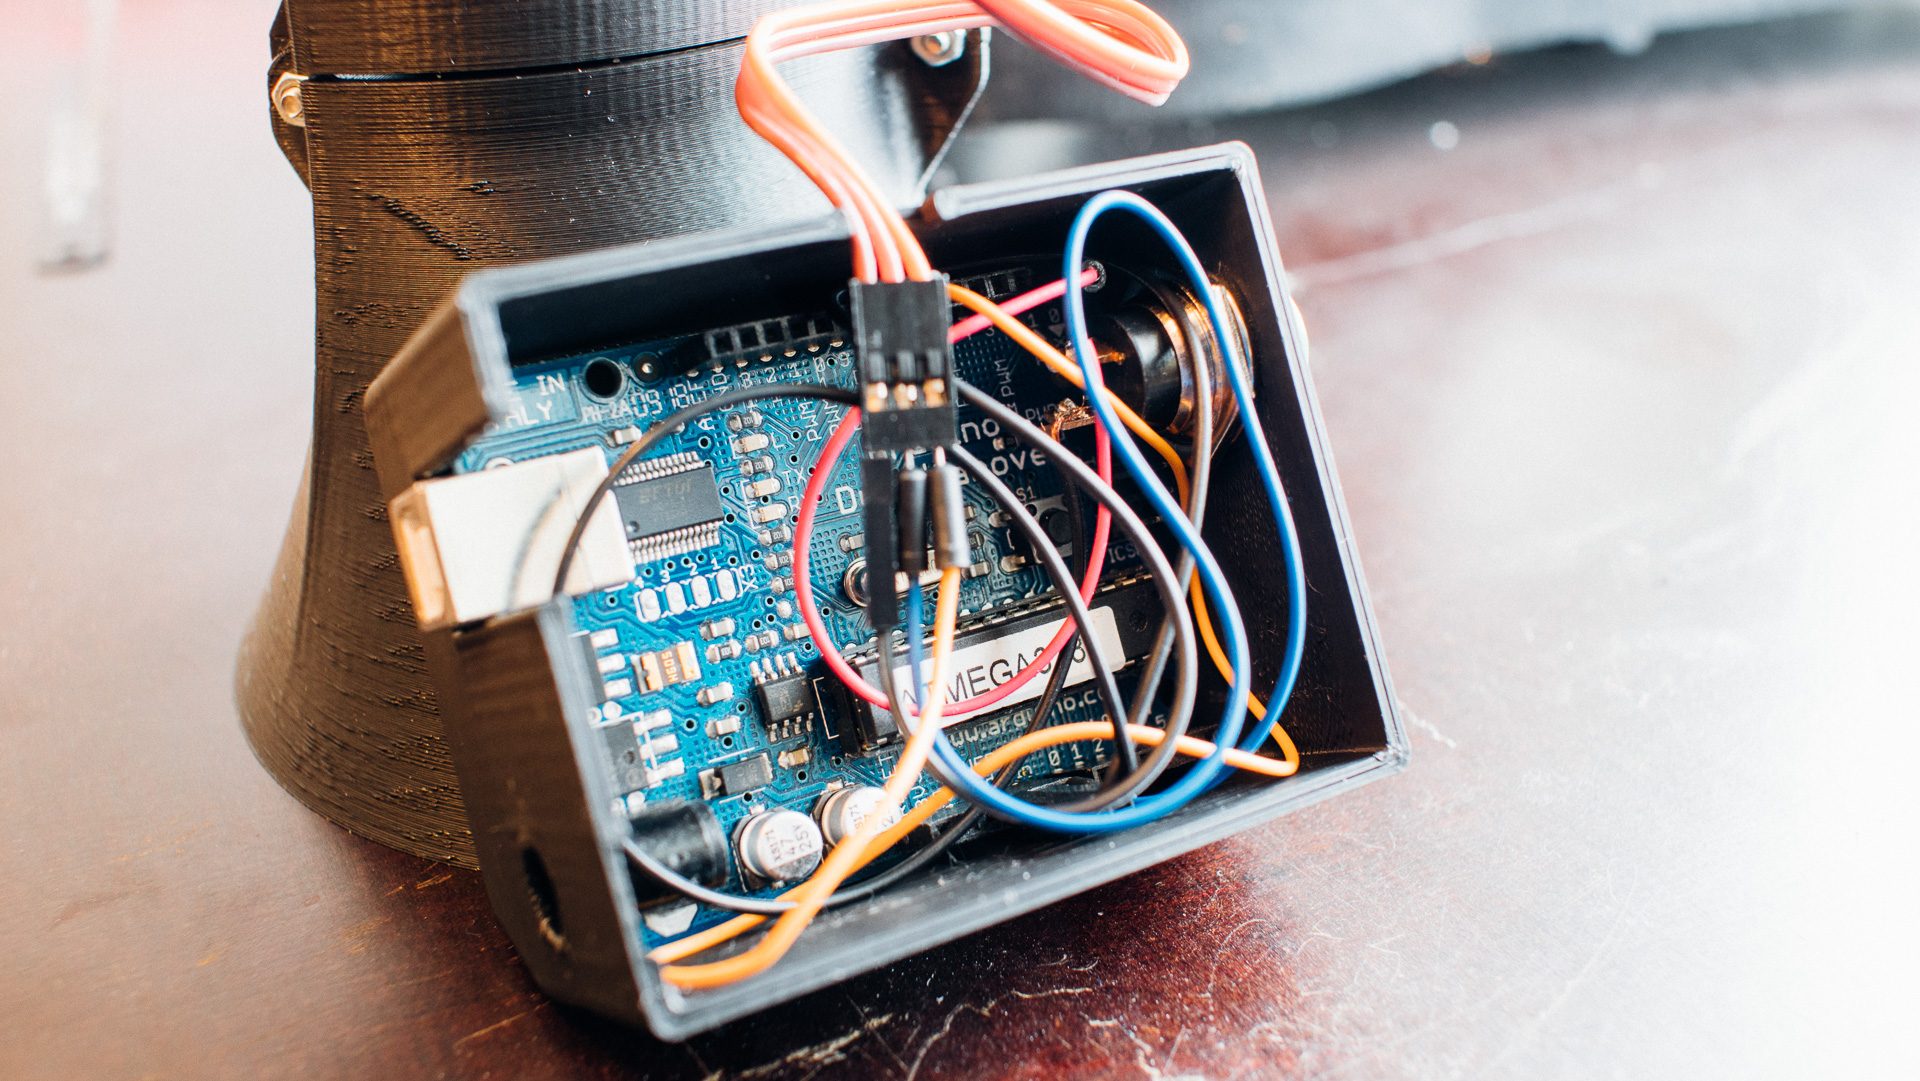
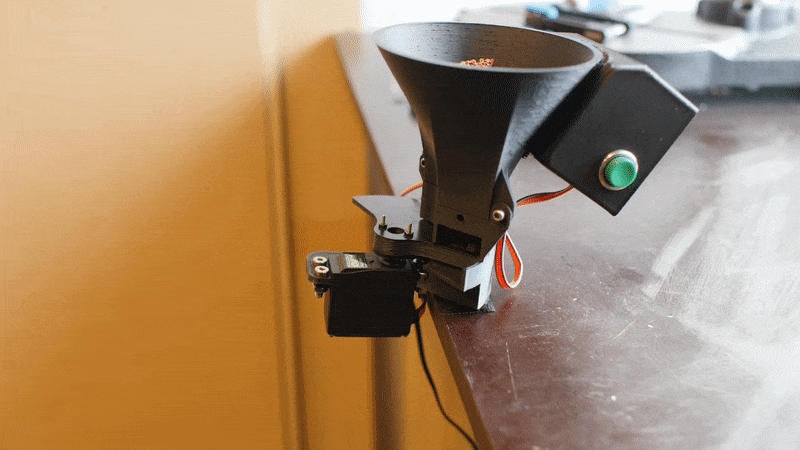
The heart of the feeder functionality is a regular standard-sized RC servo. Under the hood we find an ancient Arduino Duemilanove (precursor to the Uno). Interface-wise we have a 5V DC connector for normal operating power, a USB connector for programming and a colorful pushbutton for manual control.
Many DIY feeders don’t use microcontrollers. Instead they use simple mechanical timers. With a microcontroller, a machine like this become a thousand times more versatile and you can do lots of cool stuff which you otherwise can’t.
The Discarded Setup
Initially we wanted to use a small Chinese stepper motor and a worm gear to transport food pellets. However, pellets got stuck and the motor was too weak to do something about it. Thus this design was scrapped.
Functionality
The feeder automatically feeds a random, but small portion of food (~1-5 pellets) at a given interval specified in the code. 1 minute intervals work well. We also have a button which we can press to manually feed a single portion. The point here is not to give the dog its meals over one or several days, but to instead periodically give it a few treats over a shorter period of time.
It is crucial for the feeder’s survival that it is placed high enough up from the ground such that it’s out of the dog’s reach.
Mechanical Design
Parts
The feeder consists of five different 3D printed parts:
- A base structure which the servo is attached to.
- A rotating structure which transports the food. This can be redesigned to transport a different amount of food.
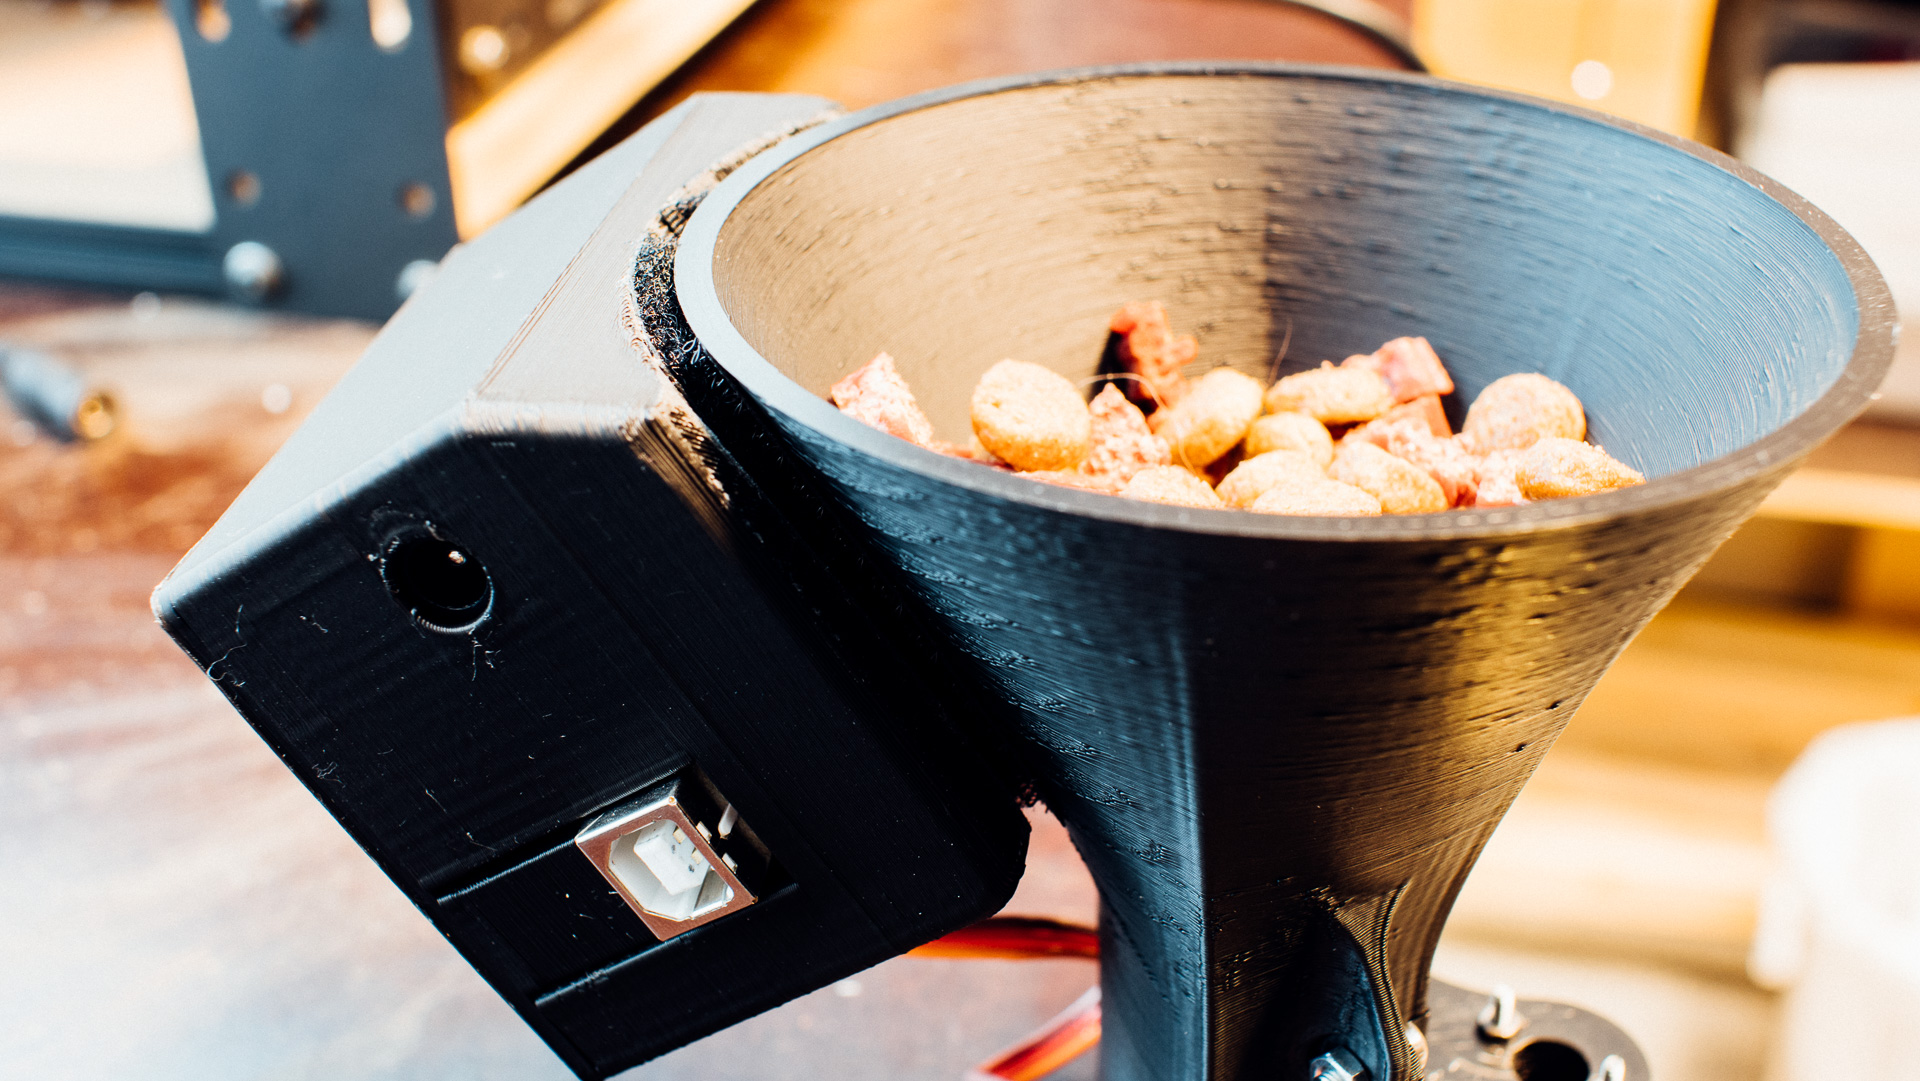
- A funnel-shaped container for food.
- A casing for electronics.
- A lid for the electronics casing.
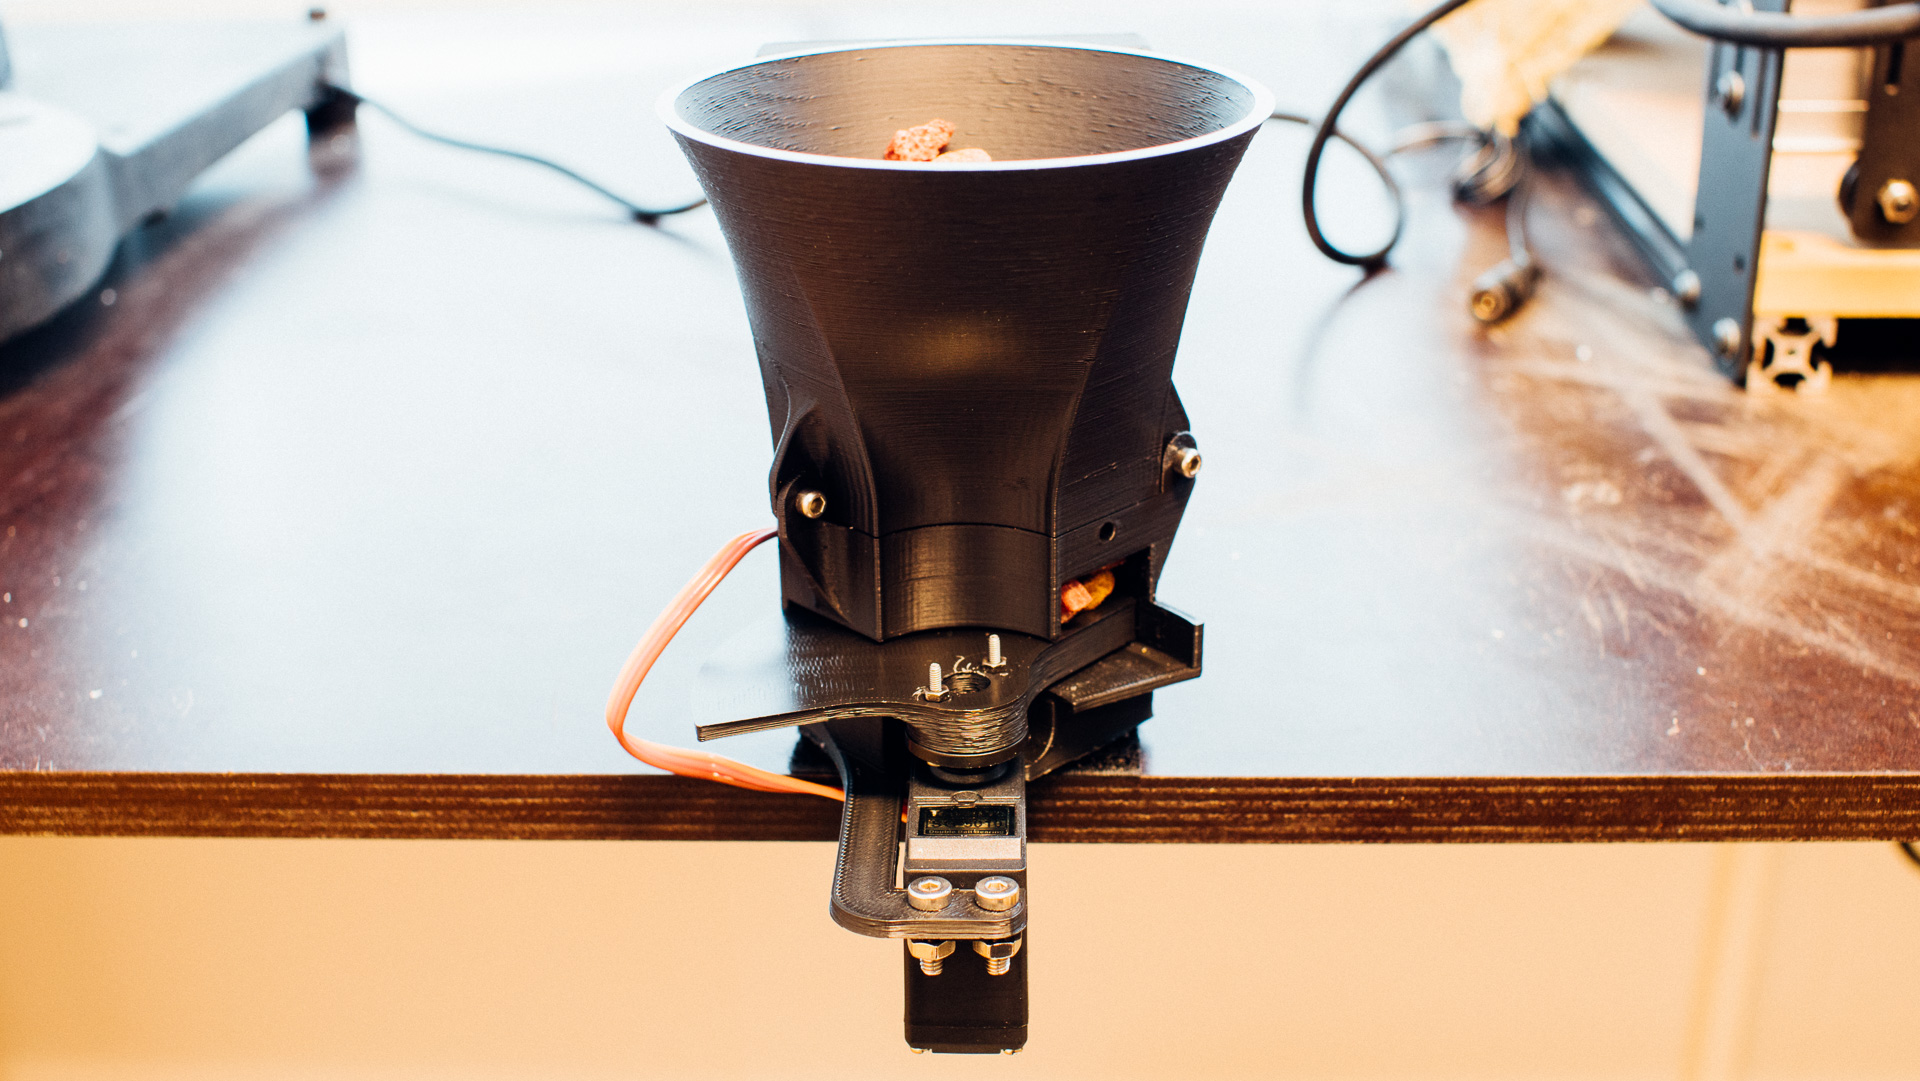
The electronics casing is attached to the container with velcro tape. We also use velcro tape to attach the feeder along an edge of a shelf or something similar.
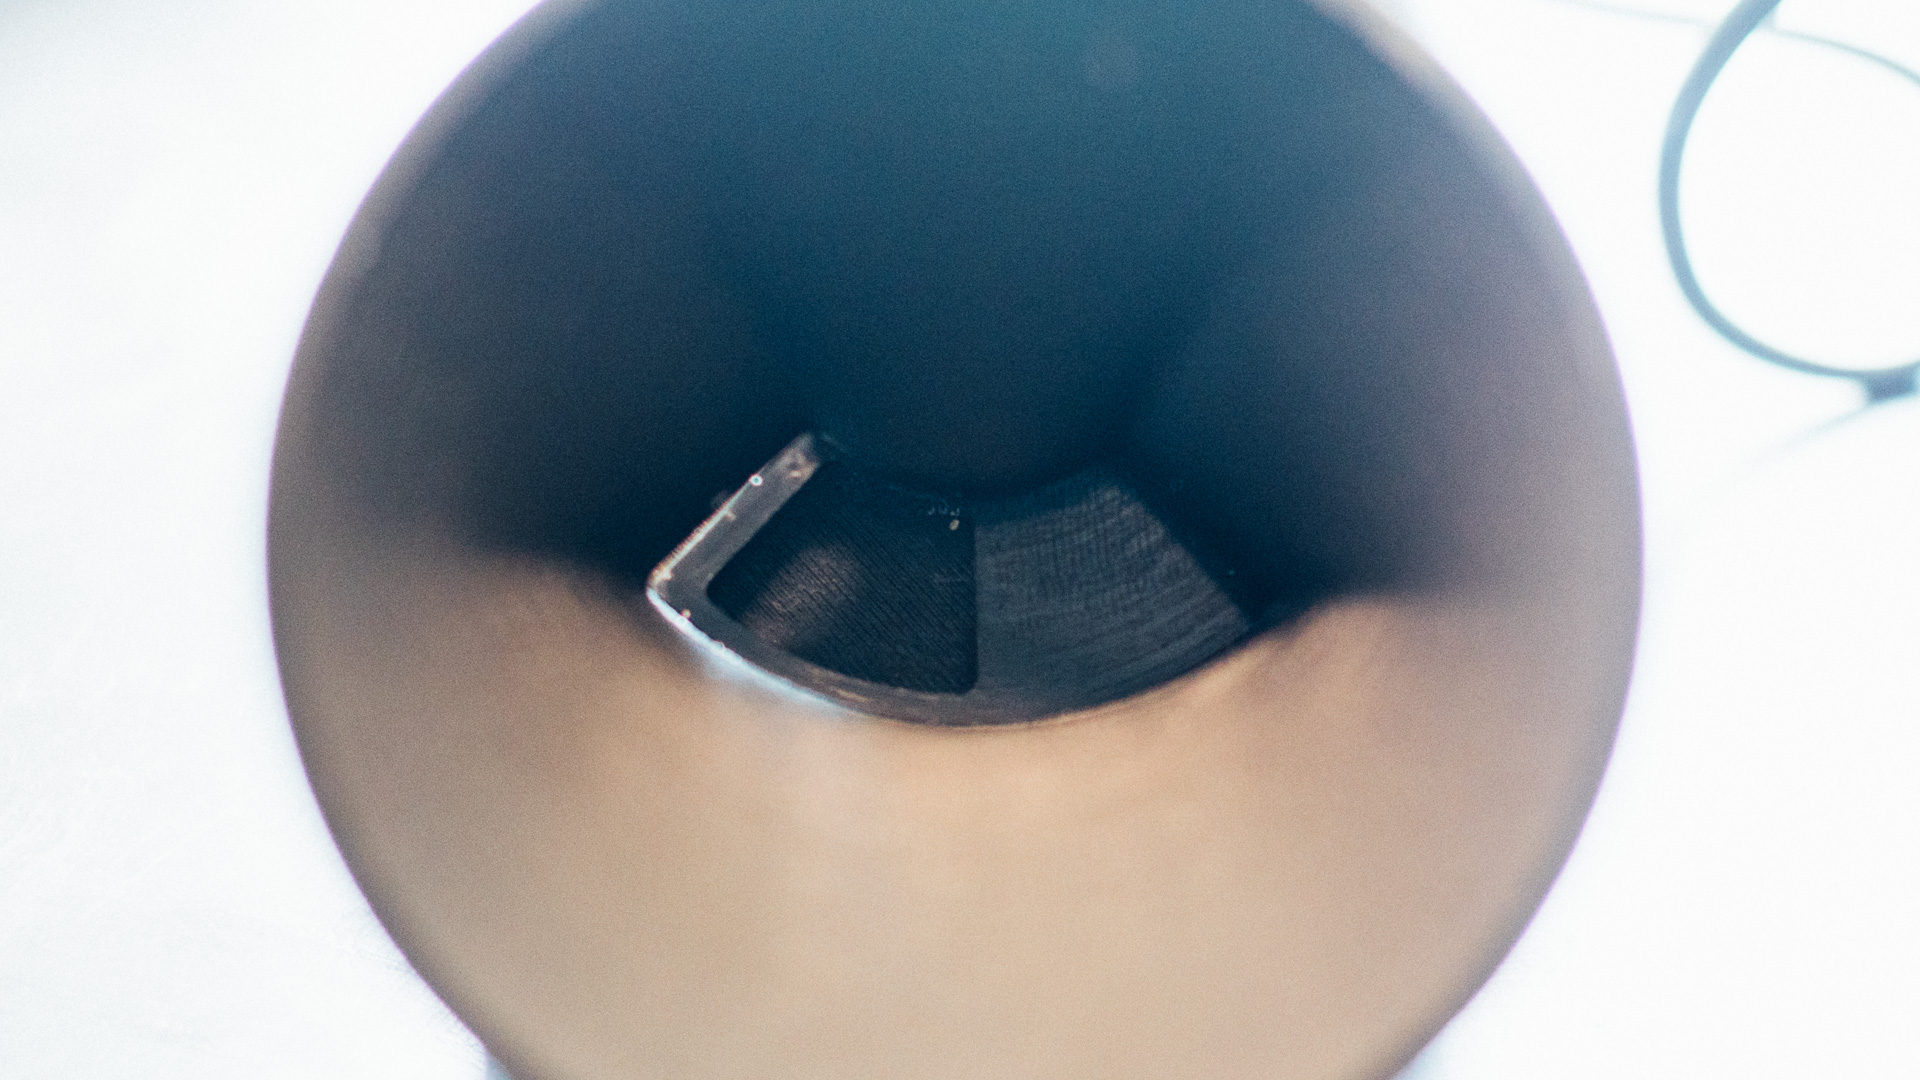
Feeding Mechanism
To dispense the food, it falls down in an internal slot which rotates when actuated by the servo. The pellets in the slot is then basically just pushed off the edge of the base structure before falling down on the floor below.
Code
Nothing unusual happens in the code. We use a GPIO interrupt for the button and the millis() function for the timer. Initially, with the stepper motor, we used a Timer1 library, but the servo library uses the same timer, and thus we had to use millis instead when switching to the servo.
#include <Servo.h>

#define FEED_INTERVAL_MS	60000
#define SERVO_START			105
#define SERVO_END			50
#define PIN_SERVO			9
#define PIN_INTERRUPT		2

Servo myservo;

byte feed_flag = 0;
int pos = 0;
unsigned long time_now = 0;

void setup(){
	myservo.attach(PIN_SERVO);
	pinMode(PIN_INTERRUPT, INPUT_PULLUP);
	attachInterrupt(digitalPinToInterrupt(PIN_INTERRUPT), myISR, LOW);

	pos = SERVO_START;
	myservo.write(pos);
}

void loop(){
	if(millis() > (time_now + (FEED_INTERVAL_MS))){
		time_now = millis();
		feed_flag = 1;
	}

	if(feed_flag){
		feed();
		feed_flag = 0;
	}
}

void myISR(){
	feed_flag = 1;
}

void feed(){
	for (pos = SERVO_START; pos >= SERVO_END; pos--) {
		myservo.write(pos);
		delay(15);
	}
	for (pos = SERVO_END; pos <= SERVO_START; pos++) {
		myservo.write(pos);
		delay(15);
	}
}
Plans for the Future
We still need to test this more extensively in the dog-environment, but from a technical standpoint it is working very well at the moment.
There are lots of cool expansions we can think of for this project which adds more “smartness”. However, we’ll keep those for ourselves until next time.
CAD Files
Update: By popular demand we’ve decided to include ready-to-print STL-files such that you can 3D print one of these pet feeders yourself.

This work is licensed under a Creative Commons Attribution-NonCommercial-ShareAlike 4.0 International License.
August 28th 2018 – Updated with CAD files.


