In the two previous posts in this series, we can read about how a coffee machine was hacked using the BBC micro:bit, and the options for low power wireless with this device. In this post we will take a look at the creation of the custom enclosures for the micro:bits in the system.
The Timer Device
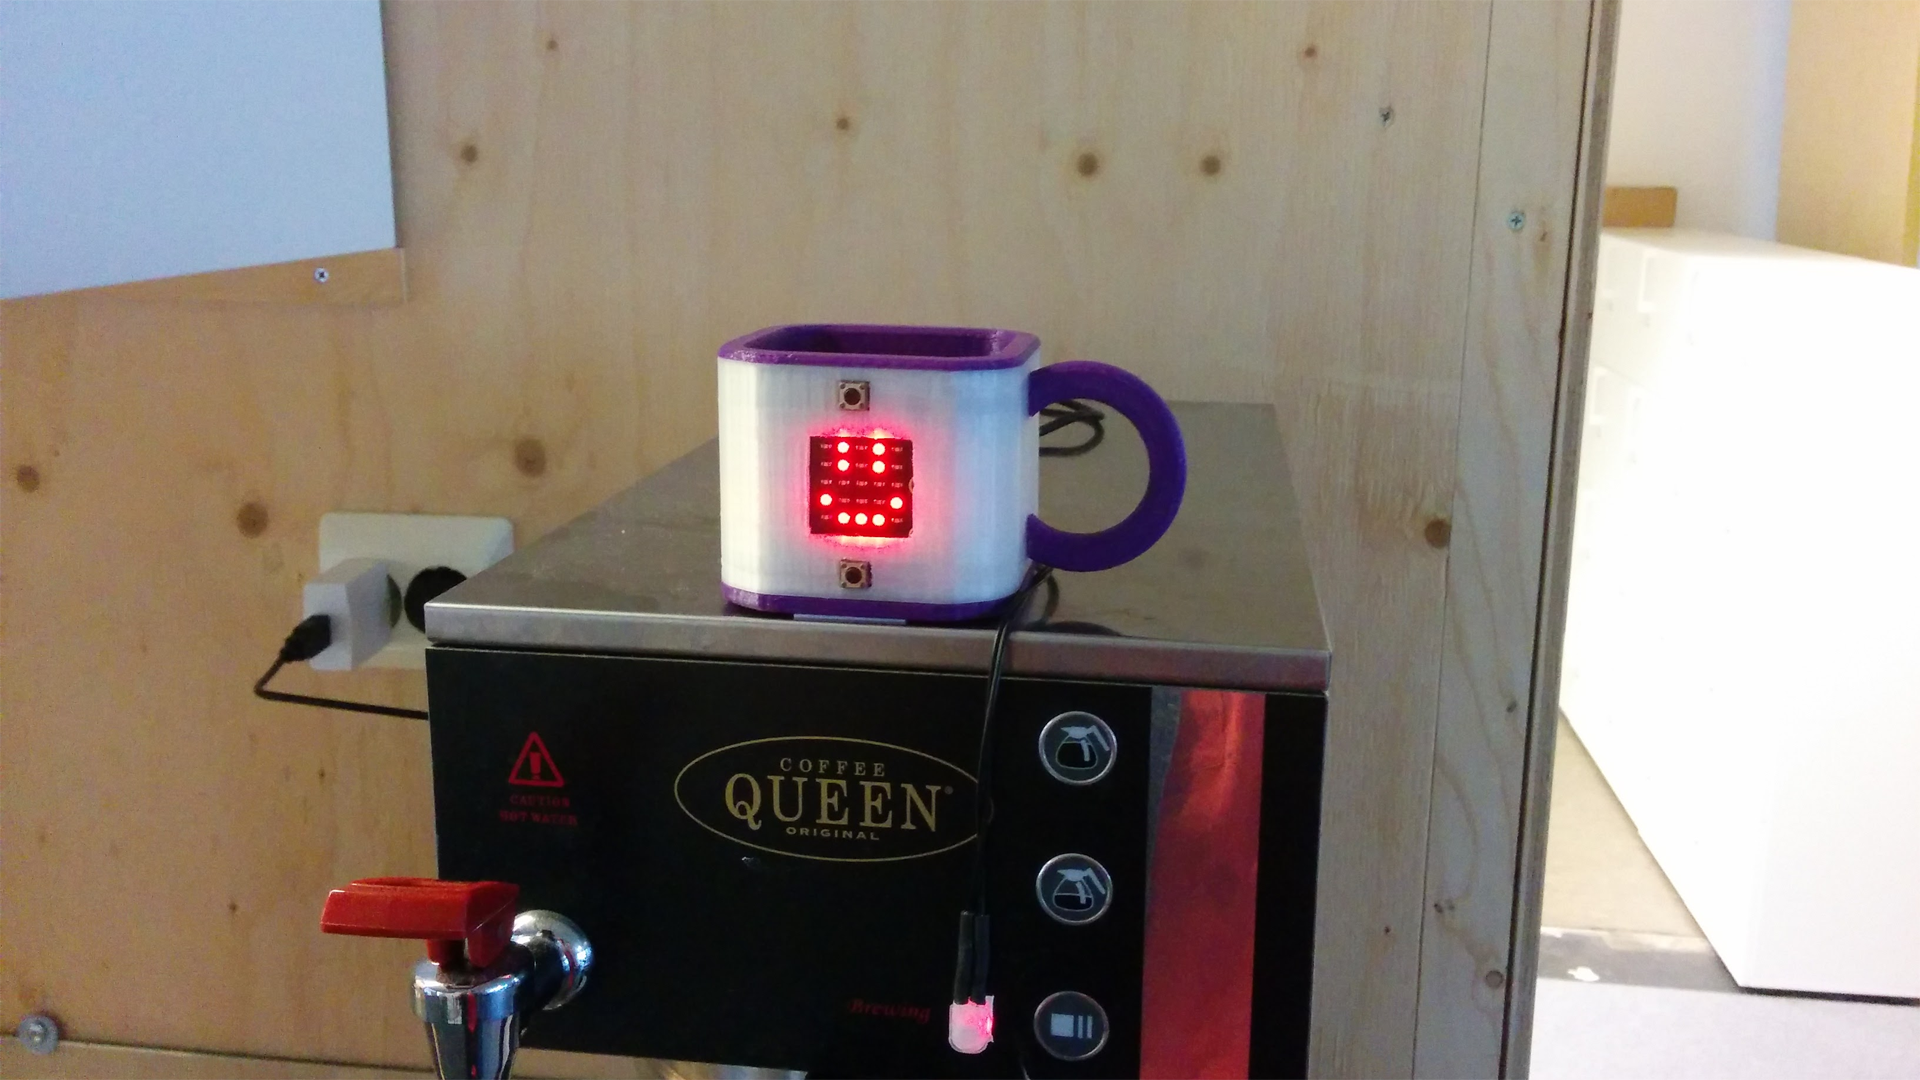
For the timer device mounted on the coffee maker, we wanted a design showing that the information on the screen was coffee related. We considered coffee beans, coffee pots but landed on making it look like a coffee mug. The first edition had a coffee mug front plate, but it was not very good-looking. It had the USB cable sticking out on top, and was also very prone to fall apart when using it.
The new design had to be more three-dimensional, and be more aesthetically pleasing. When creating a normal coffee mug shape, two problems became apparent:
- The micro:bit has a flat front with a screen and buttons that must be visible and accessible.
- The micro USB connector is placed on the side of the board, making it impossible to hide the USB cable when having the board in the front.
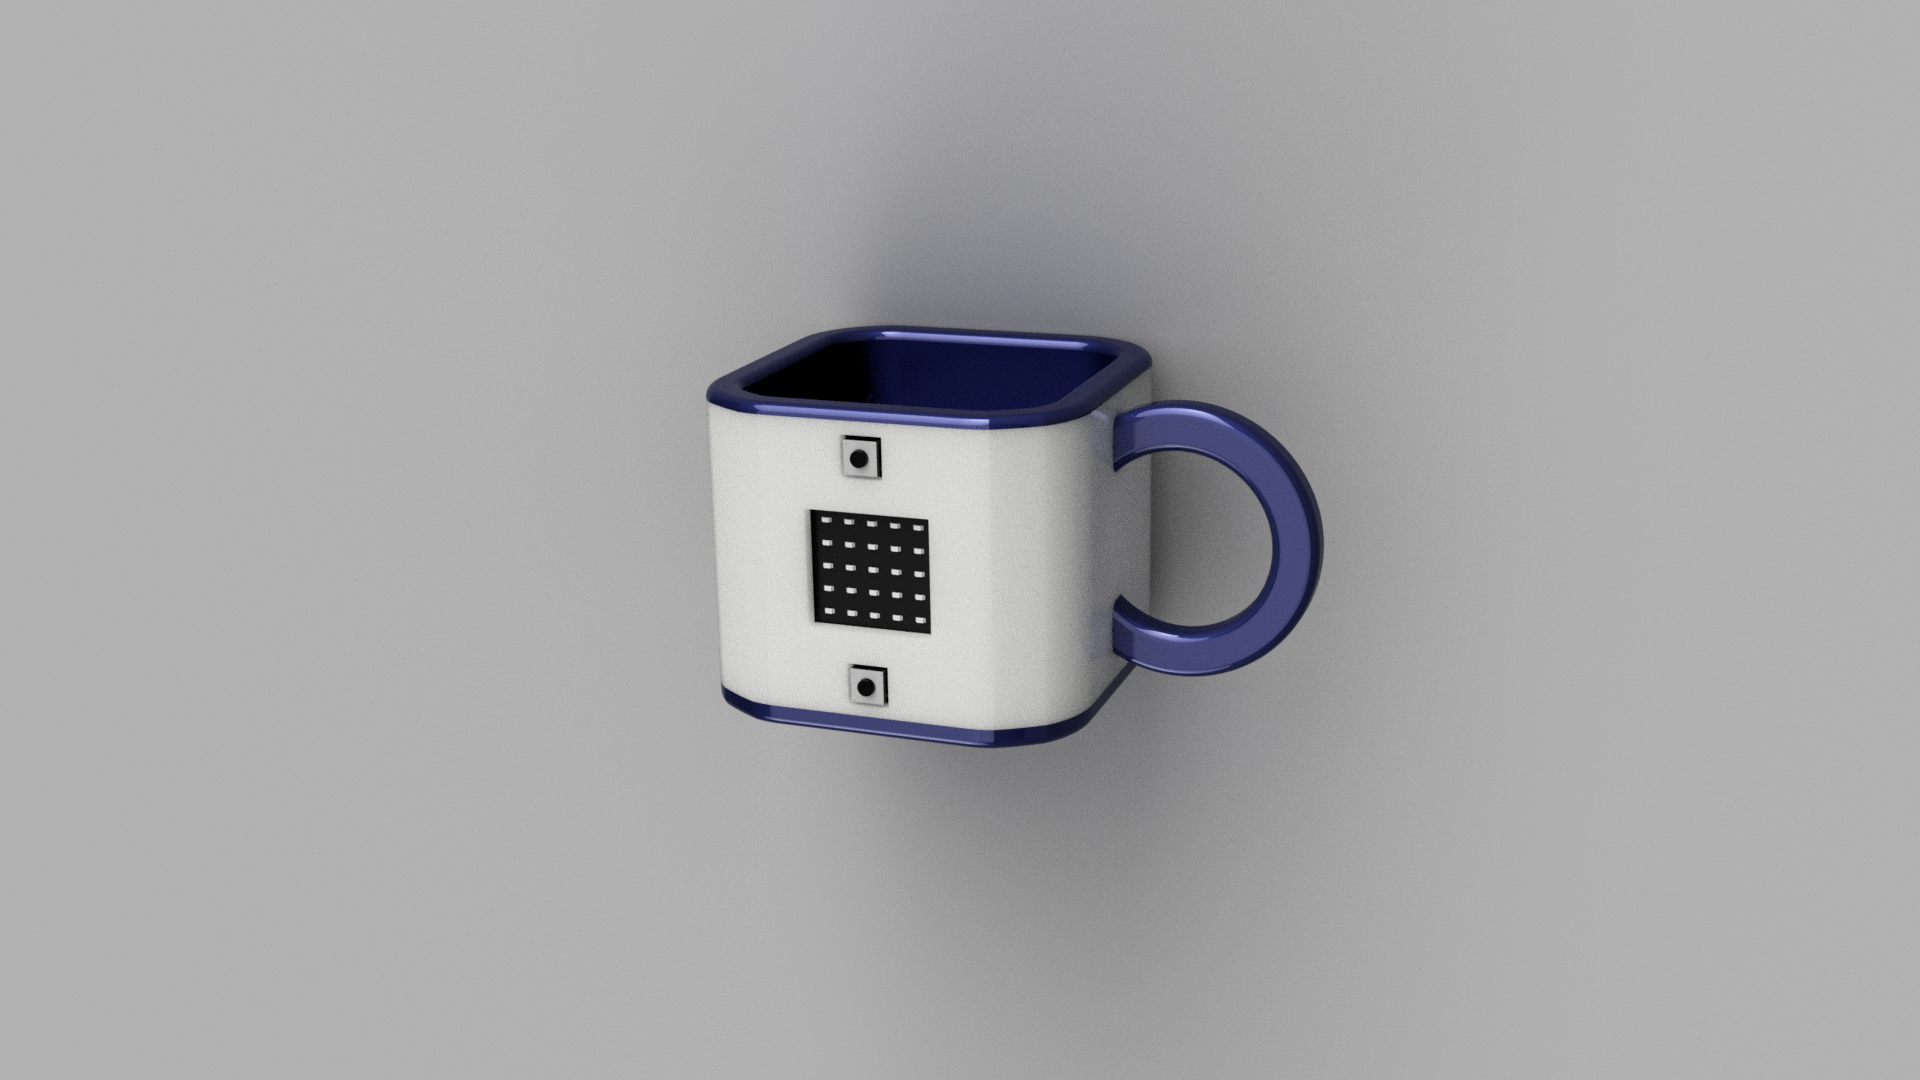
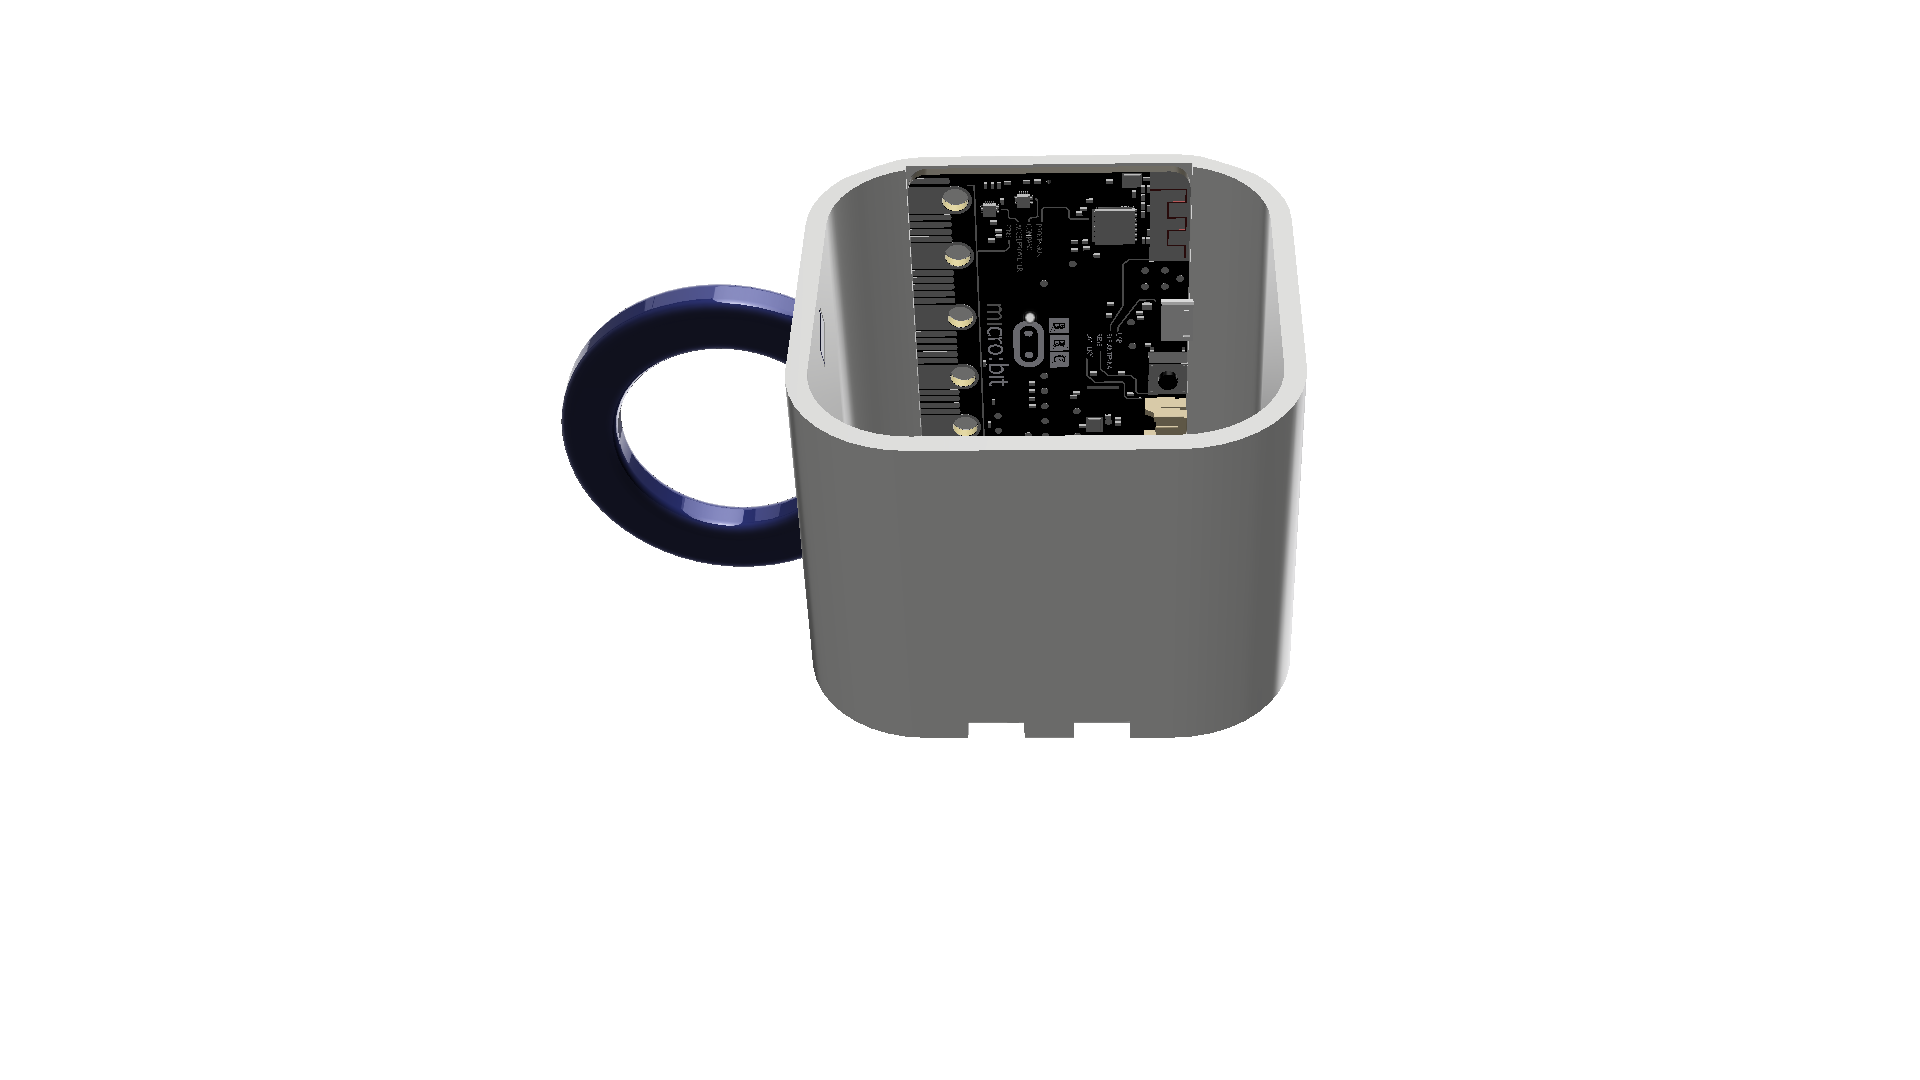
Instead of making the mug round, it was designed as a square block with rounded edges. This made for a coffee mug look, but with a flat front.
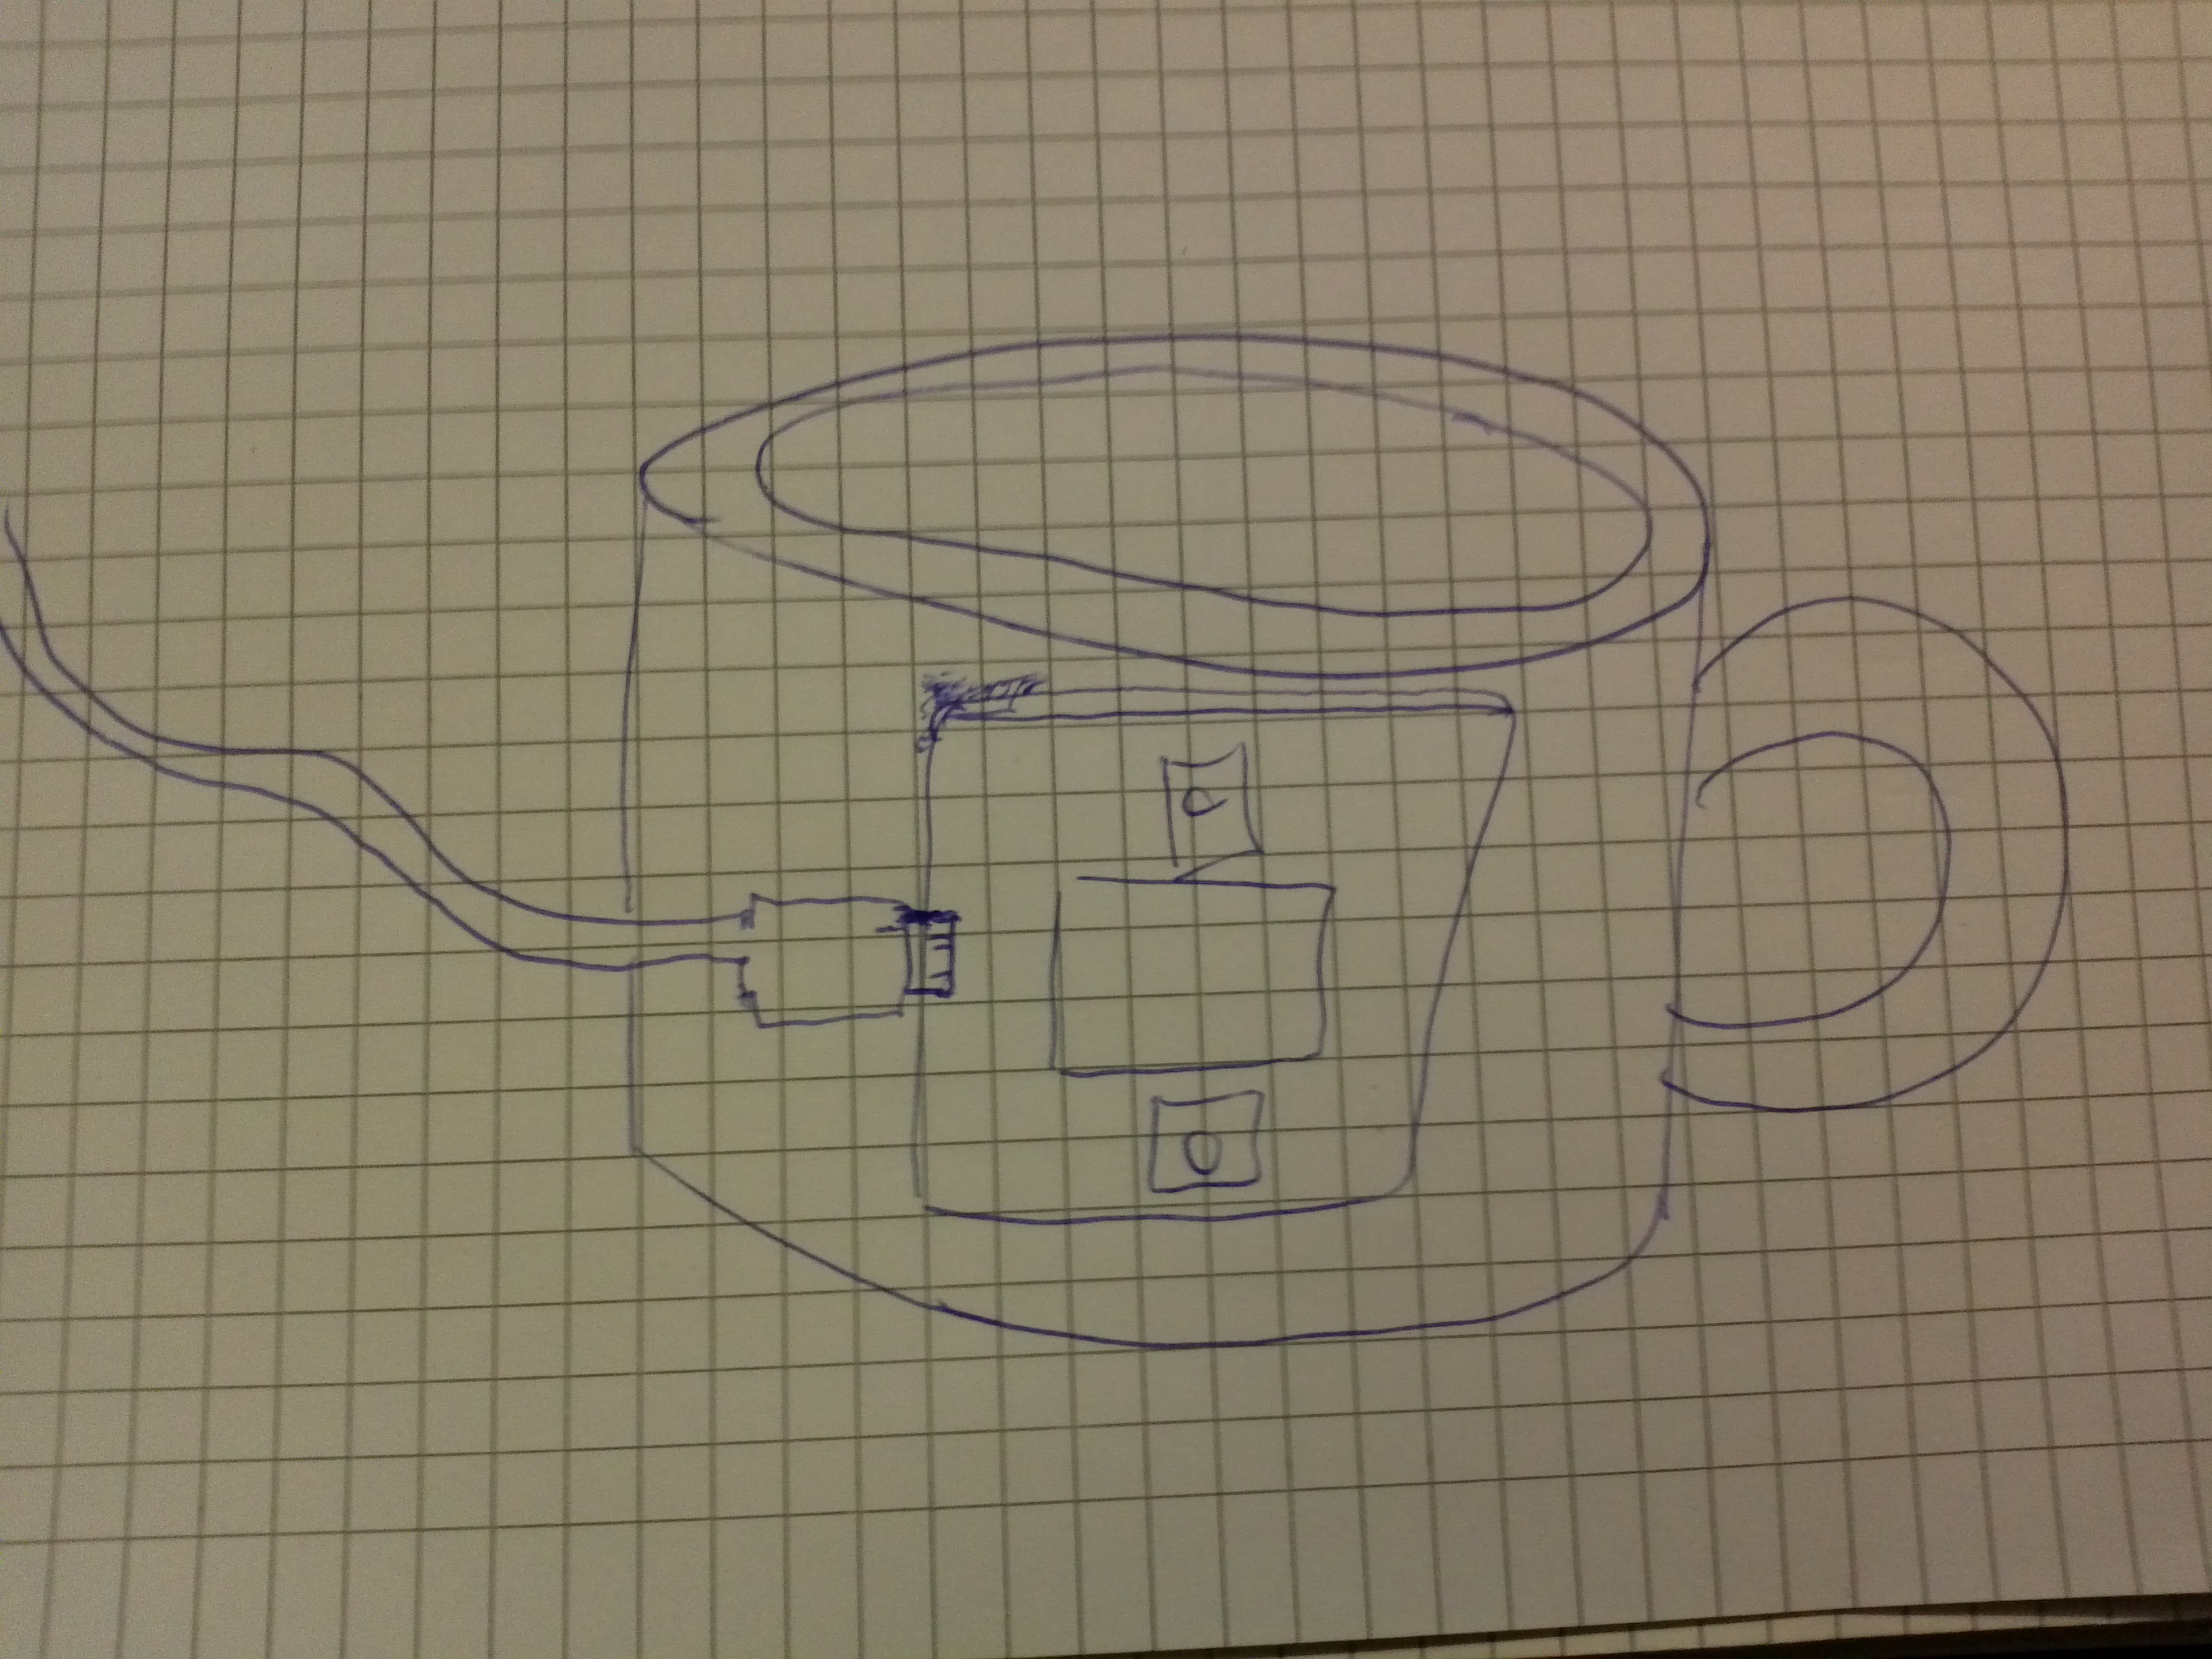
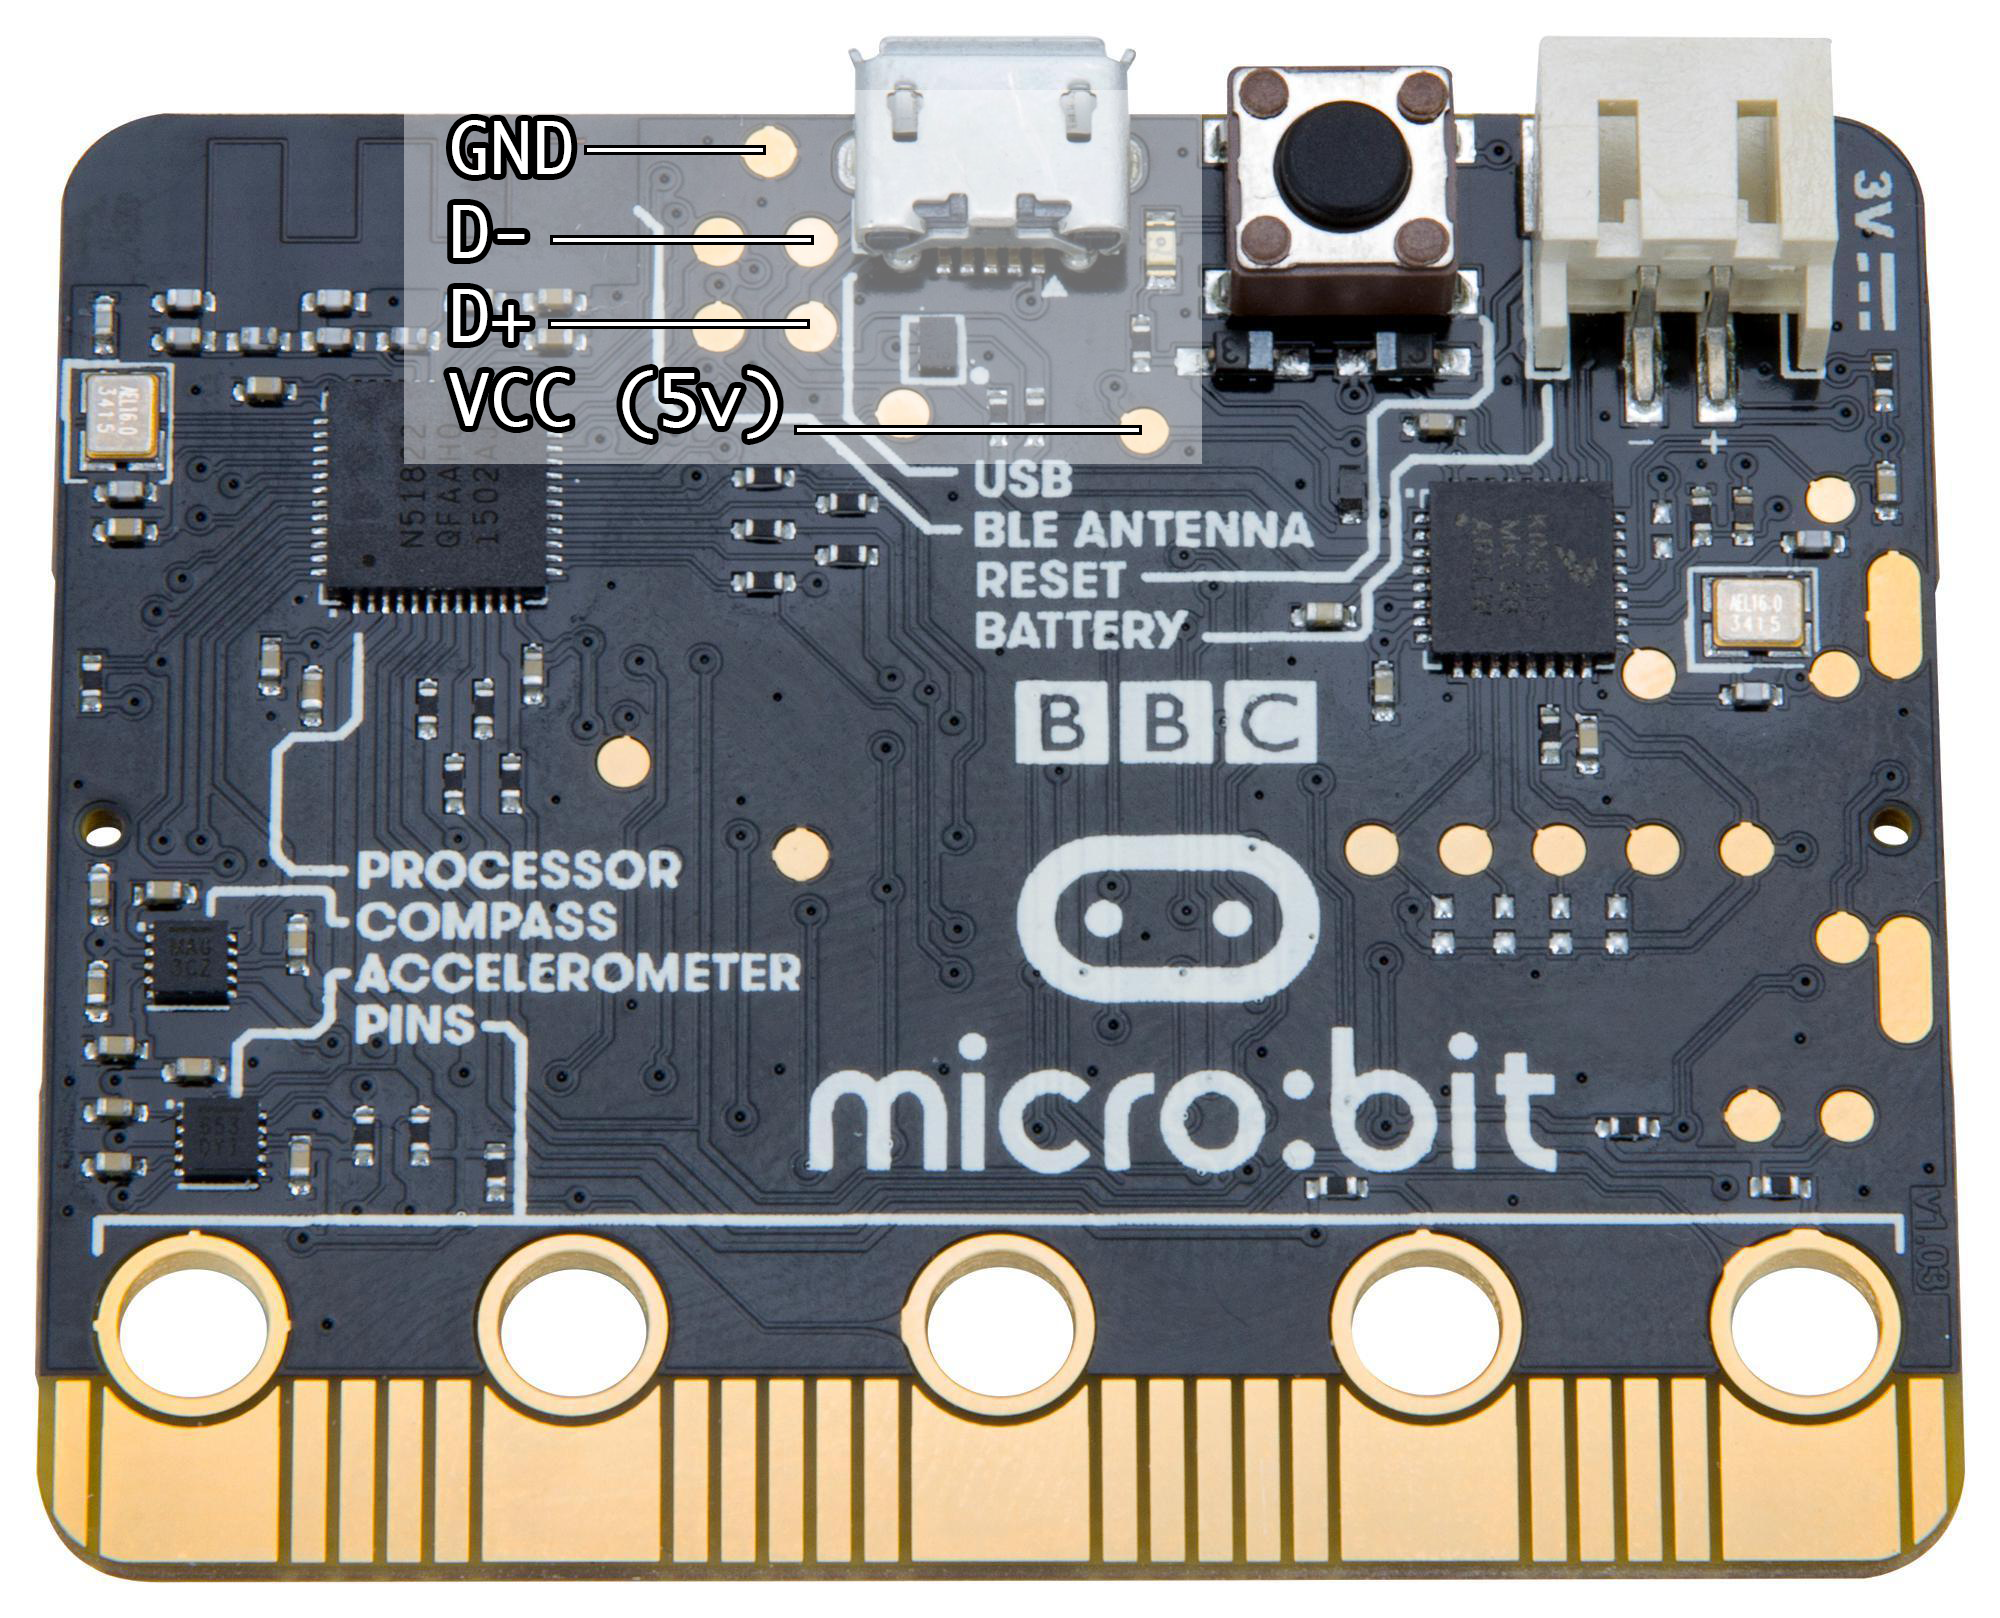
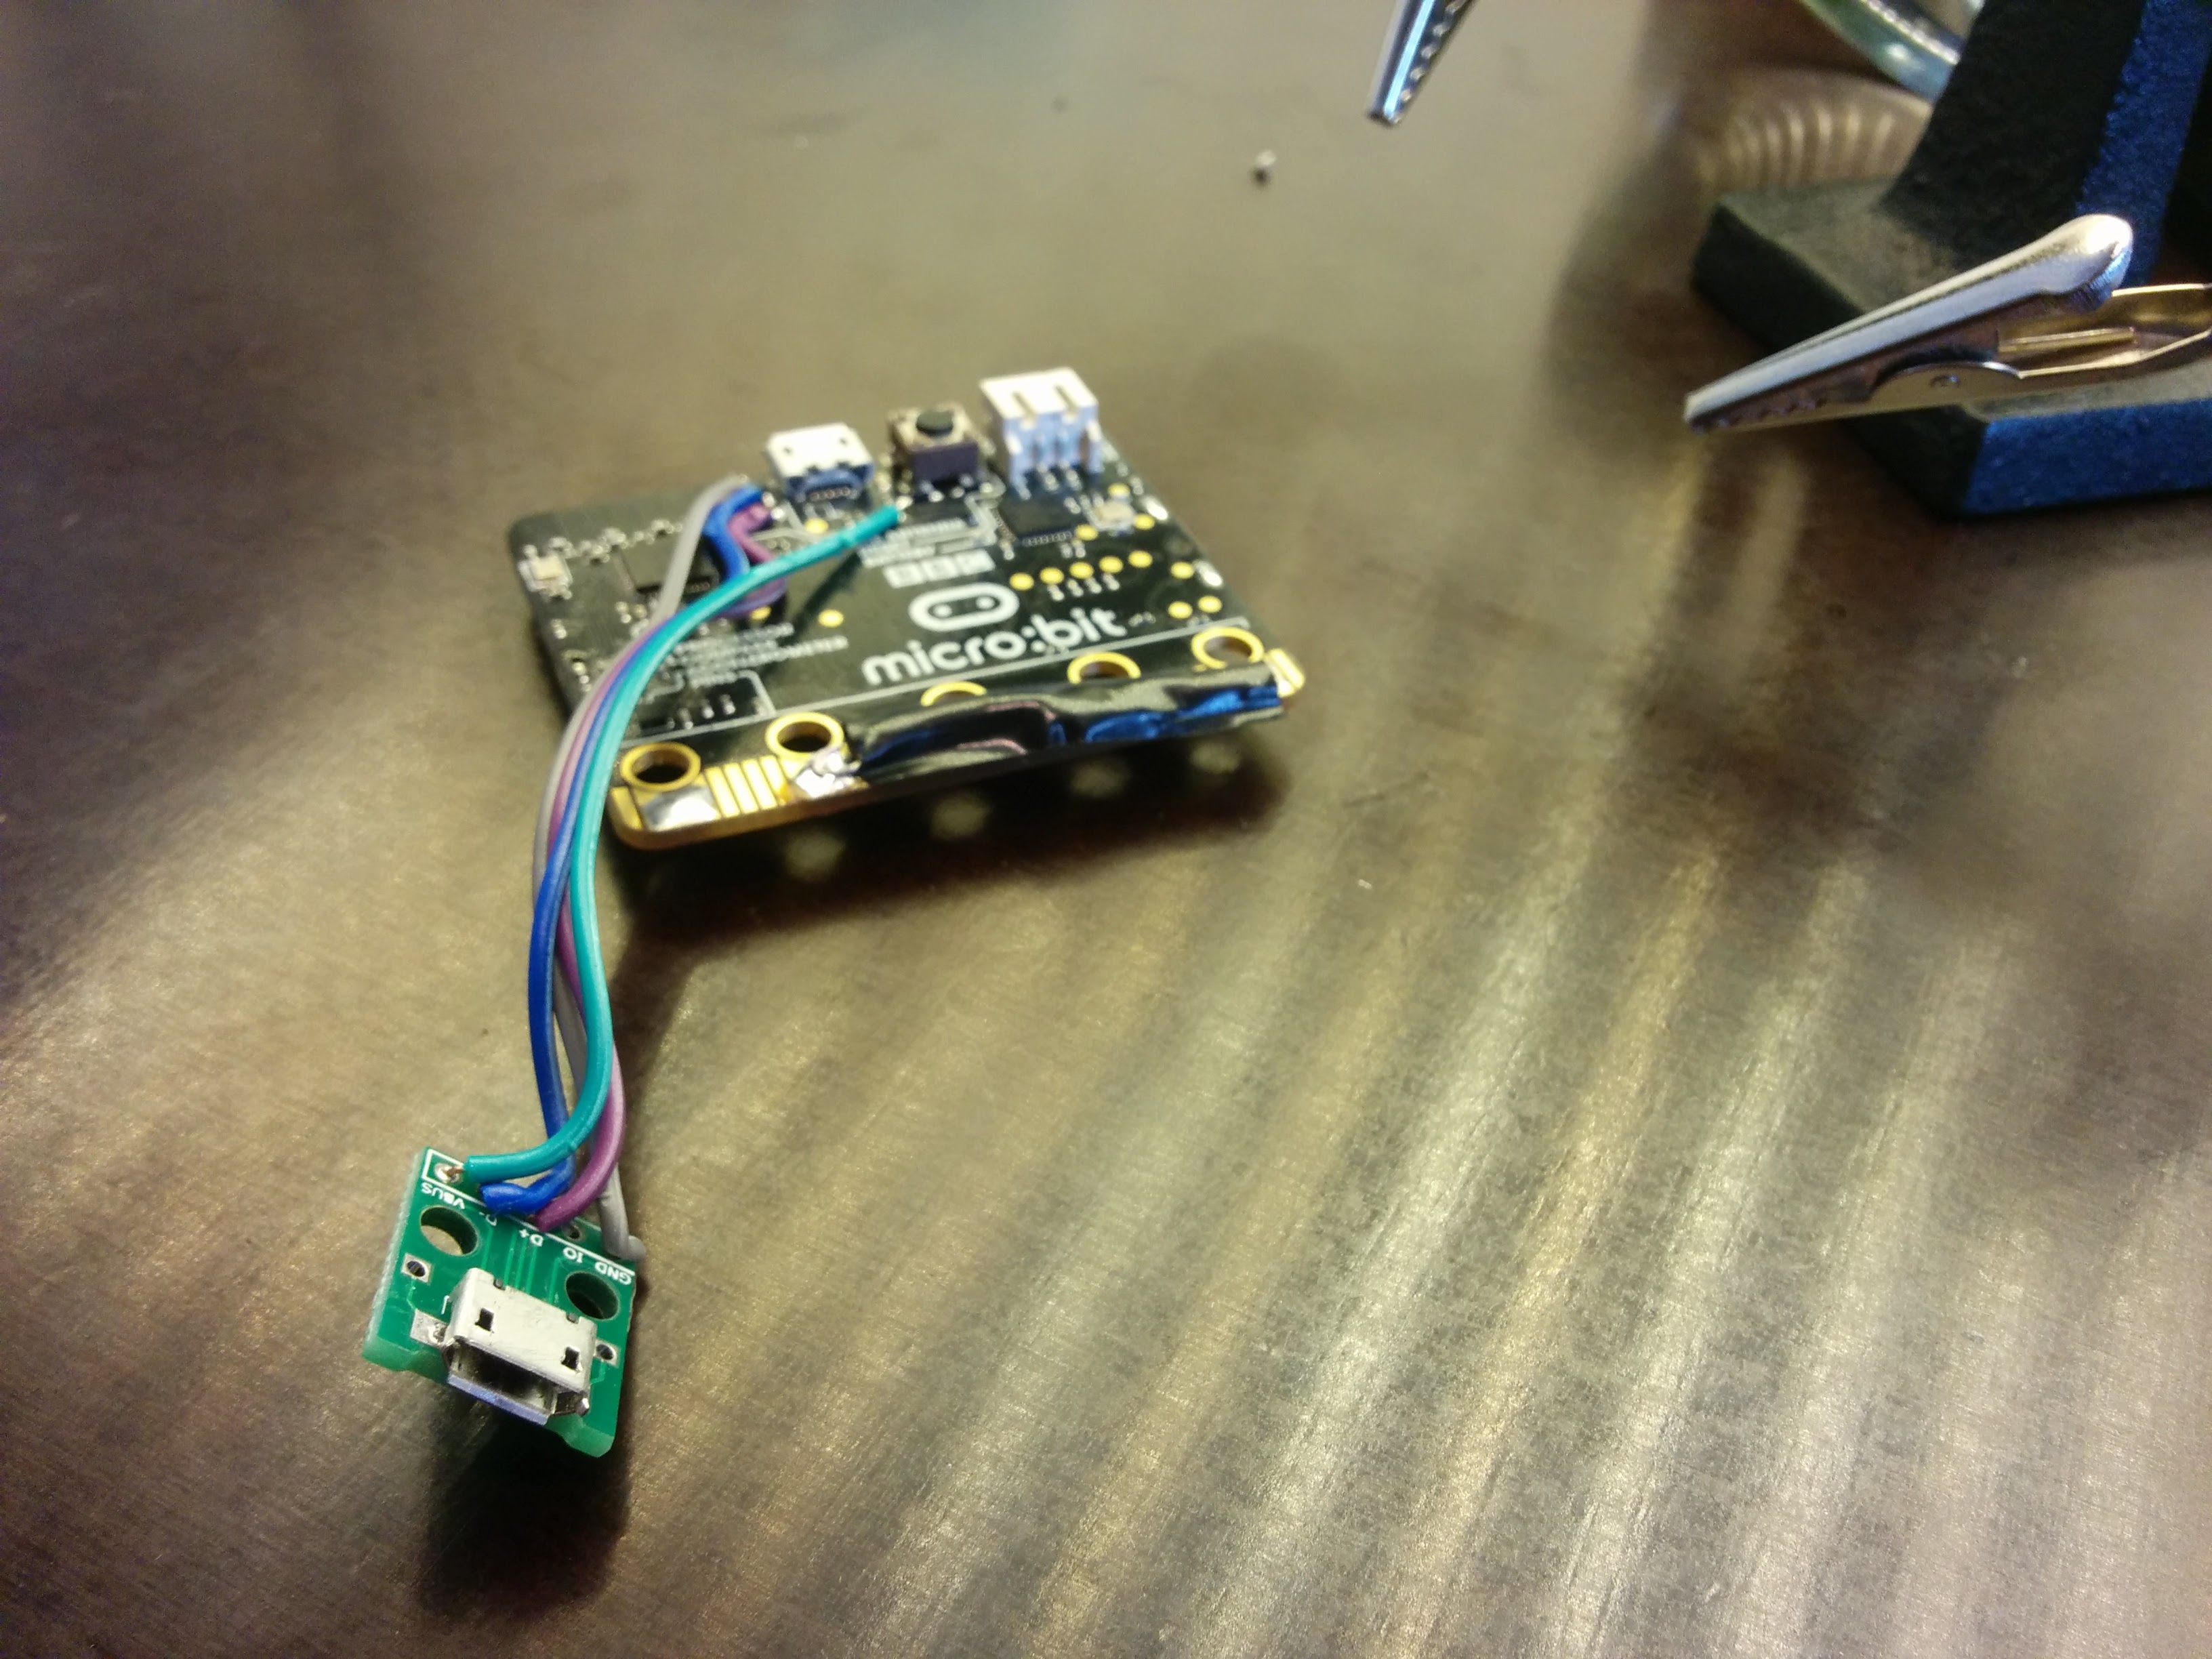
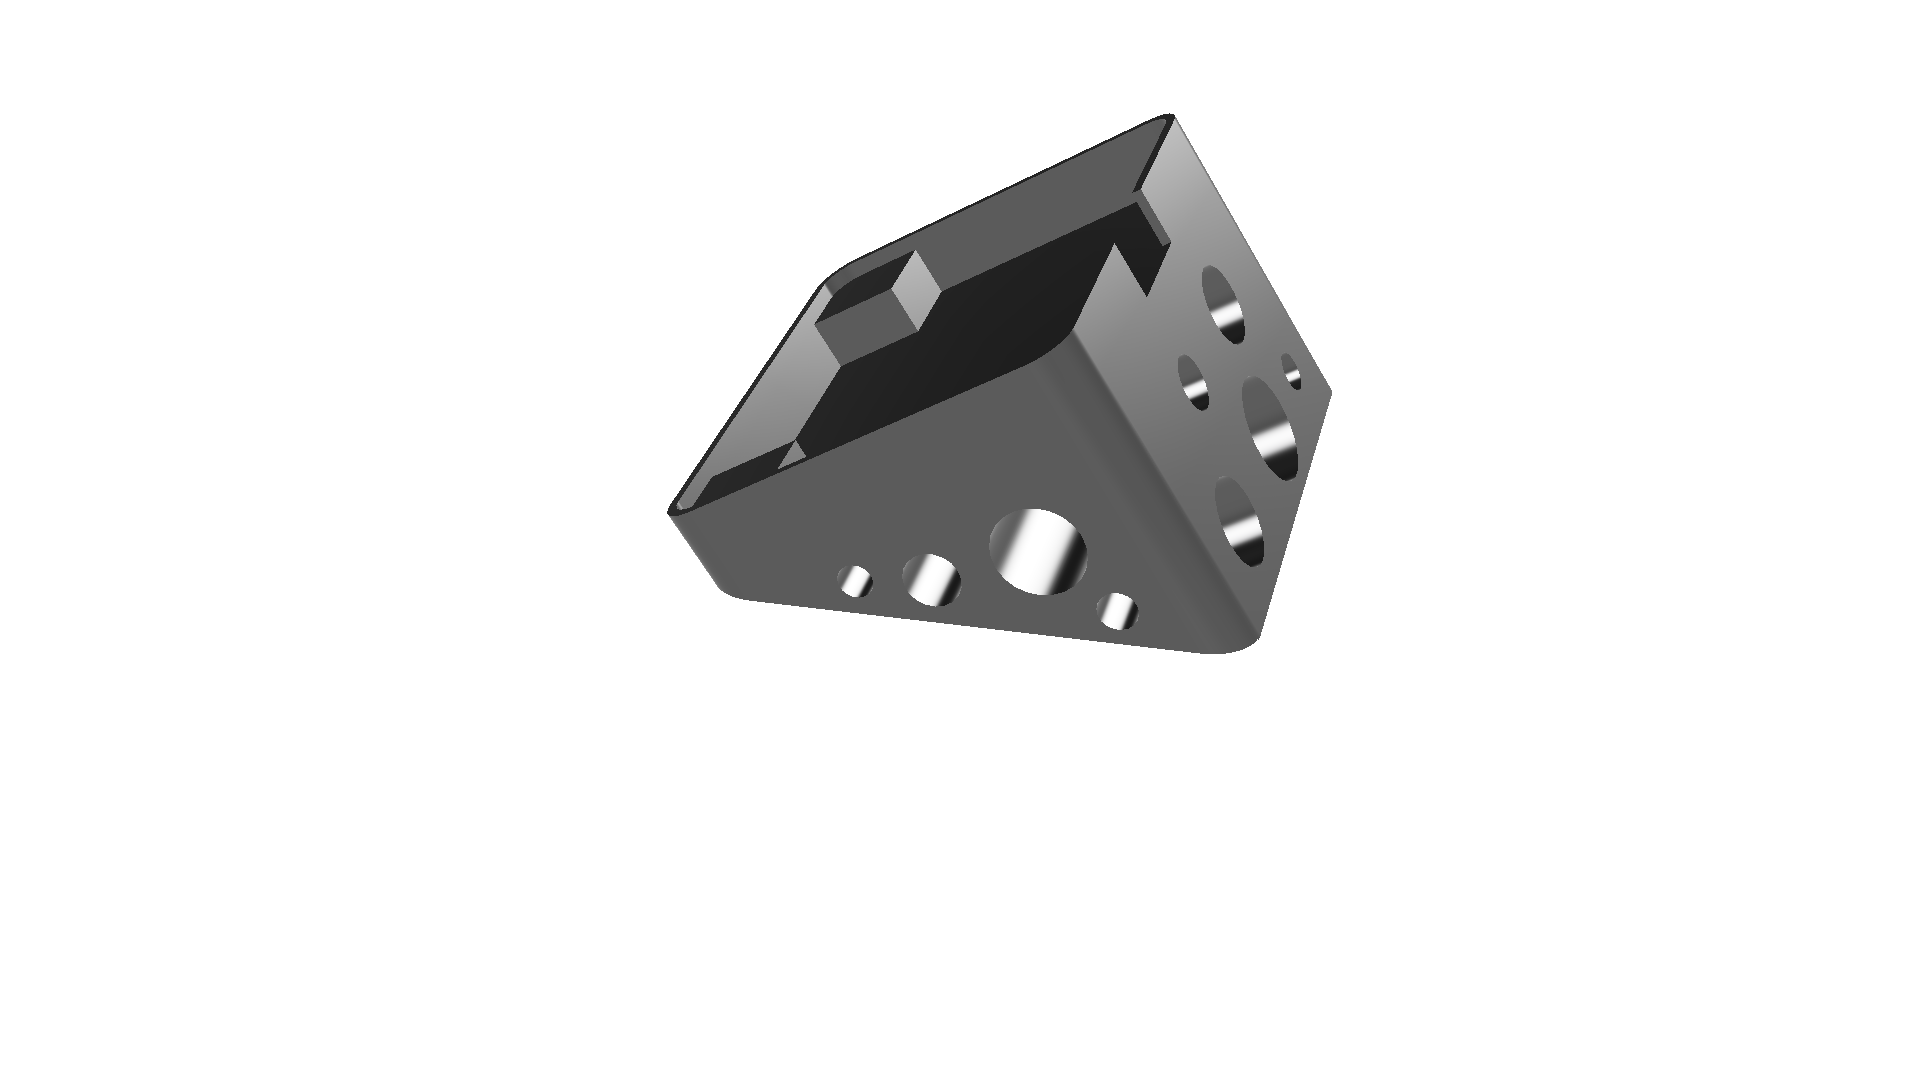
The USB connector problem was solved by connecting another micro USB connector with some wires. It was soldered to the pads on the backside of the micro:bit. See the image below to see which pad is which. The correct pads were discovered by measuring with a multimeter. The new USB connector could then be placed where we wanted it, which was on the backside of the mug.
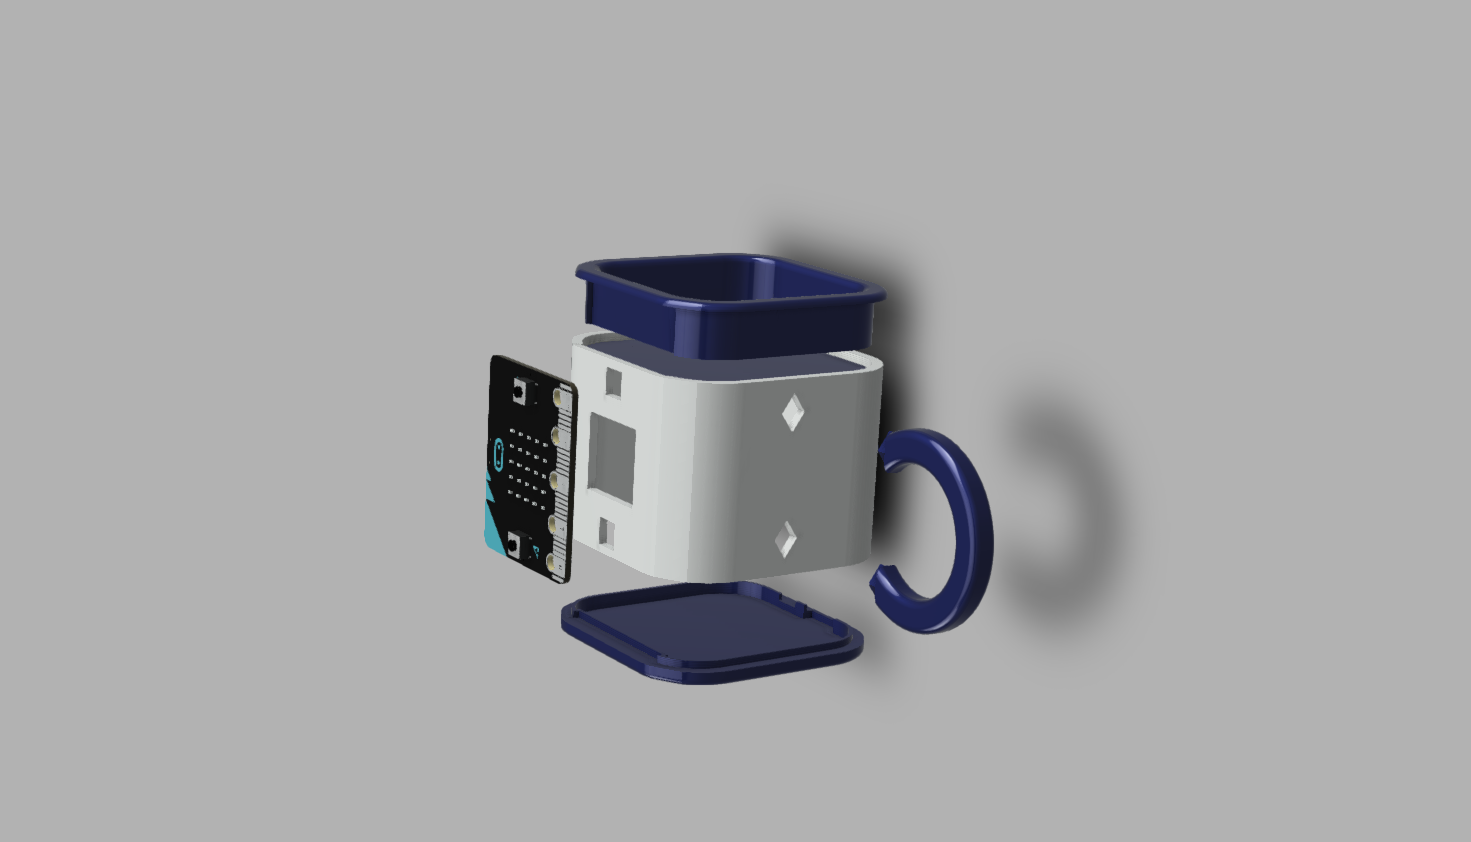
When designing an enclosure for the micro:bit, it is important that its back is supported. If not, the board will be pushed in when someone pushed the buttons on the front. At the same time, it must be possible to insert and take out the micro:bit from the enclosure. These two demands are conflicting, and needs a creative solution. In the first version, the board was put into a holder, and then a front cover was mounted in front of it. This ensured both back support and access to the buttons, but it was not pretty nor very practical. In the final version, this was solved in a more elegant way. The inside of the mug had holes for the micro:bit buttons and screen, and it could be fitted in from the inside. The micro:bit was held in place with the bottom and top lids, which could be removed.

The Receiver Devices
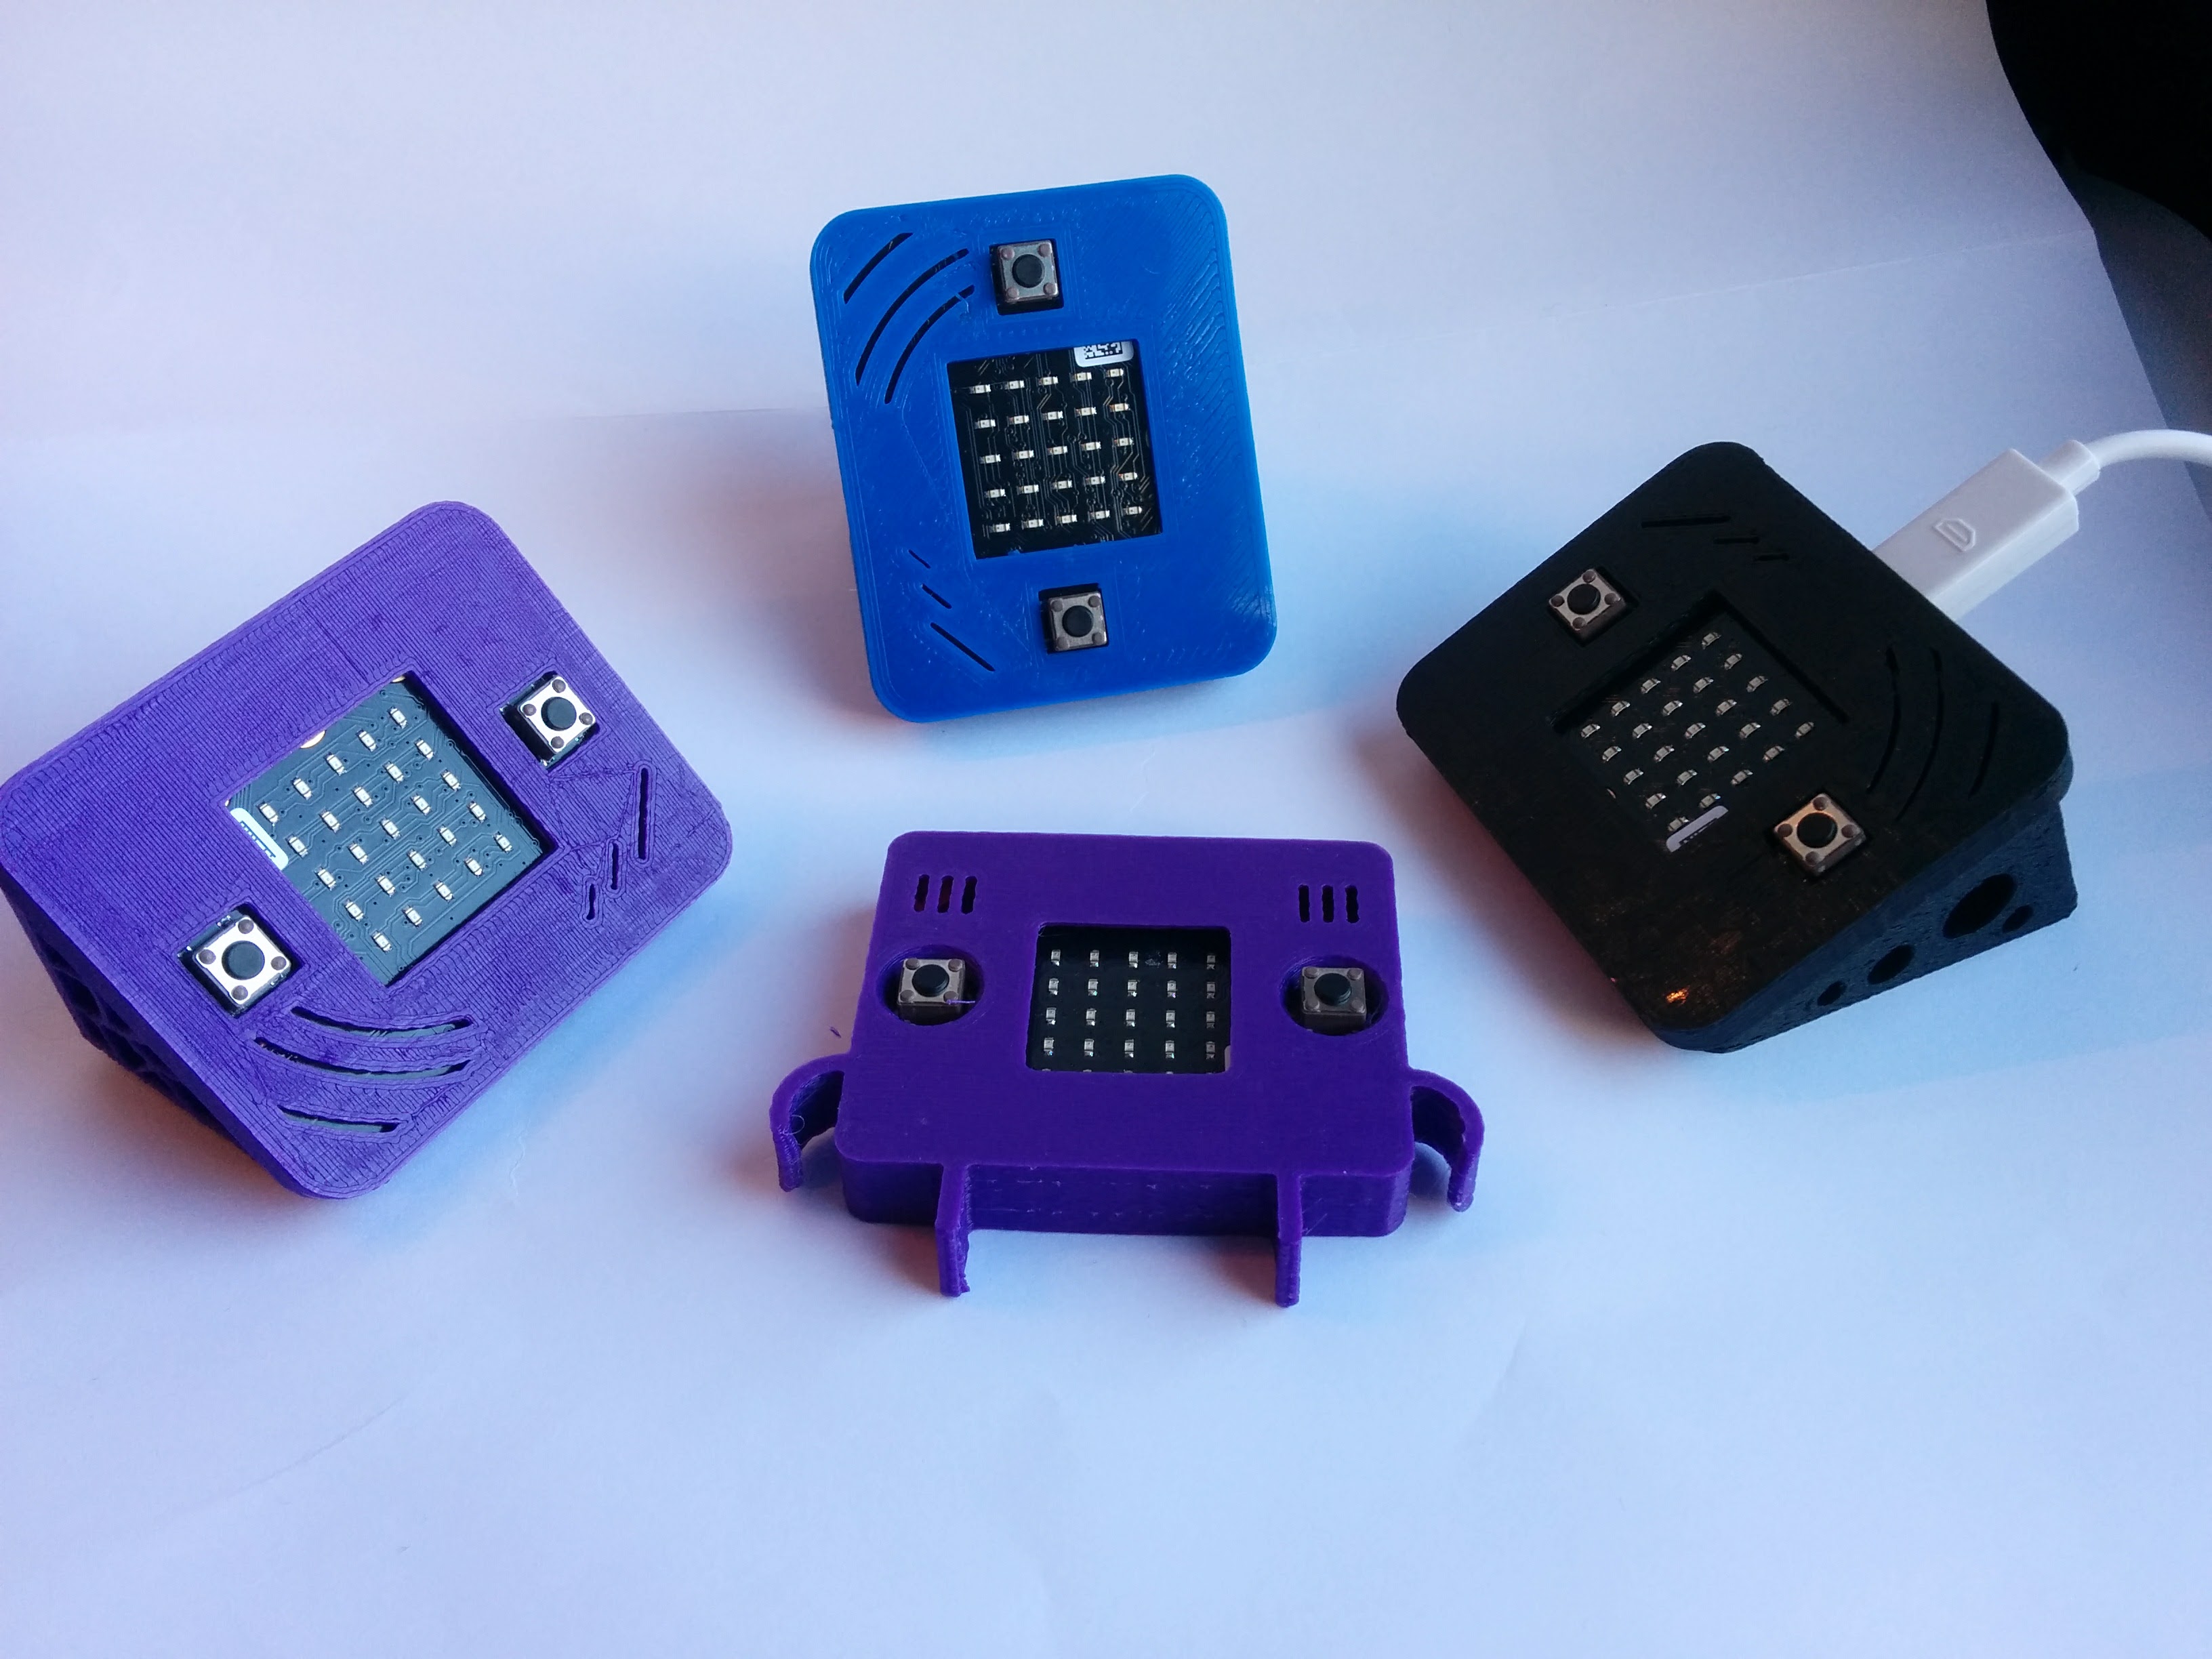
The receiver devices are small micro:bit devices for use on the desks around the office. They alert users when new coffee is made, and will also show the time since last brew when the buttons are pressed. We created a couple of different enclosures for these devices, to find out what worked best.
The most basic version was not even made by us, it was found on Thingiverse. It is a very cool micro:bit cover made by Craftyrobot.
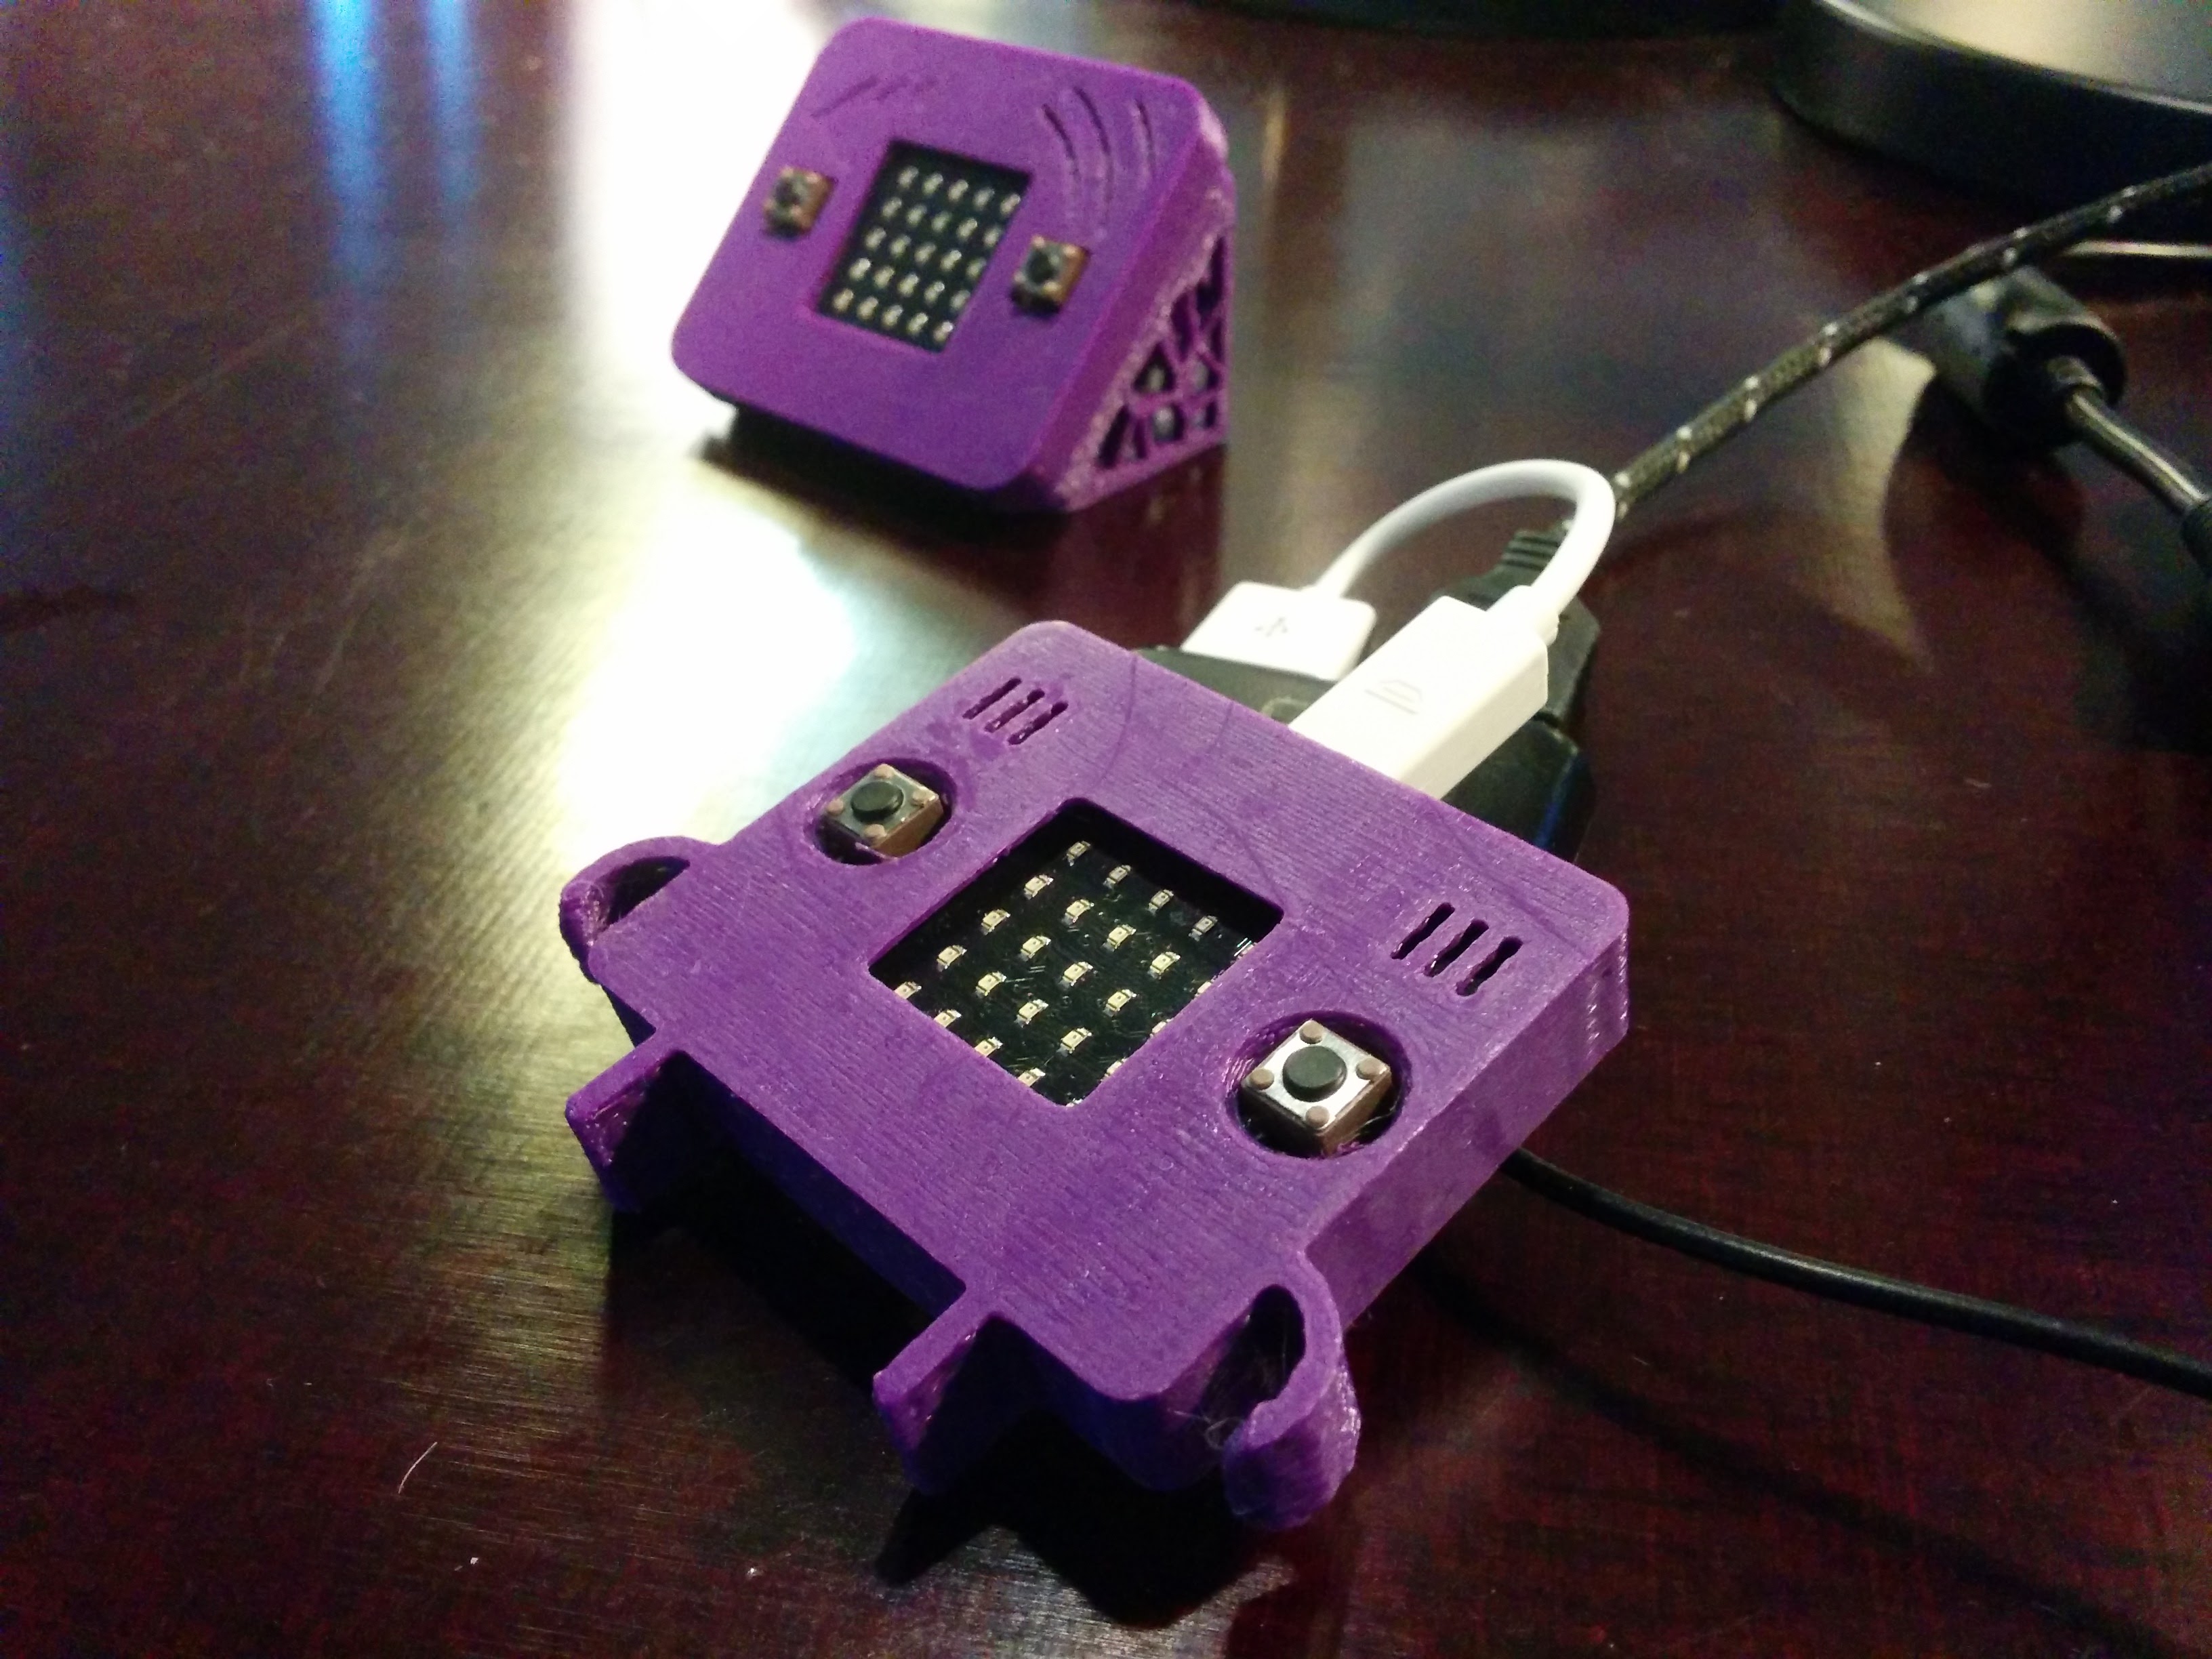
In the second and third version, the micro:bit was mounted at 45 degrees, so that the screen is visible when it is laying on a desk. One was sitting horizontally on the desk, and the other one vertically. They were made up of two parts, the base and the cover. They got some artistic cutouts in the base using a voronoi sketch generator plugin in Fusion 360. These two designs had one common flaw; They were very unstable, and would sometimes flip over or move when the buttons were pushed.
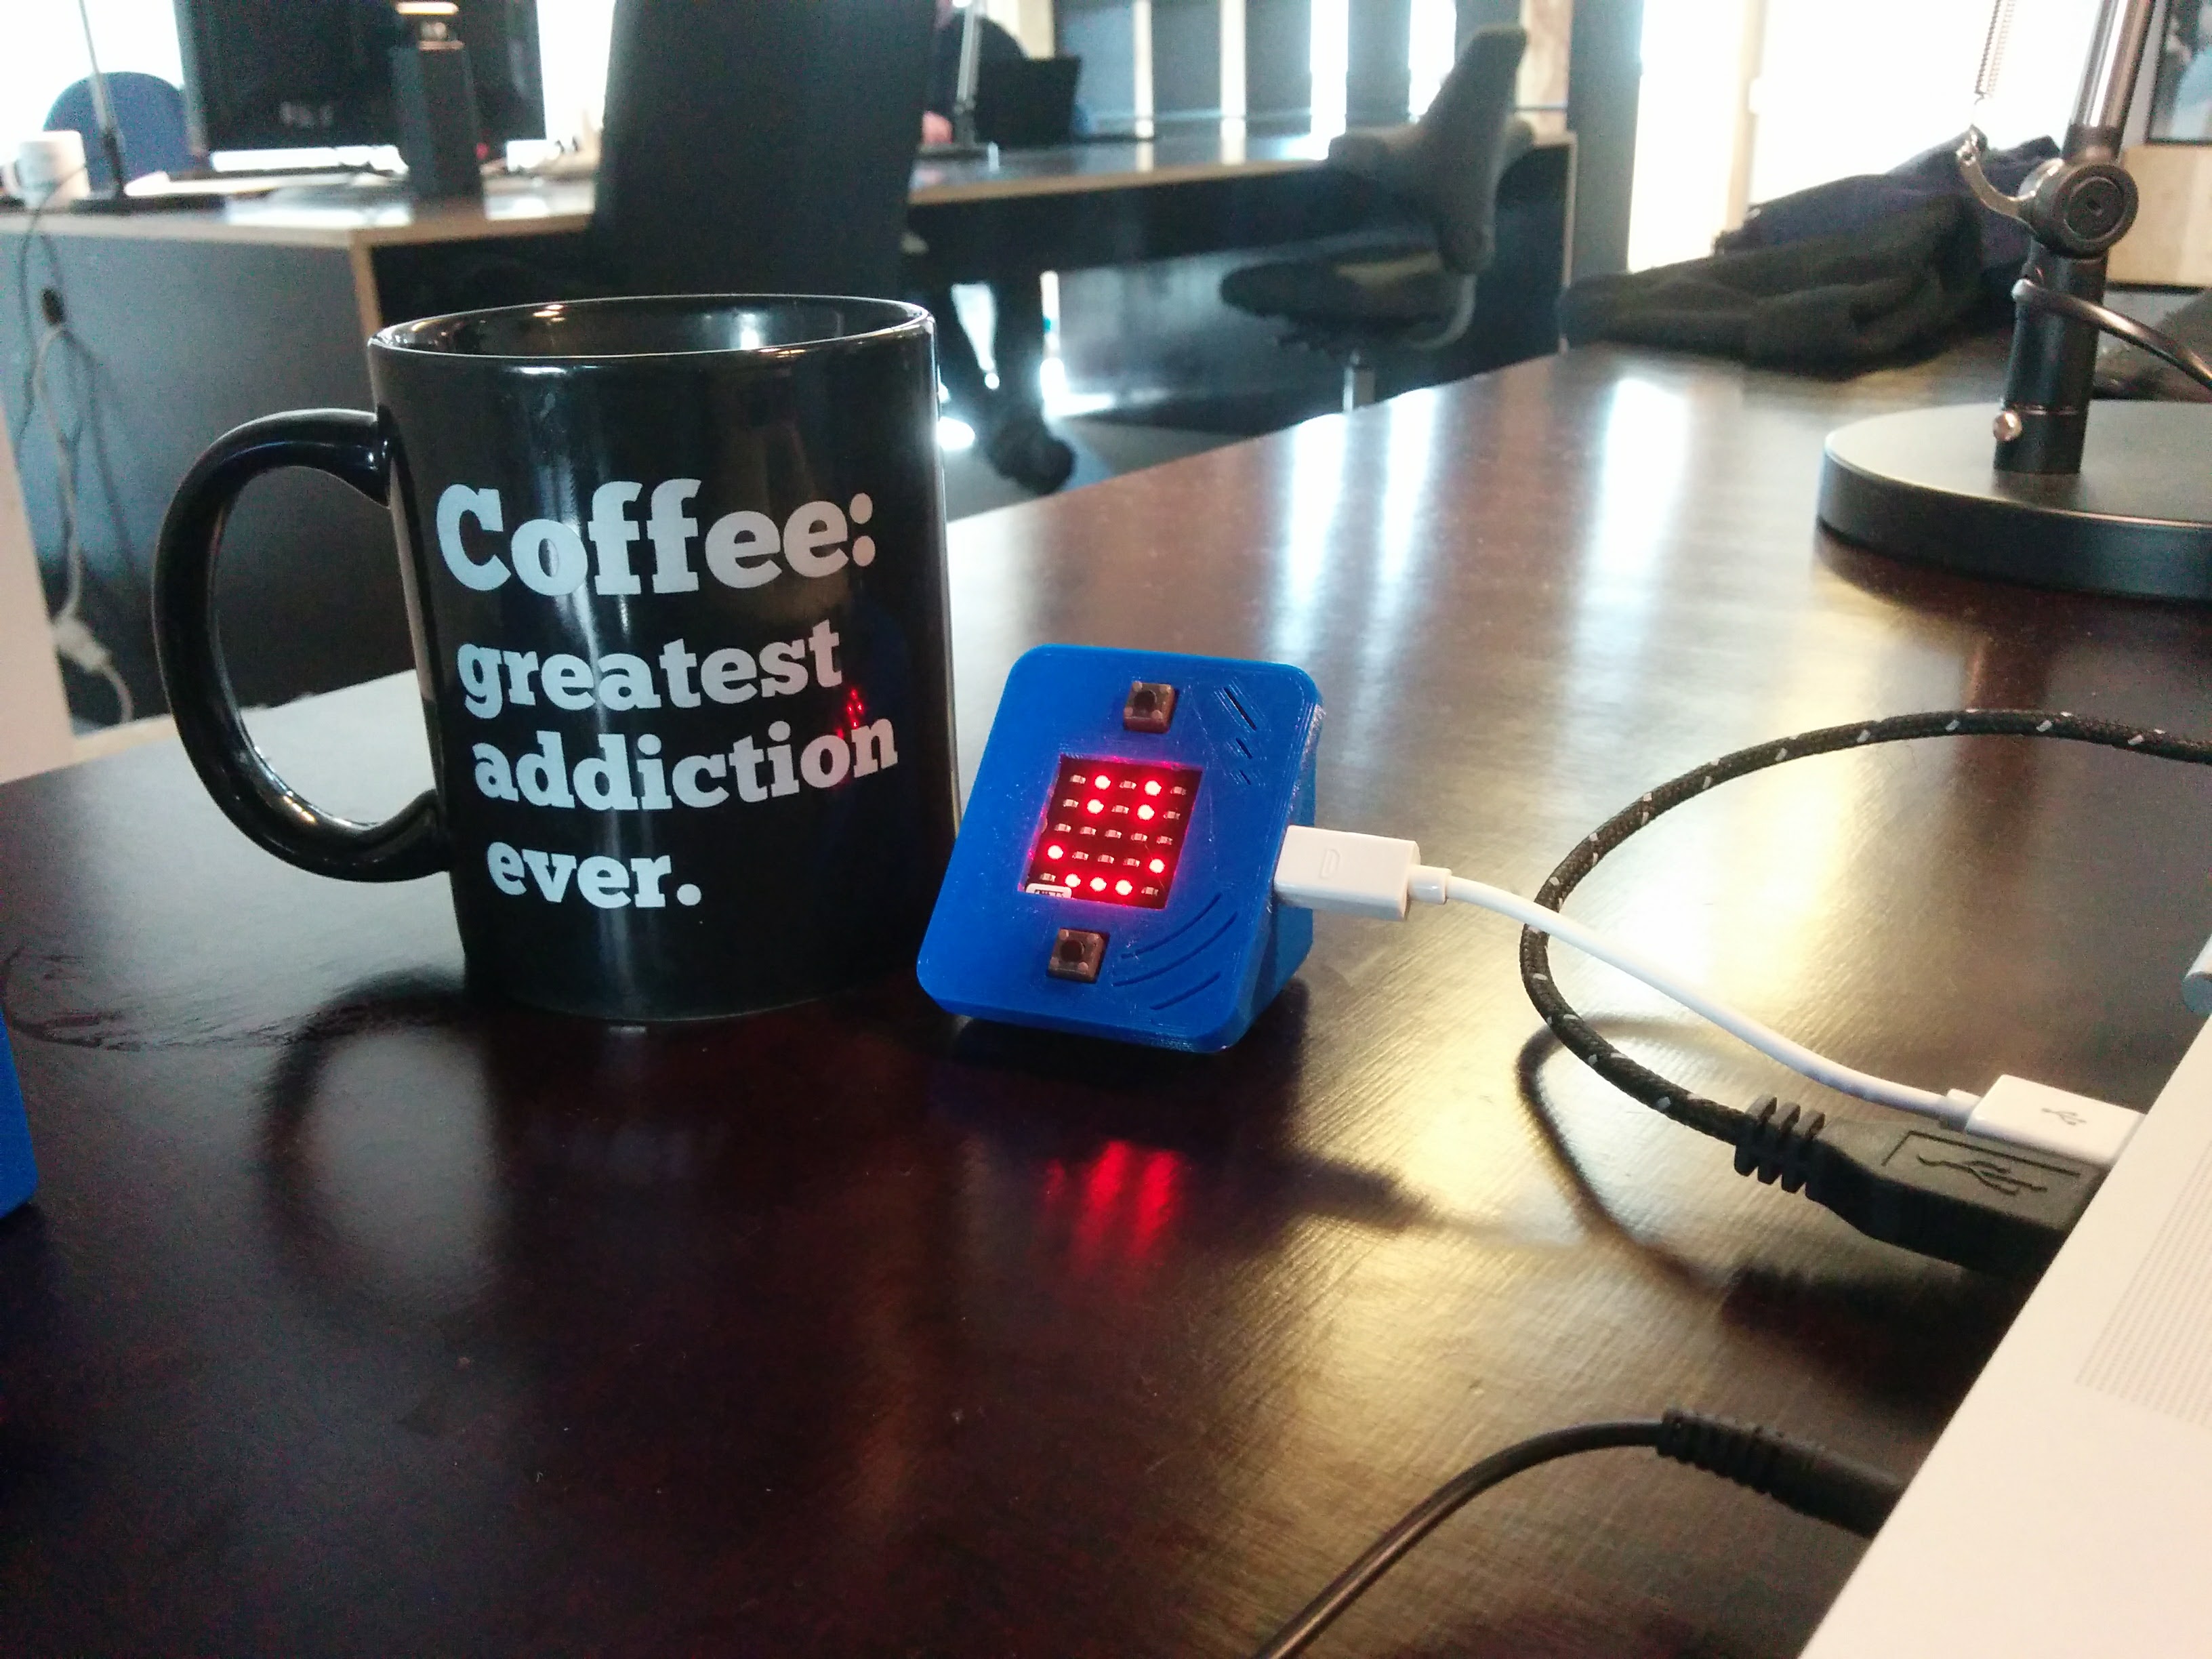
The fourth version had a more flat design, as well as a bigger and more stable base. This design gave a lot more stability, as well as a better angle on the USB cable sticking out.
Summary
In this blogpost series we have created a working wireless coffee-timer system based only on the BBC micro:bit. It measures how old the current coffee brew is, and can alert users wirelessly when new coffee is ready. We have handed out wireless receiver devices to many people in our office, and received a lot of smiles (both from the micro:bit screens and the people).
The project has given a good insight into the BBC micro:bit and what it can be used for. We believe it is a very capable device for many purposes, especially for users new to embedded systems. It is very easy to get started with it, while at the same time having more advanced options available. At the time of writing this, it is still lacking a bit when it comes to power consumption control and more direct control of hardware features. However, the micro:bit is not really meant for very advances users, which can just as easily use other microcontroller boards.
Files

This work is licensed under a Creative Commons Attribution-ShareAlike 4.0 International License.
The STL files for everything 3d-printed in this project can be downloaded here.


