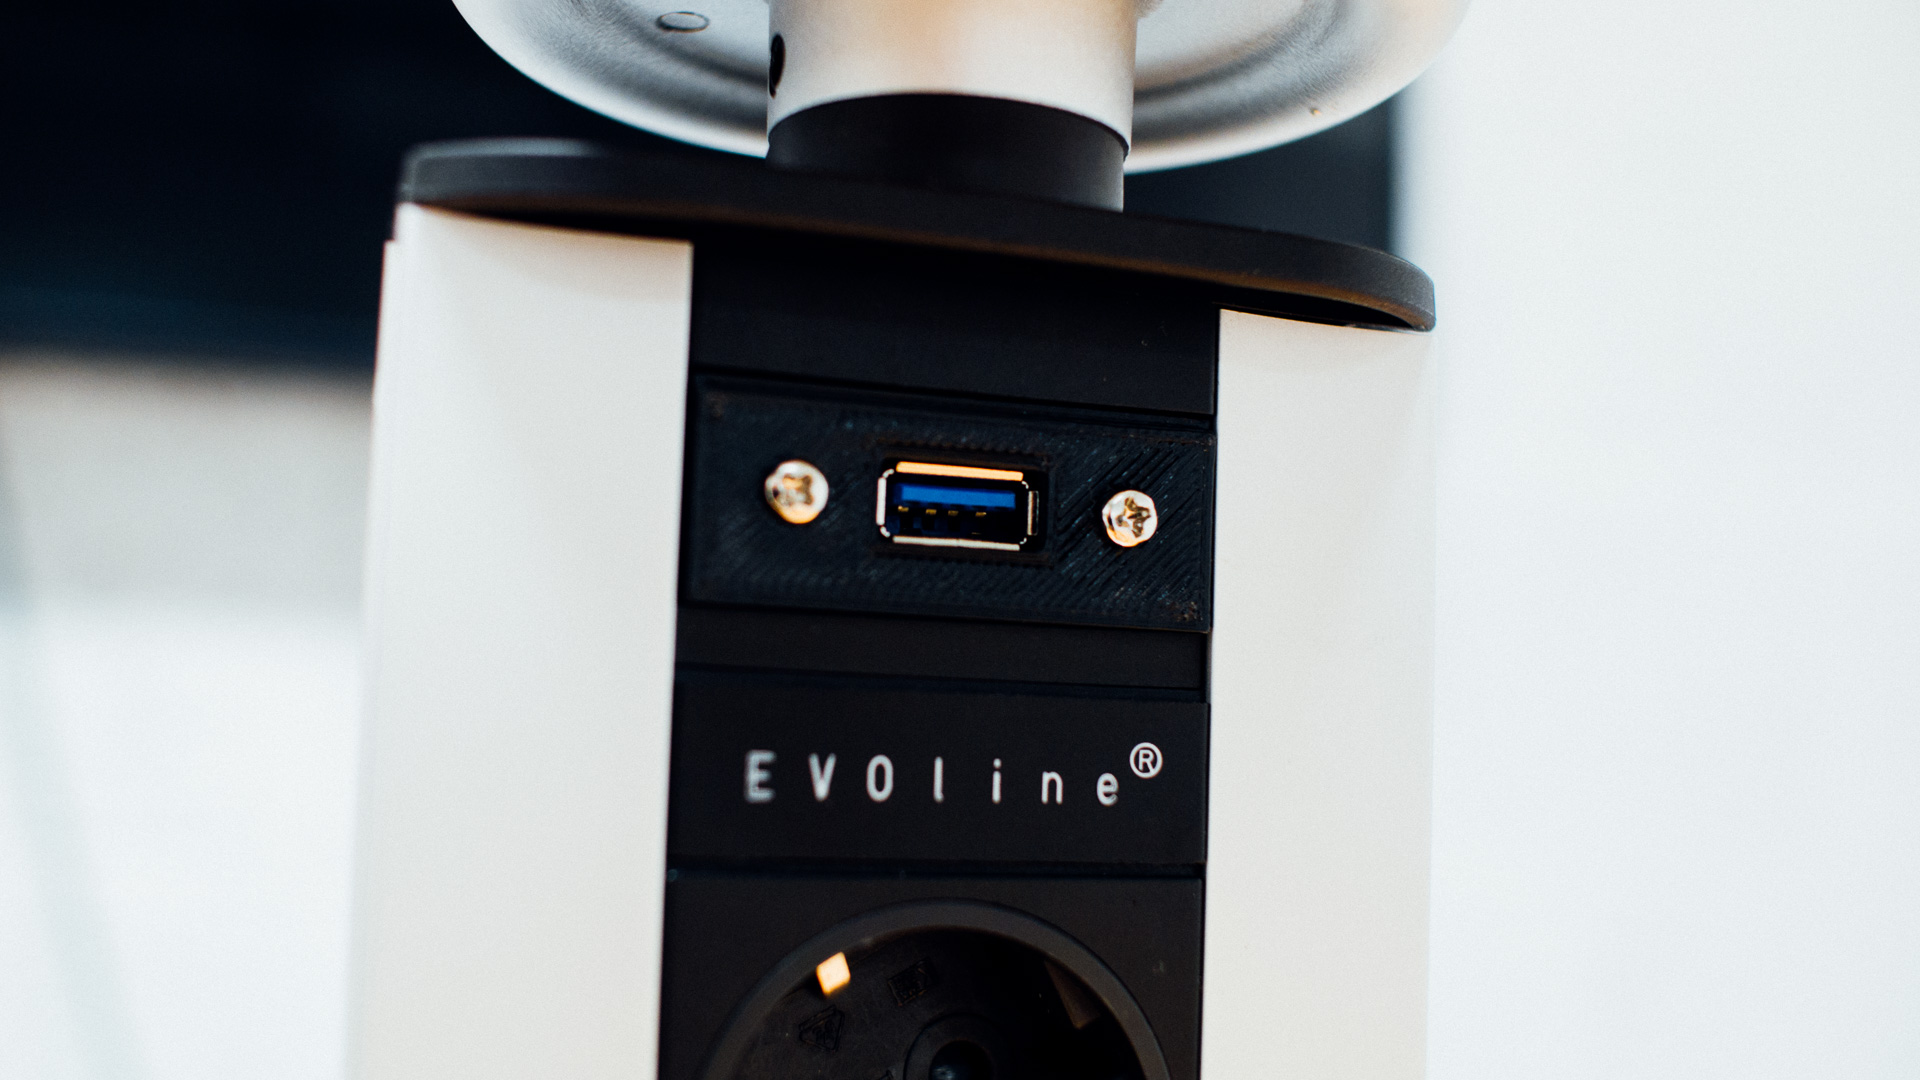
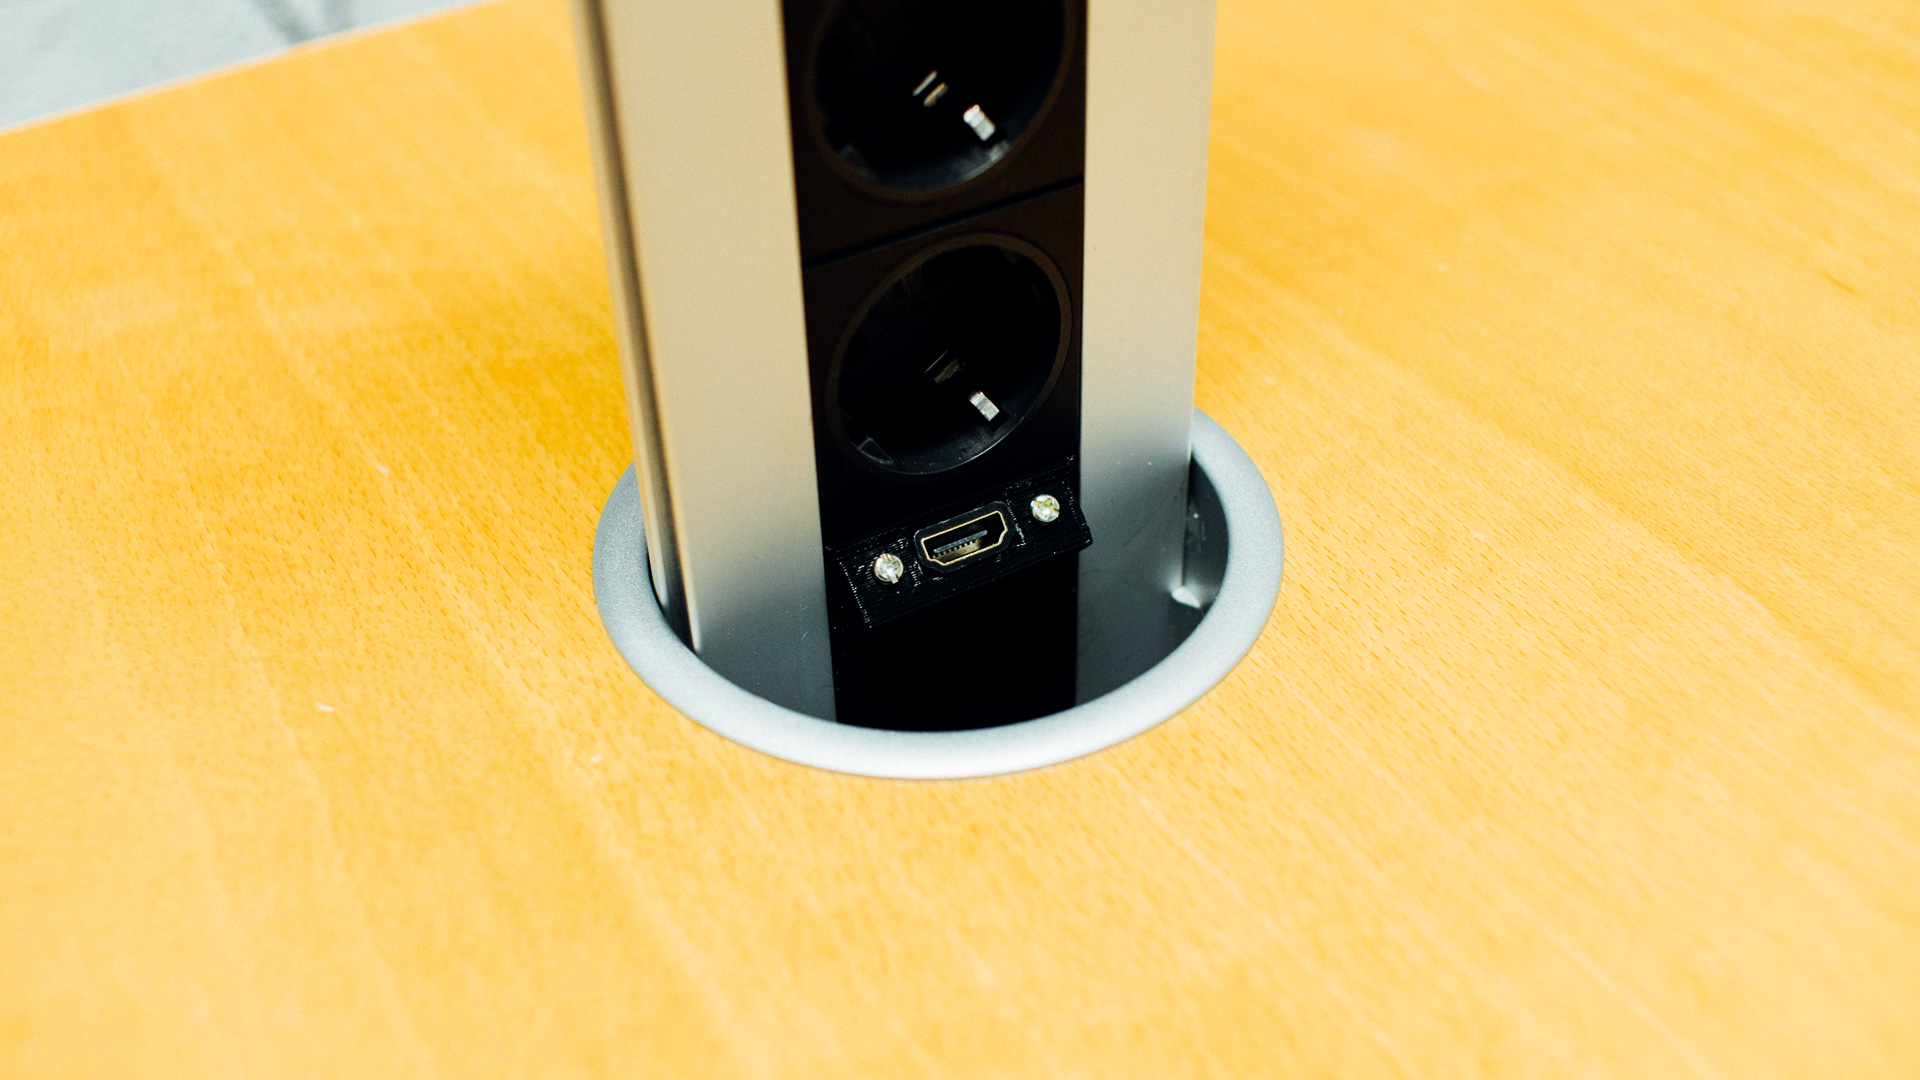
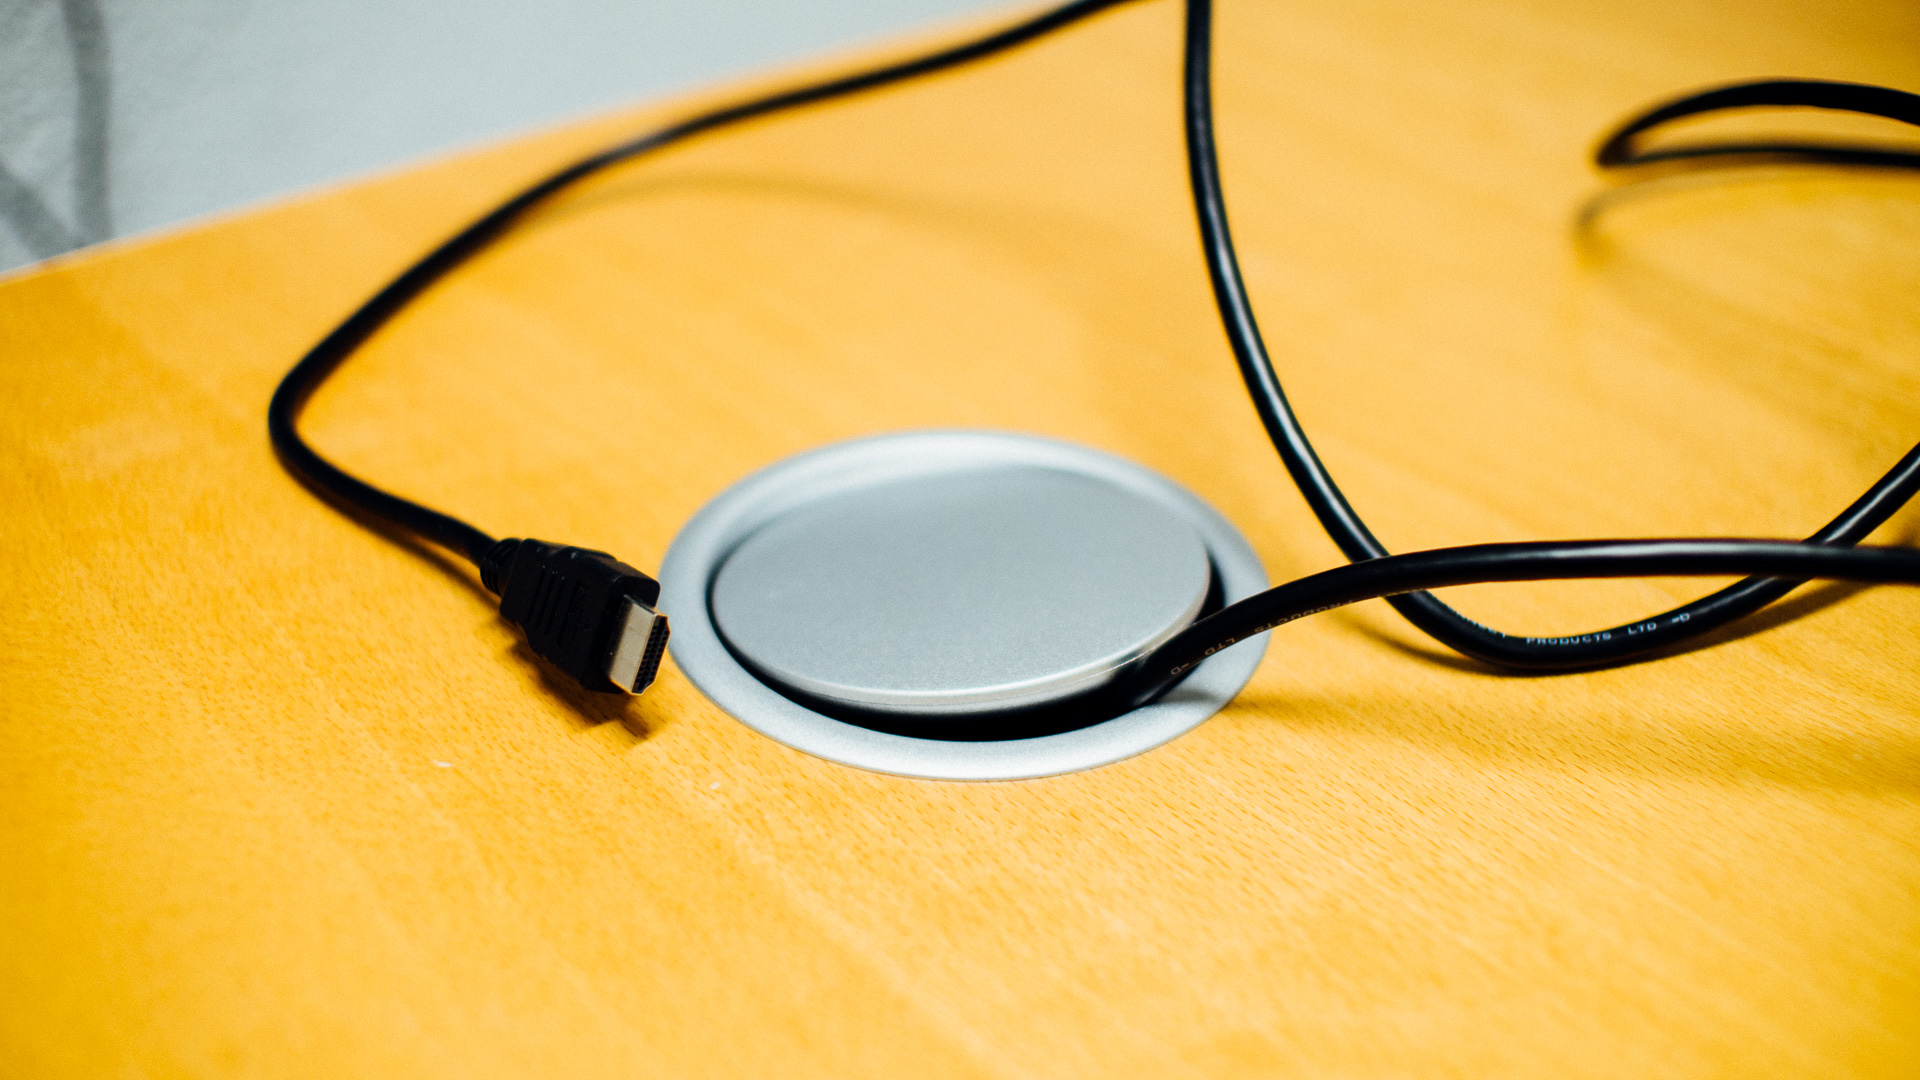
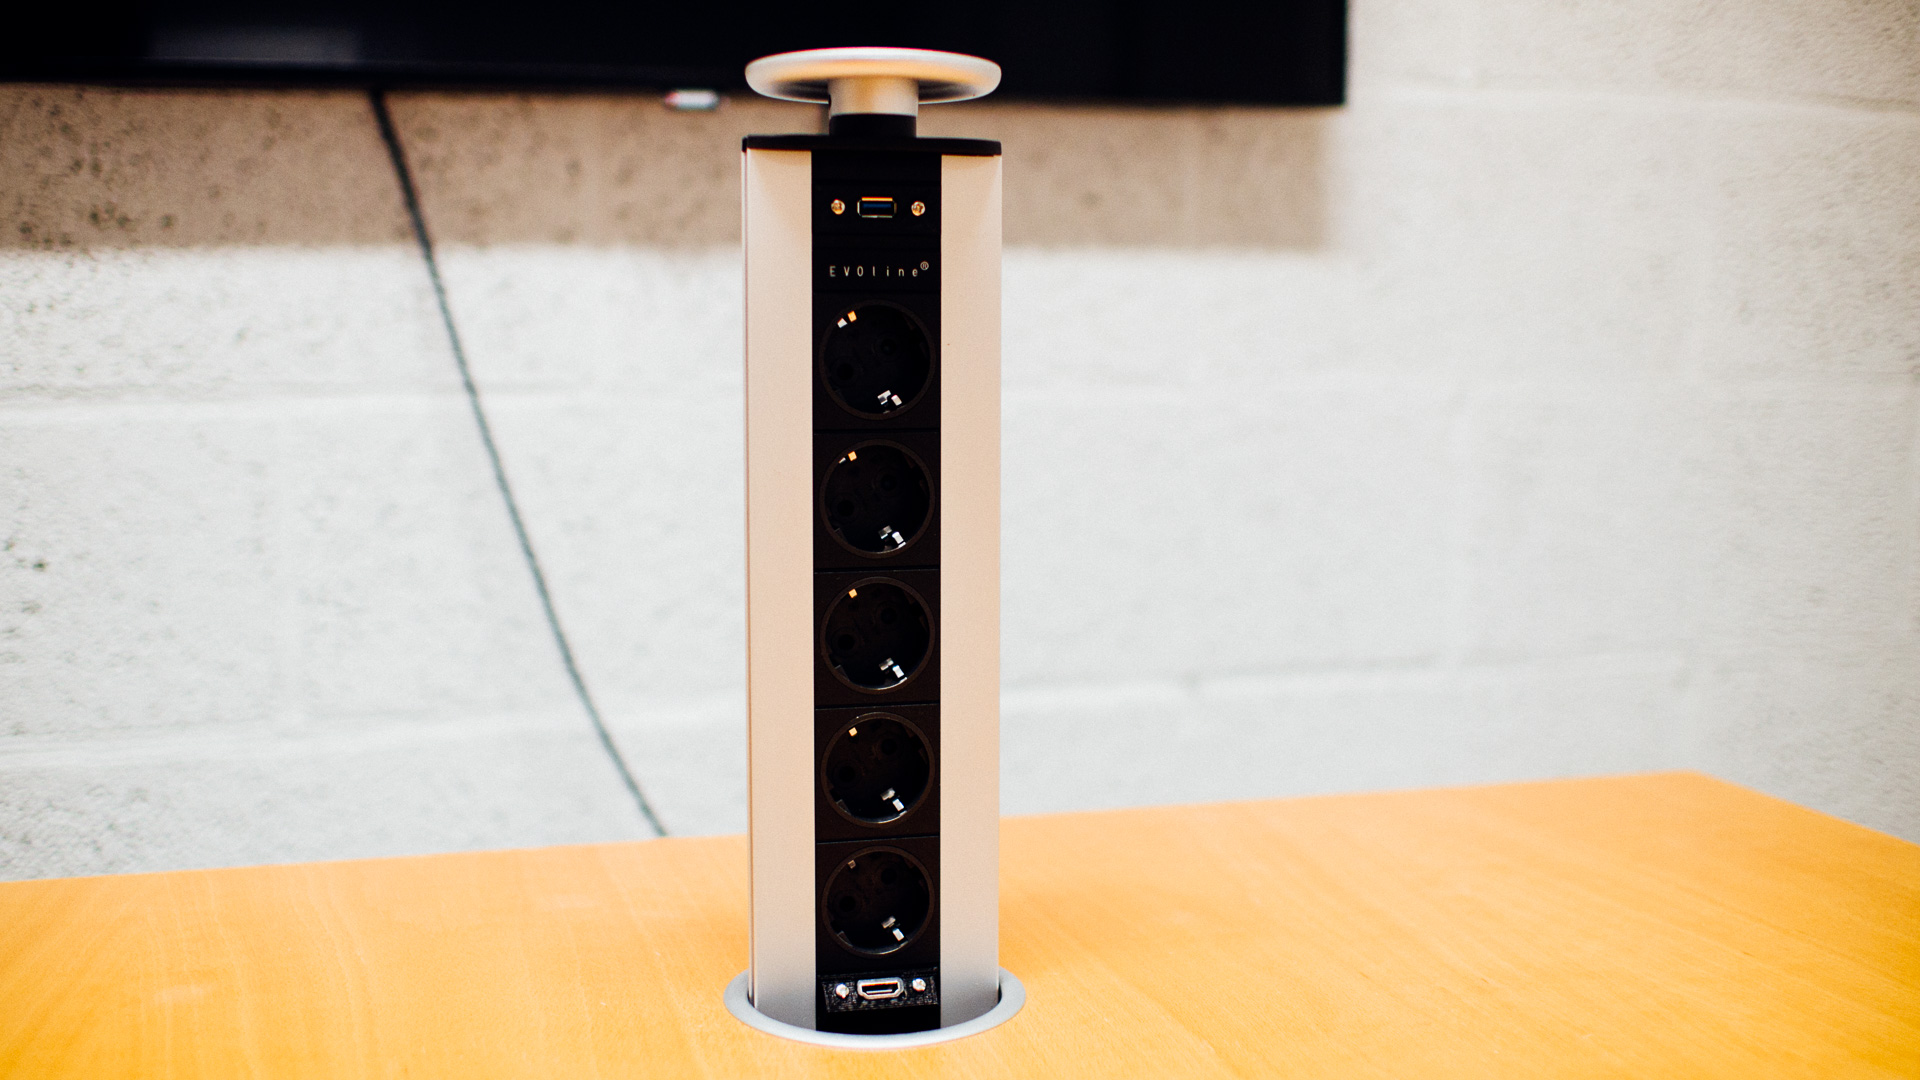
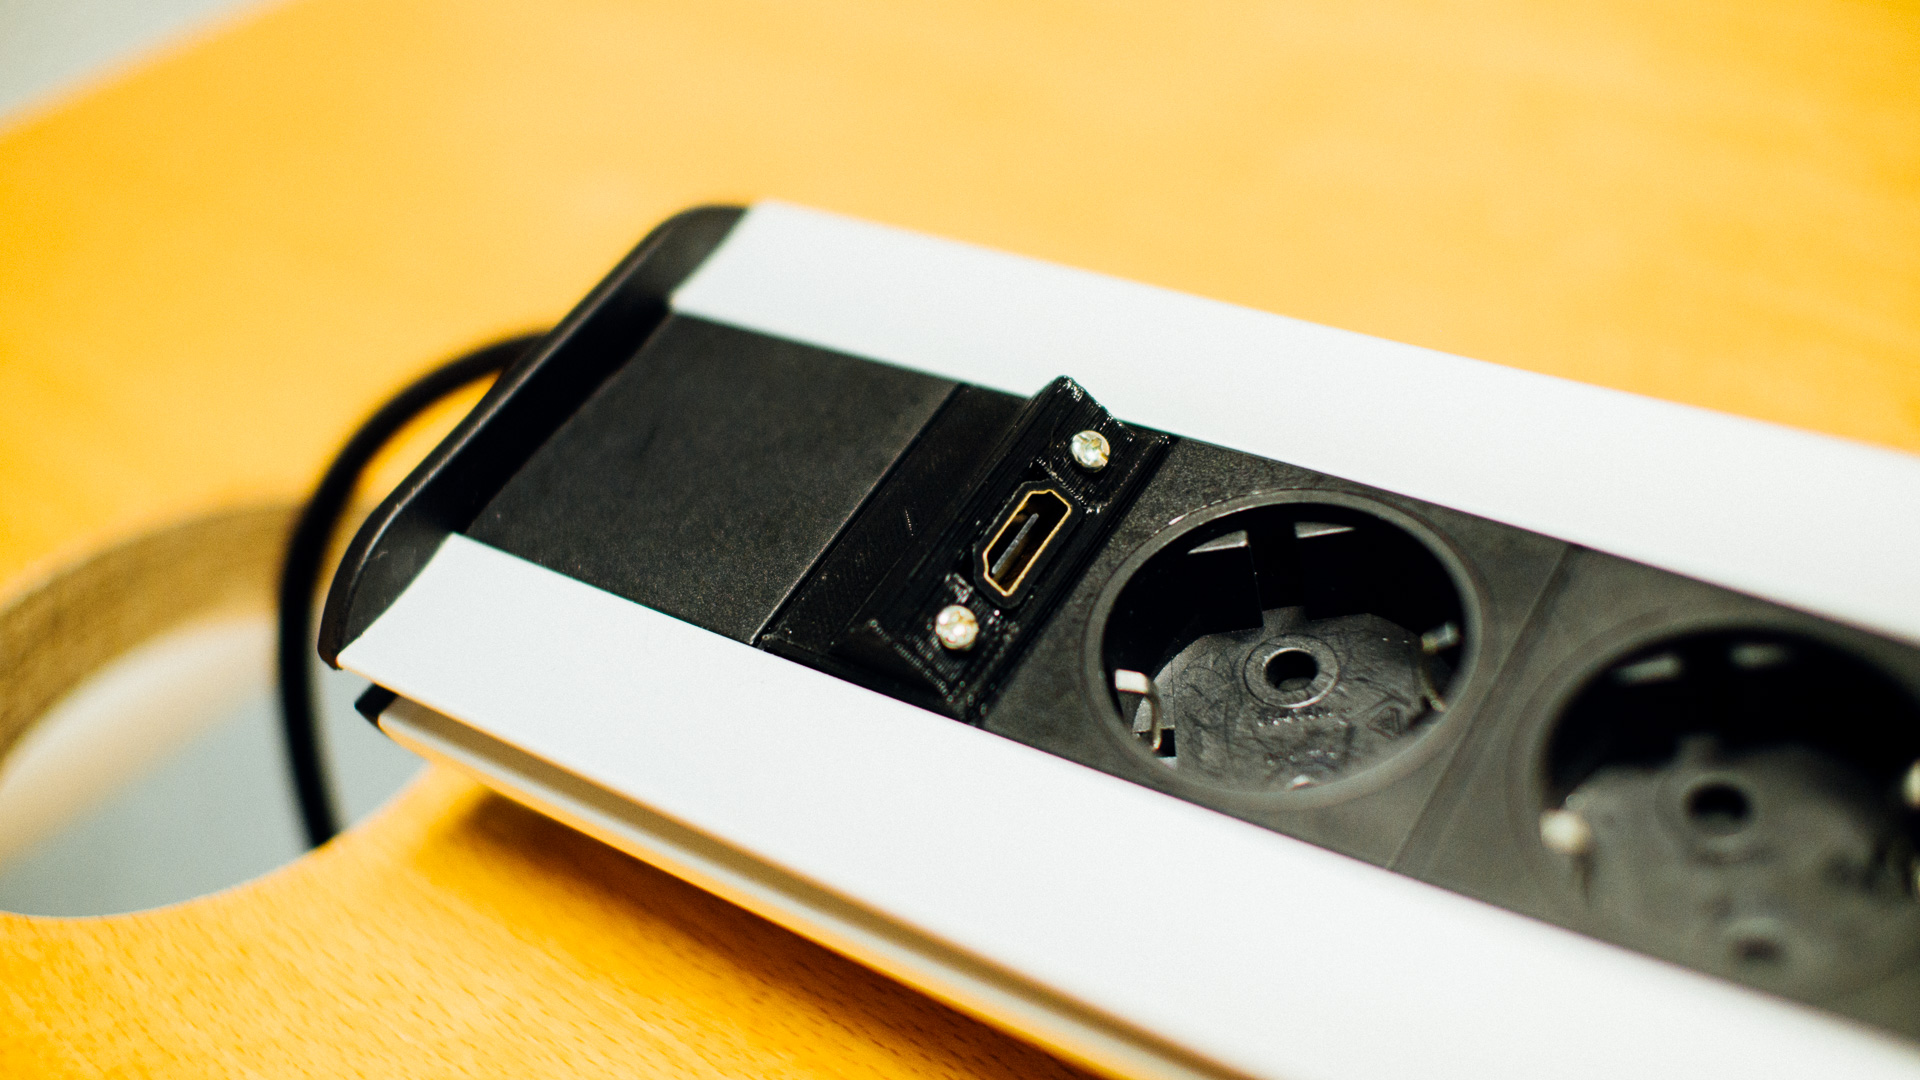
For our new office we bought a couple of used tables with inset retractable power strips (an old version of the Evoline Port). One of these had a VGA socket in addition to all the power sockets. Instead of the VGA socket we wanted to have an HDMI socket for our TV in our meeting room as well as a USB socket.
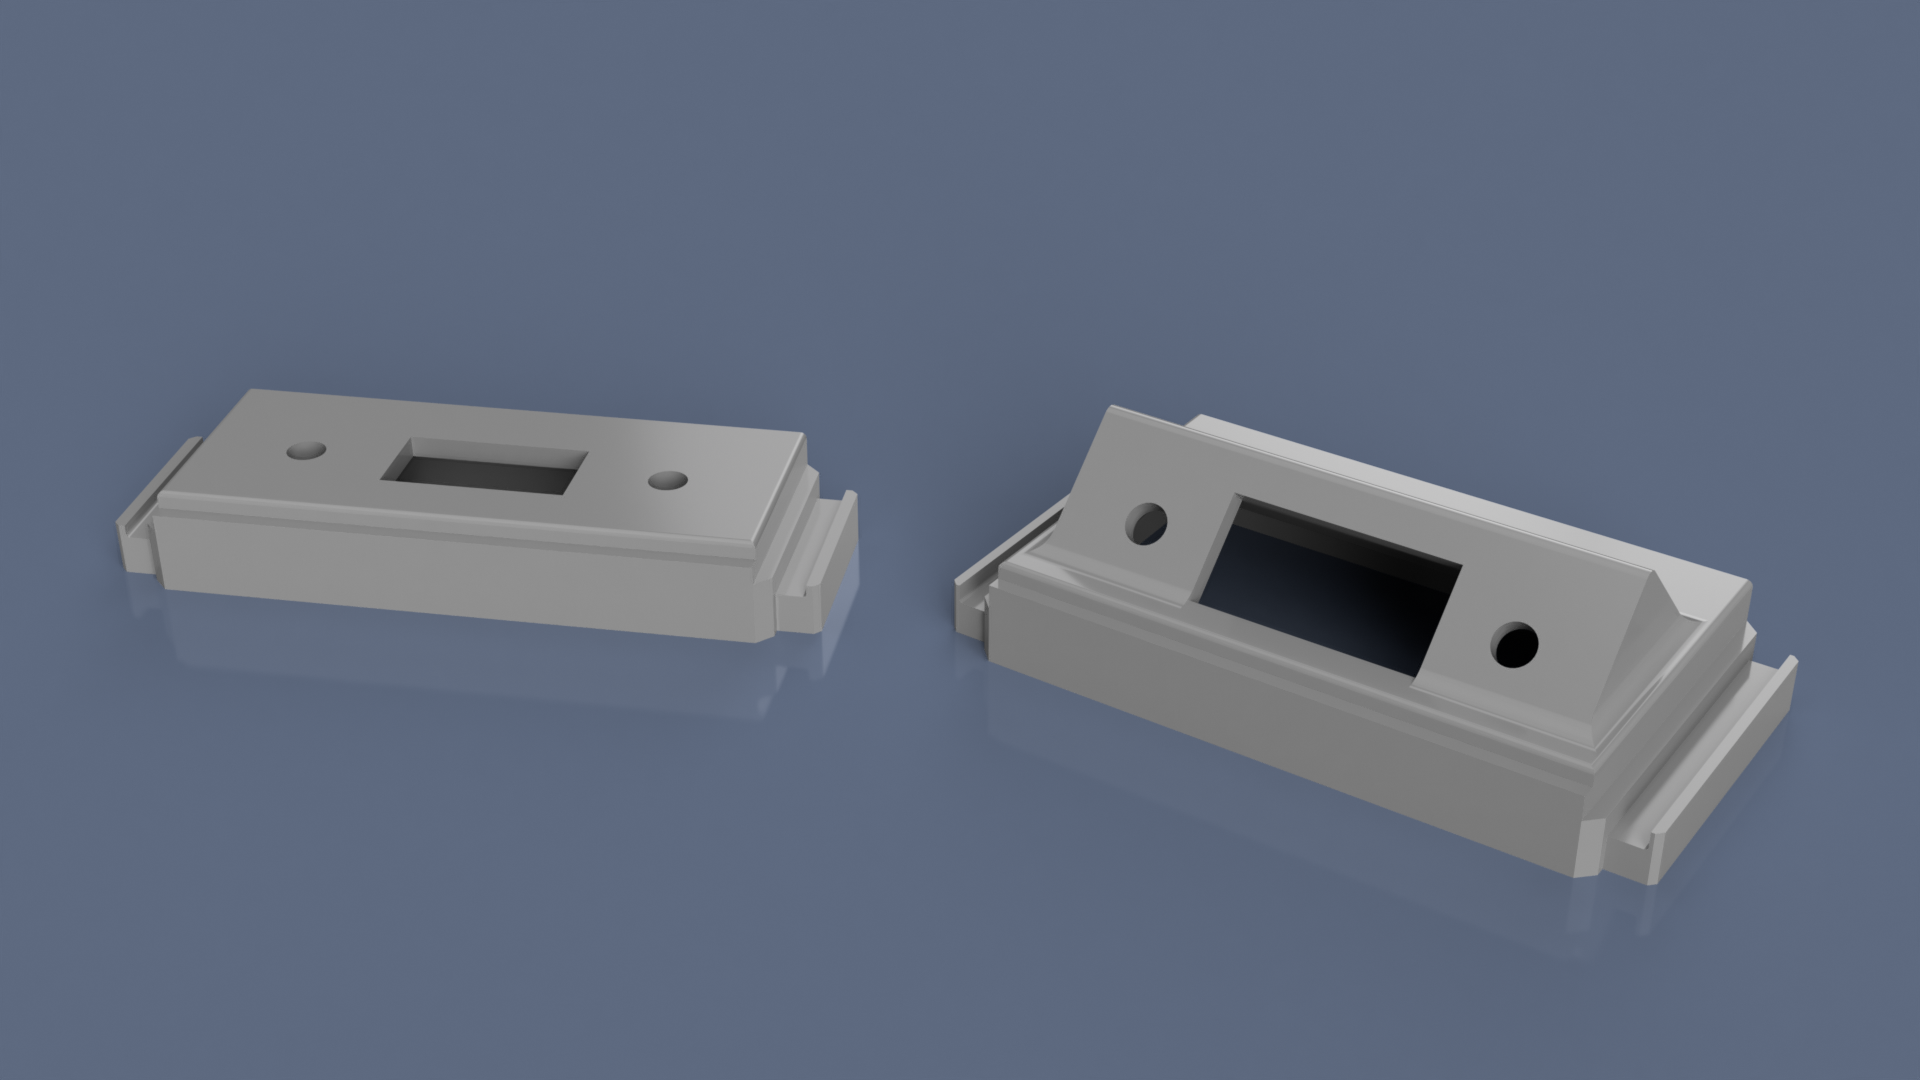
For this we decided to model and 3D print two custom brackets. The power strip system has a modular nature where you can slide in and out different modules. We mimicked the already existing brackets so our design would fit the power strip and become own modules themselves.
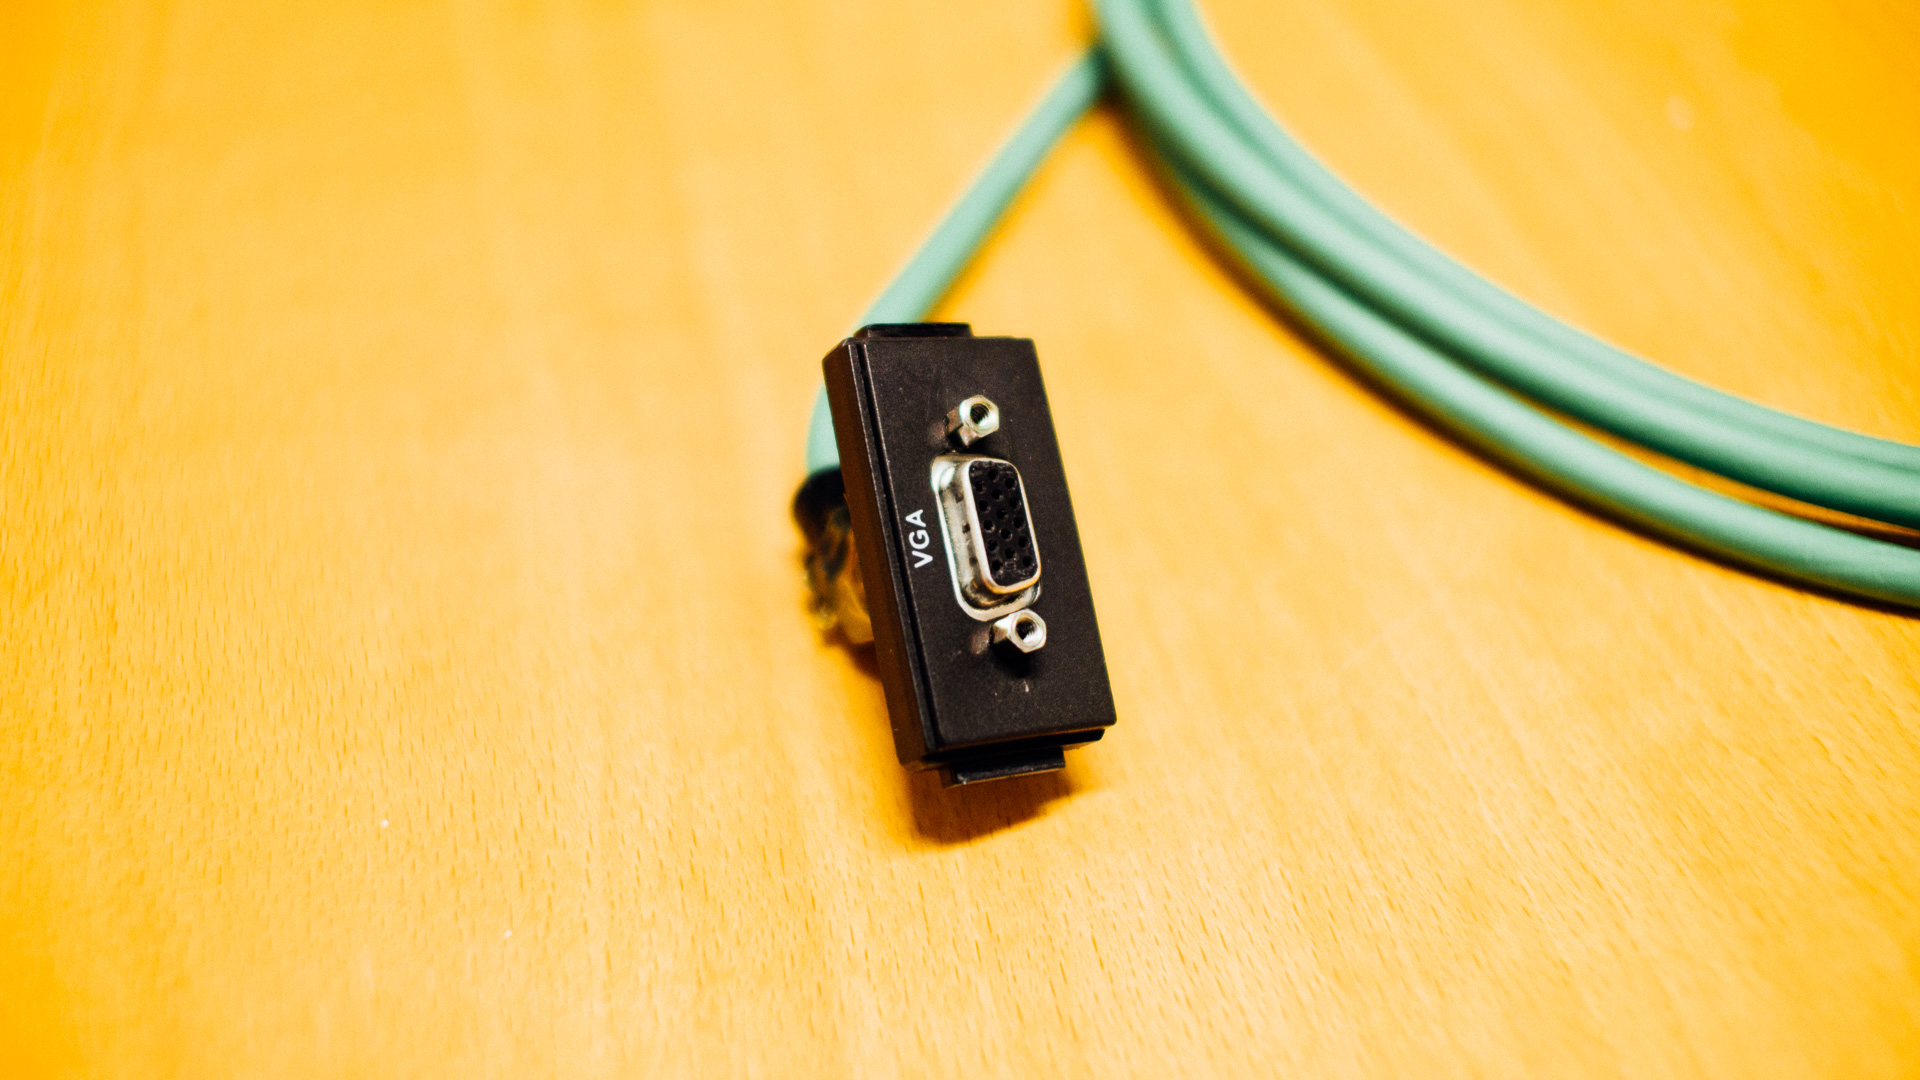
Hardware-wise, we got panel mount extension cables from eBay: USB and HDMI.
CAD
Our two brackets are quite similar in their basic shape. The most obvious difference is the angular features on the HDMI bracket. The reason for this 45° angle is to get enough space for both the plug on the outside (relative to the hole in the table) and the socket on the inside.
3D Printing
These brackets are somewhat difficult to print, with overhangs from every angle. We wanted to test Meshmixer‘s support algorithm, which ended up looking like this:
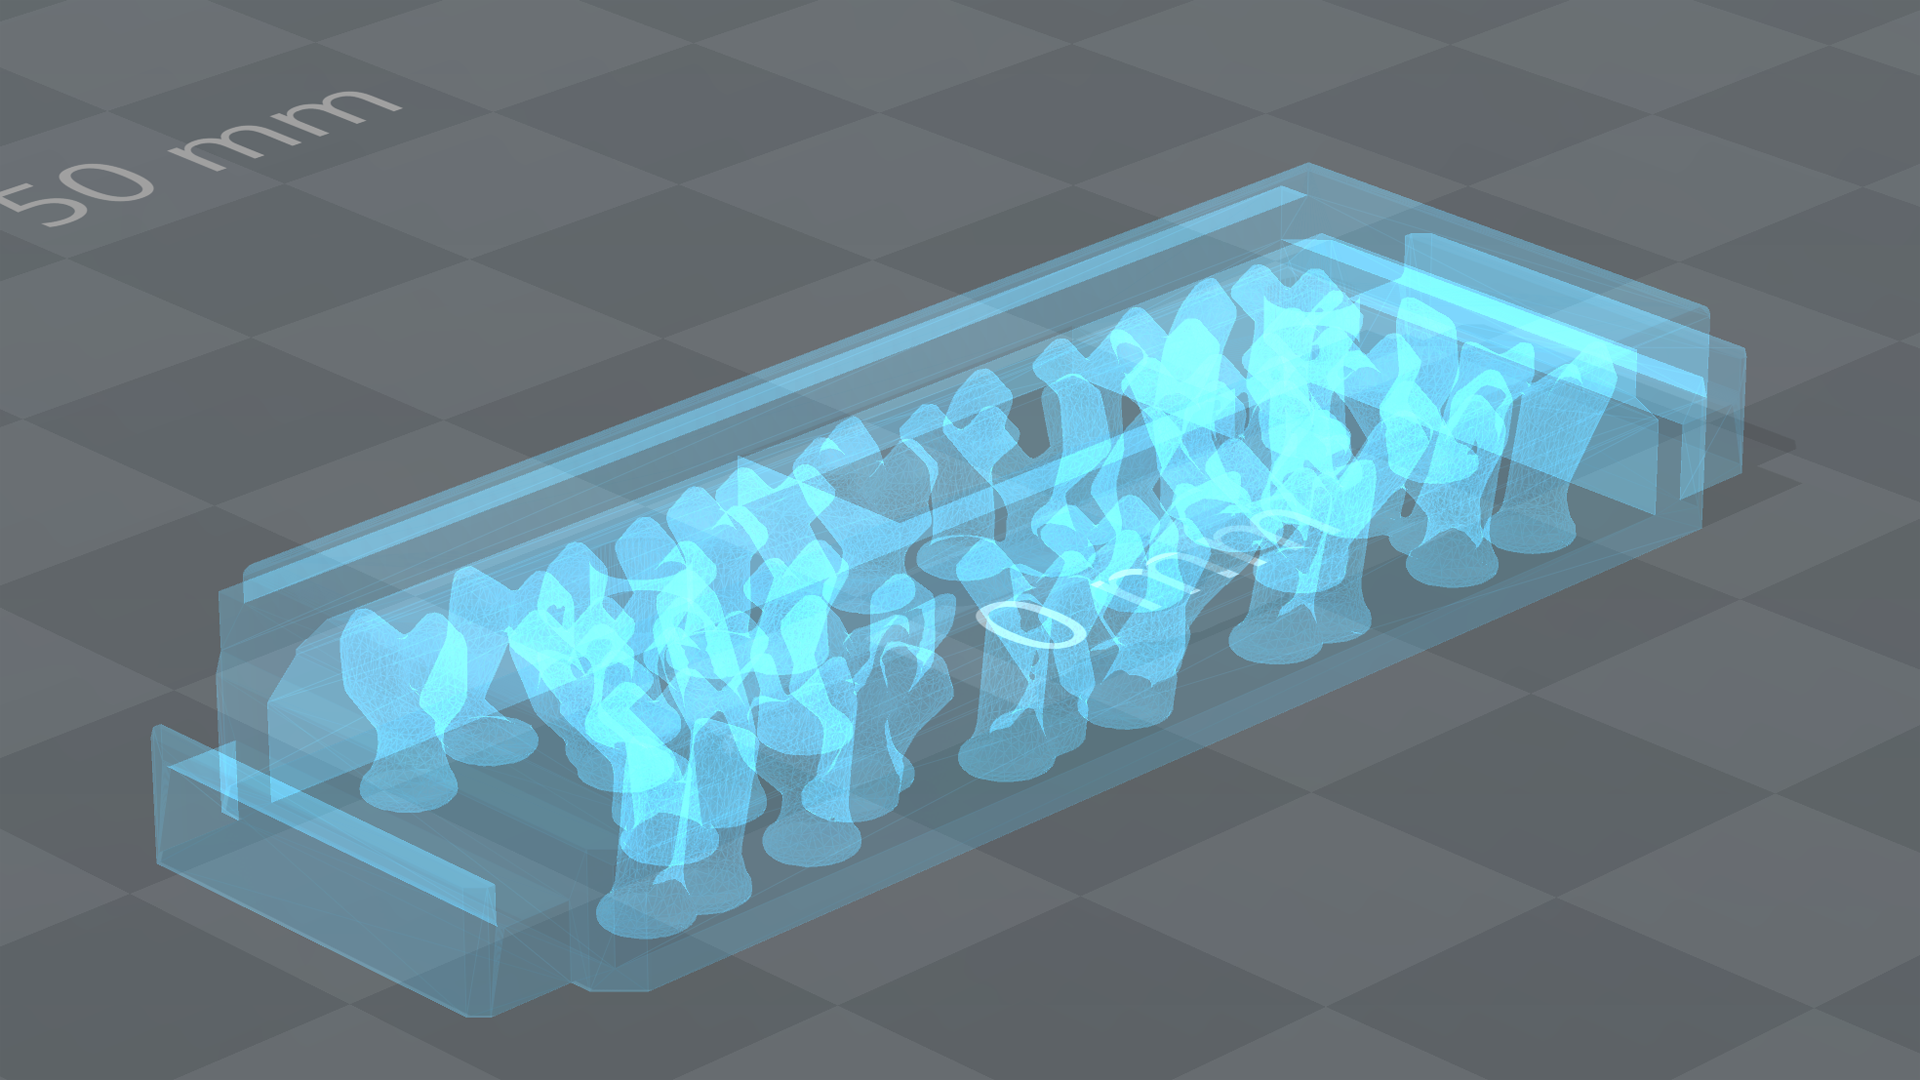
It worked OK on our old fanless Solidoodle 3. The support was easier to remove than a more massive type, but it ended up being a bit of a mess between the support tips (mostly due to lack of 3D printer fans). Difficult-to-remove support residue remained stuck to the inside of the bracket as well. After a couple of revisions and a bit of post-print work, we reached an acceptable level of quality and could mount the brackets in the power strip.
Modding of the Power Strip
The power strip has a “filler” module which just covers up unused space. This needed to be shortened since our brackets takes up more space than the VGA bracket we removed. Our trusty Dremel with a cut blade did the job with ease.
The Result
We’re quite pleased with the result, given that we printed the brackets on such an old printer. They fit really well in the power strip and the connectors and plugs has enough space.